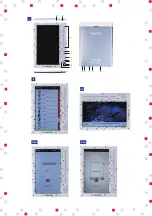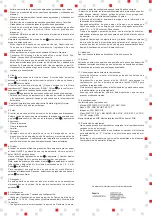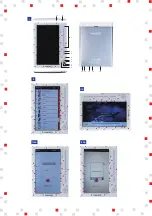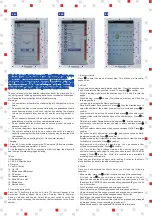
3
While playing music, press to enter the submenu and access these
options:
- Repeat mode: this gives you the options Once, Repeat once, All once,
Repeat all and Intro (only plays a few seconds of the song).
- Play mode: this gives you the options Normal and Random.
- EQ select: this gives you the following mode options: Normal, Rock,
Pop, Classic, Bass, Jazz and User equaliser.
- User EQ Setup: this lets you set the equaliser. Press the left/ right button
to adjust the bass/treble dB and the 5 and 8 buttons to change the dB
level. Once adjusted, press OK.
- Display: you can choose to display Letters (if the files contain letters) or
deactivate them.
4. Video
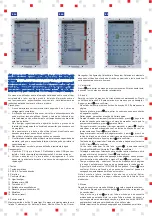
Press to enter the Video list. Then press the direction buttons to select
the film or video of your choice and press to confirm.
When you enter, you will see the message “Do you want to continue
playing the last item?” You can select “YES/NO”. Press to confirm if you
want the film to continue from the point where it stopped.
Press to show the submenu options, where you can select:
- Select time Play: use the direction and number keys to adjust the
duration of the automatic play time.
- Full screen: you can choose between Original screen and Normal
screen.
- Brightness: you can choose between five levels.
5. Pictures
When you enter you will see a mosaic view of the stored images. Press
the direction key to select the image you want to view and press to
confirm. When you have entered the image, press and five options will
appear:
- Rotate right
- Rotate left
- Zoom in
- Zoom out
- Browse: this option lets you see the images as a slideshow. You can
choose whether to Deactivate or set intervals of 5,10 or 20 seconds. The
photographs will then be shown on the screen in automatic slideshow
mode.
6. Record
When you enter you will be in Record mode. To start recording, press the
ON/OFF button and then press it again to stop. Press the ON/OFF button
once again to continue.
When you have finished recording, press and you will see: "Save
recorded file?” Choose OK or No.
Note: before recording you can press the
key to set the quality level (high
or low) and volume (select between 1, 2, 3, 4 and 5). Press to confirm.
To play a recording, go to the Music menu and select Recordings. Then
select the recording of your choice and press
to confirm.
7. Explorer
This screen shows all the files stored on the unit. Select the files directly
by pressing .
8. Setting
This menu gives you seven set-up options:
- Display Setting: you can select the Screen brightness time (5, 10, 15,
20, 30 seconds and Continuous) and Brightness level (5 levels).
- System Setting: if you select the Restore system option you will return to
Paquito's factory settings.
- Language: the available menu languages are Spanish, English, French,
German, Italian, Portuguese, Polish, Turkish, Greek, Russian, Simplified
Chinese, Traditional Chinese, Japanese and Hebrew.
- System information: an image will appear showing the manufacturer's
information.
- Automatic Shut down: you can choose the amount of time before
automatic switch-off, with a choice of 3, 5, 10, 15, 20 minutes and
Deactivate.
- Sleep Power Off Time: use the direction keys to select the amount of
time before the standby mode is activated.
- Time: use this to set the time and date. Use the right and left direction
keys to select the hour and minute fields and the up and down keys to
move the time forwards/ back. Then press OK to confirm.
9. Calendar
This shows the date in Month mode. You cannot change this.
10. Search
This mode contains a screen in which you can write using the number
keys, which in this mode appear as letters. The device will then search for
the files containing these letters.
11. General advice for playing:
- Adjust volume: adjust the volume by pressing the 5 and 8 direction keys.
- Play and pause: press the ON/OFF button to stop playing, and press the
ON/OFF button again quickly to continue playing.
- Previous and next track: press the left or right keys to go to the previous
or next tracks.
- Fast forward and rewind: press the left or right keys to fast forward or
rewind.
12. Specifications
The formats accepted are:
- Music: MP3, WMA, OGG, APE, FLAC, AAC, WAV.
- eBook: PDF,PDB,EPUB,FB2,TXT.
- Images: JPG, BMP, GIF.
- Video: MKV 720P, AVI, RM, RMVB, MP4, MOV, VOB, DAT, FLV, 3GP,
720 HD, code H.264.
4GB internal memory. Accepts mini SD cards up to 32GB.
13. Problem solving
- If you cannot switch the player on: check that the player is charged and,
if not, charge it.
- If you cannot hear sound through the headphones: check whether the
volume is set at “0”. Change the headphones to check that they are
working.
- Loud noise: check whether there is dust in the headphones or
loudspeaker. Check whether the file has been damaged.
Paquito
ref:52022-270711
Please retain this information for future reference.
Summary of Contents for Paquito
Page 1: ...1 super battery 7 TFT Color Display 7 ES ...
Page 2: ...1 II 6a II 6b 1 2 3 4 5 6 7 8 9 12 13 10 11 14 15 16 II I II 4 ...
Page 5: ...super battery 7 TFT Color Display 7 EN ...
Page 6: ...1 II 6a II 6b 1 2 3 4 5 6 7 8 9 12 13 10 11 14 15 16 II I II 4 ...
Page 9: ...super battery 7 TFT Color Display 7 FR ...
Page 10: ...1 II 6a II 6b 1 2 3 4 5 6 7 8 9 12 13 10 11 14 15 16 II I II 4 ...
Page 13: ...super battery 7 TFT Color Display 7 DE ...
Page 14: ...1 II 6a II 6b 1 2 3 4 5 6 7 8 9 12 13 10 11 14 15 16 II I II 4 ...
Page 17: ...super battery 7 TFT Color Display 7 IT ...
Page 18: ...1 II 6a II 6b 1 2 3 4 5 6 7 8 9 12 13 10 11 14 15 16 II I II 4 ...
Page 21: ...super battery 7 TFT Color Display 7 PT ...
Page 22: ...1 II 6a II 6b 1 2 3 4 5 6 7 8 9 12 13 10 11 14 15 16 II I II 4 ...
Page 25: ...super battery 7 TFT Color Display 7 RO ...
Page 26: ...1 II 6a II 6b 1 2 3 4 5 6 7 8 9 12 13 10 11 14 15 16 II I II 4 ...
Page 29: ...super battery 7 TFT Color Display 7 TR ...
Page 30: ...1 II 6a II 6b 1 2 3 4 5 6 7 8 9 12 13 10 11 14 15 16 II I II 4 ...
Page 33: ...super battery 7 TFT Color Display 7 EL ...
Page 34: ...1 II 6a II 6b 1 2 3 4 5 6 7 8 9 12 13 10 11 14 15 16 II I II 4 ...
Page 37: ...super battery 7 TFT Color Display 7 CN ...
Page 38: ...1 II 6a II 6b 1 2 3 4 5 6 7 8 9 12 13 10 11 14 15 16 II I II 4 ...
Page 41: ...super battery 7 TFT Color Display 7 HE ...
Page 42: ...1 II 6a II 6b 1 2 3 4 5 6 7 8 9 12 13 10 11 14 15 16 II I II 4 ...


