9
IMER INTERNATIONAL S.p.A.
TR 225 N
- Insert the plug into a 16A IP67 EEC socket socket and tighten down
the retainer collar.
- The hoist is now ready for testing.
5. TESTING
:DUQLQJ7HVWLQJPXVWEHFDUULHGRXWE\TXDOL¿HG
personnel. Take all necessary safety precautions.
- Warning! The winch must be tested before use.
Before testing the hoist make sure that it has been correctly installed.
1) Lower the unloaded rope to the lower loading position, and check
that at the end of its travel three turns of rope remain on the drum.
2)
No-load test.
$SSO\DVPDOOORDGNJDQGUXQDFRPSOHWHXS
down cycle.
Test the up, down and emergency stop buttons, UP limit switch
operation, correct rope winding onto the drum and motor brake
operation.
3)
Load test.
Load the hoist with its maximum admissible load. Run
DFRPSOHWHXSGRZQF\FOHWRWHVWWKHVWDELOLW\RIWKHVXSSRUWVDQG
the motor brake.
After the test, check the support structure for failure and slippage and
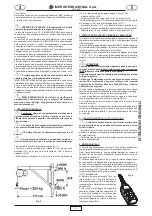
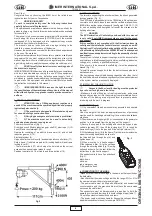
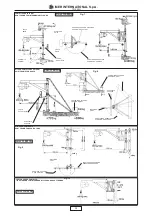
recheck the drum level (use a level as in Fig. 1).
4)
7KHKRLVWLV¿WWHGZLWKDVDIHW\ZKLFKVWRSVWUDYHODWWKH83
and fully unwound positions DOWN (16) to avoid the rope winding
on in the wrong direction.
Do not depend on this safety to stop the winch; release the control
button to stop the winch instead.
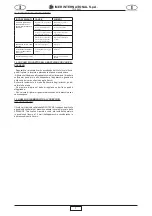
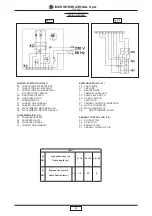
:KHQWHVWLQJLVFRPSOHWHG¿OOLQWKHWHVWUHSRUWZLWKWKHGDWH
installation check and signature (Table 2) along with any other
comments.
The test procedure described above, complete with
no-load (2) and load (3) tests, must be performed every time
the machine is installed.
6. SAFETY WARNINGS AND OPERATING PRECAUTIONS
- 1) Do not lift weights exceeding the hoist’s capacity.
- 2) Do not allow anyone to stand underneath suspended
loads.
- 3) Do not attempt to raise loads that are anchored to
the ground (e.g. buried posts, plinths, etc.).
- 4) Make sure that the load is correctly attached to the
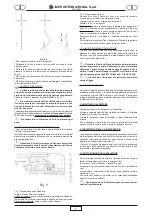
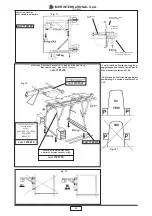
KRRN RQ WKH KRLVW DQG DOZD\V FORVH WKH VDIHW\ FDWFK ¿J
4.1, 6).
- 5) If the load requires the attachment of accessories
EHOWVURSHVVOLQJVHWFWKHVHPXVWEHRIDFHUWL¿HGDQG
approved type. The maximum capacity must be reduced by
the weight of these accessories.
- 6) Make sure that no part of the load detaches while it
is being lifted.
0DNHVXUHWKDWWKDWWKHORDGLVUHVWLQJ¿UPO\RQWKH
ground before releasing it from the hook.
- 8) Do not release a suspended load using accessories
that permit instantaneous release or by cutting the sling
since this can give rise to an elastic counter-reaction of the
entire structure.
- 9) Keep your hands and body well clear of the drum
during operation to avoid them getting caught in the winding
rope; this can result in serious injury.
- 10) Keep your hands and body well clear of the
counterweight during lifting to prevent them being crushed
against the stop lever.
- 11) Do not use the machine in adverse weather
conditions (strong wind or storms) as the load is not guided.
- 12) The control position and lighting conditions must
permit a good view of the load throughout its travel.
- 13) Check that all guards are in place.
- 14) During operation check that the rope winds on
correctly, one turn at a time, without slack or overlaps, as
this can damage it. If it fails to do so, unwind it and rewind it
correctly under tension.
- 15) Make sure that the lifting run is free from obstacles
and make sure that no one can lean out from intermediate
ÀRRUV
- 16) Cordon off the ground loading area to prevent
anyone from entering during lifting.
- 17) Keep children away from the hoist.
- 18) Do not allow unauthorised persons access to the
hoist while it is not being used.
- 19) The hoist must not be used for pulling loads
obliquely (more than 5° away from vertical).
- 20) Do not rotate the winch on its pivots by pulling the
pendant; move the frame itself by hand;
- 21) Do not leave a suspended load unattended. Raise
or lower it and unload it.
- 22) When a load is to be raised or lowered, this must
be done in such a way as to minimise dangerous sideways
and vertical movements.
- 23) Before leaving the hoist unattended, remove the
load, completely wind the rope onto the drum and disconnect
its power plug.
- 24) Do not allow the load to spin while it is being raised
or lowered as this could cause the rope to break.
- 25) Protect the winch against the rain.
When operation is resumed after a lengthy period of disuse the entire
machine must be tested under no-load conditions before starting, as
described above (point 2, Chapter 5).
7. TESTING AND MAINTENANCE
Warning!! Only carry out maintenance with the machine
switched off, unloaded and disconnected from the mains.
5HSDLUVPXVWEHGRQHE\TXDOL¿HGSHUVRQQHORUE\,0(57HFKQLFDO
Service.
- Use only IMER original spare parts.
- Check the motor brake every 6/7 days.
- Ensure that the notices and inscriptions on the
machine are prominently displayed and legible.
- Keep the machine clean of dirt.
- Check the operation of the UP and DOWN position
limit switches at the start of each work shift.
- Check the electrical cable at the start of every work
cycle for accidental damage.
7.1 STEEL ROPE
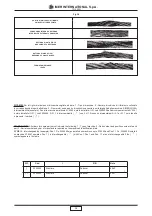
8VHRQO\QHZURSHVZLWKDPDQXIDFWXUHUVFHUWL¿FDWHRIFRQIRUPLW\
DWWHVWLQJ WKHLU VDWLVIDFWLRQ RI WKH IROORZLQJ VSHFL¿FDWLRQV DQG RI
VWDQGDUG81,(17KHVHDUHPLQLPXPVSHFL¿FDWLRQVURSHV
ZLWKEHWWHUVSHFL¿FDWLRQVPD\EHXVHGZLWKWKHH[FOXVLRQRIWKH2'
which must always be 5 mm.
External diameter :
5 mm
Type :
133 wires anti-spin
Direction of lay :
CDX
Strand dia.:
0.32 mm
6WUDQGVWUHQJWK
1PP
2
Preformed:
Yes
Minimum breaking strain :
16 kN
Length :
31 m
Surface treatment : galvanised and greased
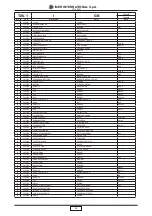
The IMER reference code is given in the spare parts table.
7.1.1 ROPE REPLACEMENT
This operation must be carried out by an authorised IMER
International service centre.
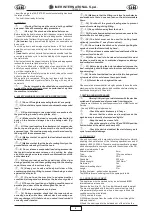
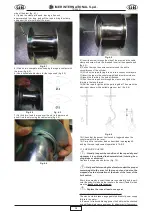
5HPRYHWKHKRRNUHI¿JDQGZLWKGUDZWKHFDEOHZHLJKW
The drum is equipped with a device to ensure that two turns
RIURSHUHPDLQIXOO\ZRXQGRQZKHQDQHZURSHLV¿WWHGWKLV
condition must be maintained.
1) Fully unwind the rope.
2) Withdraw the rope from the inside of the drum through the
hole and the slot.
3) Feed the new rope into the hole and out of the slot on the


