26
EN
CLEANING AND CARE
WARNING! Risk of damage to the appliance. Detachable
parts shall not be washed in a dishwasher.
• Release the hopper from the juicing container by rotating it anti-clockwise [Fig. I].
• remove the juicing container lifting it from the motor casing [Fig. L].
• Flip over the filter and remove the reamer, and then the mixer [Fig. M].
• Clean the pulp outlet under a jet of water by opening the silicone flap [Fig. N].
• Wash all removable parts - the presser, the hopper, the hopper cover, the reamer, the filters, the
mixer, the juicing container, the sorbet accessory and the containers for the juice and manual pulp
waste.
• Clean the filters outside and inside with the brush supplied [Fig. O].
• Never immerse the washable parts in water hotter than 60°C.
• Wipe the motor unit with a dampened and thoroughly squeezed out sponge.
• Dry with a dry cloth.
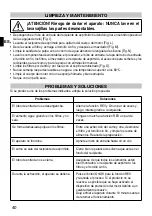
TROUBLESHOOTING
Should one of the problems indicated occur, adopt the proposed solution:
Problems
Solutions
The hopper is not released.
Alternate the REV and On function a few times
and then try to turn it again counterclockwise.
The food continues to turn in the filters and is
not extracted.
Operate in REV mode a couple of times.
Excessive pulp is accumulated in the filters.
Remove the filter and reamer and clean to
remove the pulp between individual batches of
juice. Resume the process.
The appliance does not work.
Close the hopper tightly until it clicks audibly.
Juice leaks out of the juicing container.
Properly close the silicone lever at the bottom of
the container.
The hopper does not close.
Check properly assembly of all the parts: juicing
container, filters and auger.
The appliance stops during extraction.
Press the On/Off button to REV and resume
the process. If the appliance should not resume
operation, the motor cut out switch might have
tripped due to overheating.
Let the appliance cool down for 10 minutes
before re-using it.
The plastic parts stain with vegetables, such
as carrots.
Clean the plastic parts with a cloth dipped in
vegetable oil.
Summary of Contents for Succovivo Pro 2000
Page 3: ......
Page 5: ...II C B E D G F I H ...
Page 6: ...III DATI TECNICI TECHNICAL DATA DATOS TÉCNICOS L O N M ...

