9
1-5
1-4
INS
TALLER
US
ER
MAINTEN
AN
CE TECHNI
CI
AN
1.7 ELECTRIC CONNECTION.
The appliance has an IPX5D protection degree,
electrical safety of the appliance is reached only
when it is connected properly to an efficient
earthing system as specified by current safety
standards.
Attention:
Immergas S.p.A. declines any respon-
sibility for damage or physical injury caused by
failure to connect the boiler to an efficient earth
system or failure to comply with the reference
standards.
Also ensure that the electrical installation
corresponds to maximum absorbed power
specifications as shown on the boiler data-plate.
Boilers are supplied complete with an “X” type
power cable without plug. The power supply
cable must be connected to a 230V ±10% / 50Hz
mains supply respecting L-N polarity and earth
connection;
, this network must also have a
multi-pole circuit breaker with class III over-
voltage category.
To protect from possible dispersions of DC
voltage one must provide a type A differential
safety device.
When replacing the power supply cable, contact
a qualified firm (e.g. the Authorised After-Sales
Technical Assistance Service). The power cable
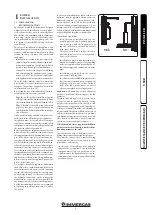
must be laid as shown (Fig. 1-3).
In the event of mains fuse replacement on the
P.C.B., use a 3.15A quick-blow fuse. For the main
power supply to the appliance, never use adapt-
ers, multiple sockets or extension leads.
• Comando Amico Remoto remote control
electrical connection
V2
(CAR
V2
).
The boiler
only functions if connected to the Comando
Amico Remoto remote control
V2
, supplied as
per standard with the boiler. The CAR
V2
must
be connected to the + and - IN clamps and to
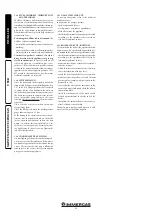
clamps 44 and 41 on the P.C.B. (in boiler) ob-
serving the polarity and using the connection
cable that comes out of the boiler and which is
appropriately marked (Fig. 1-4). Connection
with the wrong polarity prevents the CAR
V2
from operating although without damaging
it. The connection to the boiler is made using
wires with a minimum section of 0.50 mm
2
and maximum section of 2.5 mm
2
and with a
maximum length of 50 metres.
• External temperature probe electrical con-
nection.
The boiler only works if it is connected
to the external temperature probe supplied
as per standard with the boiler. Refer to the
relative instruction sheet for positioning of
the external probe. The probe allows to auto-
matically decrease the maximum system flow
temperature when the outside temperature
increases, in order to adjust the heat supplied to
the system according to the change in external
temperature. The correlation between system
flow temperature and external temperature
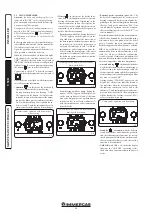
is determined by the parameters set in menu
“M5” under item “P66” according to the curves
represented in the diagram (Fig. 1-5). The elec-
tric connection of the external probe must be
made on clamps 38 and 39 on the boiler P.C.B.
(Fig. 1-4).
• Heat pump electrical connection.
The boiler
can be combined with an Immergas heat pump
which must be connected to the boiler as shown
in the wiring diagram (Fig. 1-4).
One must configure some parameters on the
heat pump remote panel:
“Assistance Menu -> Zone Definition”:
Remote control enabling: NO
Room thermostat enabling: SI
- “Zone Set Point” menu
Set mandata riscaldamento
Set mandata raffrescamento
Set the flow parameters according to your
requirements.
N.B.:
hot/cold and on/off request of the heat
pump will be managed by the boiler and not
from the heat pump's remote panel.
Configure the boiler parameters as indicated in
paragraph “circuit board programming” (Par.
3.9).
Important:
it is mandatory to prepare separate
lines with different supply voltage; it is essential
to separate the low voltage connections from the
230 V ones. All boiler pipes must never be used
for earthing the electrical or telephone system.
Ensure elimination of this risk before making the
boiler electrical connections.
TM-MAX/MIN = Selected flow temp. range.
TE = External temperature.
EXTERNAL PROBE
Correction law of the flow temperature depend-
ing on the external temperature and user
adjustments of the central heating temperature.
MAX
MIN
MAX
MIN


