background image

+Cam  Outdoor  HD  Quick  Start  Guide  

16


Safety Information


Do not point the camera directly at the 
sun, or else it will damage the image 
sensor.


Keep the camera away from heat to 
avoid electric shock. 

Do not attempt to open, dismantle, 
repair, or service the camera. Doing so 
may cause electric shock and other 
hazards. 

Any evidence of misuse, abuse, or 
tampering will void the Limited Warranty.


To maintain compliance with FCC’s RF 
exposure guidelines, this equipment 
should be installed and operated with


minimum distance of 20 cm between the 
radiator and your body. Use only the 
supplied antenna. 


Troubleshooting 

Summary of Contents for +Cam Outdoor HD

Page 1: ... Cam Outdoor HD All Weather ...

Page 2: ...t s enclosure that may be of sufficient magnitude to constitute a risk of electric shock to persons The exclamation point within an equilateral triangle is intended to alert the user to the presence of important operating and maintenance servicing instructions in the literature accompanying the product Warning Apparatus shall not be exposed to dripping or splashing and no object filled with liquid...

Page 3: ...harmful interference to radio or television reception which can be determined by turning the equipment off and on the user is encouraged to try to correct the interference by one or more of the following measures Reorient or relocate the receiving antenna Increase the separation between the equipment and receiver Connect the equipment into an outlet on a circuit different from that to which the re...

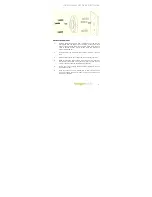
Page 4: ... Please follow the directions to install the camera outdoors Mount the camera in a position outside to ensure the most comprehensive view for video monitoring 1 Wall Bracket Screws 2 Power extension cord 3 Screws 4 Base Pivot 5 Antenna 6 Mounting Plate ...

Page 5: ... pilot holes for the wall bracket screws figure 7 into the wall 3 Attach screws figure 5 to the wall mounting plate figure 6 4 Make sure that the power supply unit extension cord figure 4 is placed into the drilled hole of the wall figure 9 and run the cord into the wall towards the main power adapter 5 Drill in the screws through the wall bracket plate and into the wall bracket screws 6 Make sure...

Page 6: ... iSecurity app from Apple s App store or the Google Play Store 2 Connect to Power Connect the Cam Outdoor HD to the AC power adapter then plug your power cord into the electrical outlet The Led light in front of the camera should be green this indicates power and set up mode is on ...

Page 7: ...Wi Fi Setup reset button on the back of the camera The Wi Fi Setup LEDs in the front of the camera will flash green and orange alternatively The Cam Outdoor HD is now ready to connect to your Wi Fi This may take up to 2 minutes from when the camera is first powered on ...

Page 8: ...Guide 8 3b Connect device to Cam Outdoor HD iOS Android Go to your device s settings Under the Wi Fi setting connect to the Cam HD AWXXXX last 4 digits of Cam ID network and make sure you are connected to the Cameras Wi Fi network ...

Page 9: ...e establishes its connection to the Cam Outdoor HD usually takes around 30 seconds launch the iSecurity App If you don t see the pop up prompt please close the app and re launch it iSecurity app will automatically detect your camera When prompted click Yes to setup your camera ...

Page 10: ... Cam Outdoor HD Quick Start Guide 10 4b Setup Wizard Follow the instructions in the Camera Setup Wizard to complete installation ...

Page 11: ...ee the page below the setup process has been completed Restart iSecurity and please log in again You can use your iOS Android devices to access the camera anywhere in the world Make sure your phone has access to the internet via 3G 4G or Wi Fi for internet connection ...

Page 12: ... Guide 12 5 Using iSecurity Main Features Window Please enter your user name and password created during the setup process to access your Cam Outdoor HD Friends Cameras Recorded Events App Settings Camera Status Configure Camera ...

Page 13: ...door HD Quick Start Guide 13 6 iSecurity Features Camera Viewer Swipe directional controls to Pan Tilt To pan tilt you must first zoom in Audio Muting Off On Take a Snapshot Audio only Mode Record a video clip ...

Page 14: ... 14 6a Zoom Function Zooming In Touch the screen with two fingers together and slide outward at an angle and the image will zoom in Zooming Out Touch the screen with two fingers apart and slide inwards at an angle and it will zoom out ...

Page 15: ...e 15 6b Audio Talkback 1 To use Audio Talkback first press the Audio button to initiate sound to listen in 2 Then press the Audio Talkback button and speak into your device then let go for the audio to transfer to the camera s speaker ...

Page 16: ...not attempt to open dismantle repair or service the camera Doing so may cause electric shock and other hazards Any evidence of misuse abuse or tampering will void the Limited Warranty To maintain compliance with FCC s RF exposure guidelines this equipment should be installed and operated with minimum distance of 20 cm between the radiator and your body Use only the supplied antenna Troubleshooting...

Page 17: ...cators During Wi Fi Setup Mode Green Setup mode on Flashing Green Orange Setup mode initializing Light Off Setup mode off During Normal Operation Green Connected to iSecurity Orange Connected to local Network Flashing Orange Not connected to any network ...

Page 18: ... Cam Outdoor HD Quick Start Guide 18 Reset button If the camera has shut down please hold down the power button on the back of the camera for 20 seconds to reset the camera For More Information ...

Page 19: ...Guide 19 To get the latest camera driver updates or to learn more about Imogen Studio products please visit www imogenstudio com To get the latest software updates or to learn more about Seedonk please visit www isecurityplus com ...

Page 20: ...Revised December 3 2014 ImogenStudio 2014 ...

Reviews: