background image


iWaylink  Inc. 


48 


Calendar 

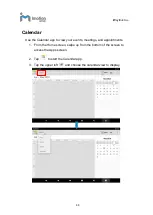
Use the Calendar app to view your events, meetings, and appointments.   

1.  From the Home screen, swipe up from the bottom of the screen to 

access the Apps screen. 

2.  Tap 

  to start the Calendar app. 

3.  Tap the upper left 

  and choose the calendar view to display.   


Summary of Contents for PT101

Page 1: ...PT801 PT101 Rugged Tablet User s Manual Version A0 06 08 2020 ...

Page 2: ...15 of FCC Rules which are designed to provide reasonable protection against interference when operated in a commercial environment Operation of this equipment in a residential area is likely to cause interference in which case the user at his her own expense will be required to take whatever measures to correct the interference This device complies with part 15 of the FCC Rules Operation is subjec...

Page 3: ...eless signal interference make sure there are no other wireless devices operating nearby in the same application area General Safety Precautions Please read this User Manual thoroughly before using this device Use only the components and accessories supplied by the manufacturer Do not attempt to disassemble the PT801 PT101 rugged tablet as it does not contain parts that can be repaired by the user...

Page 4: ...to avoid cracking the enclosure Do not unplug the AC adapter with wet hands to avoid electric shock Do not use the PT801 PT101 AC adapter with any other devices Do not place the device in liquids to prevent short circuits or fire Do not place this device near an open fire If the power or USB cable is seriously twisted or broken stop using immediately to prevent electric shock short circuit or fire...

Page 5: ...cking 8 Features 9 Front View 9 Back View 10 Top View 11 Bottom Side View 12 Side View 13 Status LED Indicator 13 Initial Setup 14 Charging the Battery 14 SIM Card Micro SD Card Installation 15 Powering On Off PT801 PT101 16 Powering On PT801 PT101 16 Powering Off PT801 PT101 16 Power Button Panel 16 Using the Touchscreen 17 Managing Settings 17 Setting Date and Time 19 Setting the Display 20 Adju...

Page 6: ...ck Access Panel 26 Battery Management 26 Monitoring Battery Use 27 Optimizing Battery Savings 27 Network Internet 27 Wi Fi 28 Setting Up a Wi Fi Hotspot 29 Connecting with Bluetooth 29 Airplane Mode 30 Connected devices 31 Bluetooth 32 USB Connection with a PC 34 Reset 35 Chapter 3 Utility Applications 37 Apps 37 Widgets 37 Adding Widgets and App Shortcuts to the Home Screen 38 Managing Folders 39...

Page 7: ...the PT801 PT101 50 Product Storage 50 Cleaning 50 Troubleshooting 51 Appendix A Technical Specifications 52 Key Features 52 Specifications 52 Appendix B Battery Adapter Notes 54 Battery Precautions 54 Storing Batteries 54 Adapter Precautions 54 Appendix C Battery Caution Notes 55 ...

Page 8: ...ore PT801 PT101 is designed with advanced power saving technology that provides long battery life for daily operation This User s Manual provides information on how to use this device and its accessories Unpacking Carefully remove and unpack the PT801 PT101 device and other package items from the protective material Save the containers for later storage and shipping Check that you have received th...

Page 9: ...t View PT801 Table 1 PT801 Front View Features and Functions PT101 Table 2 PT101 Front View Features and Functions No Feature Function 1 Status LED Indicator Lights during system booting and charging 2 Touch Screen 8 projected capacitive touch with multi touch support No Feature Function 1 Status LED Lights during system booting and charging ...

Page 10: ... Screen 10 projected capacitive touch with multi touch support 3 Rubber Cushion Rubber cushion for touch panel protection No Feature Function 1 Speaker Built in internal micro speaker 1W 8Ω 2 Rear Camera Built in 5M camera module for taking photo and videos 3 Hand Strap Hand strap for holding the tablet ...

Page 11: ...t in internal micro speaker 1W 8Ω 2 Hand Strap Hand strap for holding the tablet 3 Rear Camera Built in 5M camera module for taking photo and videos No Feature Function 1 Power Button To power on power off or wake the system up if it falls into sleep mode 2 Micro SD Card Slot Slot for installing micro SD card 3 SIM Card Slot Slot for installing Nano SIM card ...

Page 12: ...ine out combo jack No Feature Function 1 Power Jack 5V DC IN Power Jack 2 Docking Station Connector Connect to the docking station 3 Connecting Hole Connecting hole for docking station No Feature Function 1 Micro USB Port Micro USB port x 1 OTG 2 Power Jack 5V DC IN Power Jack 3 Docking Station Connector Connect to the docking station 4 Audio Port Mic in line out combo jack ...

Page 13: ...m status and battery life The below chart enumerates all the possible LED indicators and its meaning for your reference 5 Connecting Hole Connecting hole for docking station No Feature Function 1 Micro USB Port Micro USB port x 1 OTG No Feature Function 1 Micro SD Card Slot Slot for installing micro SD card 2 SIM Card Slot Slot for installing Nano SIM card 3 Power Button To power on power off or w...

Page 14: ...power adapter which comes with PT801 PT101 Using a different power adapter may damage your device When the low battery warning message appears please fully charge the battery to avoid data loss When the battery is running very low less than 6 percent of battery capacity the system will automatically shut down to protect the battery being over discharged Trickle Charging Process If PT801 PT101 has ...

Page 15: ... cover located on the top side of the PT801 to find micro SD card slot and SIM card slot PT101 Pull off the rubber cover located on the left side of the PT101 to find micro SD card slot and SIM card slot 3 Have the rear of the tablet face towards you to install micro SD card or SIM card 3 1 To insert a micro SD card into the micro SD card slot make sure the side with the golden finger of the card ...

Page 16: ...801 PT101 press and hold the power button for around 2 seconds and then tap Power off In the case the system cannot be successfully powered off you need to press and hold the power button for at least 7 10 seconds In the case the system halts for unknown reasons you are advised to hold down the button until a system shutdown is initiated Power Button Panel The Power Button Panel provides easy acce...

Page 17: ... floats so you can drag it around or a pop up menu may appear Swipe Tap on one spot and slide your finger to another spot This action moves information around on the screen Drag Touch and swipe to move items on the screen Lift your finger to complete the action Pinch Touch the screen with two fingers that are separated and then bring them together This motion zooms out on an image or map Spread To...

Page 18: ...fications Default apps App permissions Special app access Battery Battery saver Battery Manager Battery percentage Last full charge Screen usage since full charge Display Brightness level Adaptive brightness Wallpaper Sleep Auto rotate screen Font size Display size Screen saver Device theme Sound Media volume Call volume Alarm volume Notification volume Do Not Disturb Shortcut to prevent ringing D...

Page 19: ...the current minute and release 9 Tap AM or PM then touch OK Security location Screen lock Location Show passwords Device admin apps Encryption credentials Trust agents Screen pinning Accounts Add account Automatically sync data Accessibility Text to speech output Font size Display size Magnification Large mouse pointer Remove animations Dwell timing Auto rotate screen Touch hold delay Vibration Mo...

Page 20: ...tness level and adjust the brightness slider to change the brightness 5 Tap the Home Key to return to the Home screen Setting Screen Rotation To set screen rotation 1 Swipe down from the status bar to open the quick access panel 2 Tap the Settings icon 3 Tap Display and then Advanced 4 Slide the Auto rotate screen slider to On to enable screen rotation when the device is rotated or slide to Off to...

Page 21: ...access panel 2 Tap the Settings icon 3 Tap Display then Advanced 4 Tap Font size 5 Slide the font slider to make the screen text larger or smaller 6 Tap the Home Key to return to the Home screen Accessibility The PT801 PT101 offers several accessibility options to assist people with visual of motor impairments To use the accessibility options 1 Swipe down from the status bar to open the quick acce...

Page 22: ...creen as follows 1 Press the Power button to turn on or wake the PT801 PT101 2 Swipe up from the lock icon at the bottom 3 If the PIN or Password feature is enabled then enter the required PIN or Password to unlock Home Screen After you unlock the screen the Home screen appears It may vary in appearance from the screen below depending on the configuration You can move or place apps shortcuts and w...

Page 23: ...ar Icons Status bar icons are described in the table below Table 12 Status Icons No Feature Function 1 Status Bar Displays notification icons on the left and status icons on the right 2 Widgets Stand alone applications such as the clock calendar and others can be placed and launched from the Home screen 3 Shortcut Icons Application shortcuts can be placed anywhere on the Home screen Icon Descripti...

Page 24: ... the left Airplane mode Connected to Wi Fi network Not connected to a Wi Fi network or No Wi Fi signal Portable Wi Fi hotspot active Icon Descriptions Back This goes to the previous screen you were working in You can tap this button to go back only as far as the Home screen Home This button returns you to the Home screen Overview This opens a list of screens that you have worked in recently Tap a ...

Page 25: ...ose an App to adjust its notifications Quick Access Panel The quick access panel provides a fast and easy way to access frequently used functions 1 Swipe down from the status bar to open the quick access panel 2 Tap the pull down menu arrow next to the Settings icon 3 Slide the display slider to adjust screen brightness 4 Tap the tiles to access or enable disable frequently used functions Table 14...

Page 26: ...k access panel according to your preferences 1 Swipe down from the status bar to open the quick access panel 2 Swipe down a second time to reveal the entire quick access panel 3 Tap the pen icon at the bottom of the quick access panel to edit the function tiles 4 Tap and hold to move the various tile between the active and disabled sections Move tiles you don t frequently use to the bottom and rep...

Page 27: ...tions to see details on their power consumption Optimizing Battery Savings The following tips can help you save on battery consumption Reduce screen brightness Set the screen to turn off after short periods of non use Turn off Wi Fi and Bluetooth when not in use Minimize use of applications such as for music and videos that prevent the device from entering suspended mode Network Internet You can c...

Page 28: ...iWaylink Inc 28 enable disable Wi Fi settings Wi Fi To use Wi Fi you need access to a wireless access point or a hotspot 1 Tap Wi Fi and switch it to On A list of detected wireless networks appears ...

Page 29: ...u can share your data connection with other devices by turning the PT801 PT101 into a Wi Fi hotspot 1 Swipe down from the status bar to open the quick access panel 2 Tap the Settings icon 3 Tap Network internet 4 Tap Hotspot tethering 5 Turn on Wi Fi hotspot 6 The first time you turn on the Wi Fi hotspot you need to set it up 7 Enter a hotspot name or use the default 8 Enter a password or use the ...

Page 30: ...all wireless functions on the PT801 PT101 are turned off including the call function data services Bluetooth and Wi Fi When you disable Airplane mode the call function is turned back on and the previous Bluetooth and Wi Fi settings are restored Note that you can ...

Page 31: ...Airplane mode tile is displayed in the status bar Connected devices You can connect the PT801 PT101 to other devices via Bluetooth NFC or USB Make sure the required hardware for the other devices is set correctly to enable connection Connect to other devices as below 1 Swipe down from the status bar to open the quick access panel 2 Tap the Settings icon 3 Tap Connected devices 4 Tap Connection pre...

Page 32: ...iWaylink Inc 32 Bluetooth 1 Tap Bluetooth and switch it On A list of available devices appears ...

Page 33: ...vices section PT801 PT101 pairs with the device and the connection status is displayed in the Paired Devices section 4 If prompted to enter a password try 0000 or 1234 or consult the device documentation to find the password Connected Bluetooth devices appear in the status bar Normally you can easily reconnect a device by switching the PT801 PT101 s Bluetooth function ...

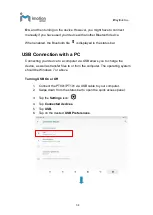
Page 34: ...ion with a PC Connecting your device to a computer via USB allows you to charge the device as well as transfer files to or from the computer The operating system should be Windows 7 or above Turning USB On or Off 1 Connect the PT801 PT101 via USB cable to your computer 2 Swipe down from the status bar to open the quick access panel 3 Tap the Settings icon 4 Tap Connected devices 5 Tap USB 6 Tap on...

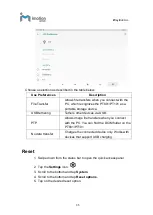
Page 35: ...ers other devices via USB PTP Allows image file transfers when you connect with the PC You can find the DCIM folder on the PT801 PT101 No data transfer Charges the connected device only Works with devices that support USB charging Reset 1 Swipe down from the status bar to open the quick access panel 2 Tap the Settings icon 3 Scroll to the bottom and tap System 4 Scroll to the bottom and tap Reset ...

Page 36: ...iWaylink Inc 36 ...

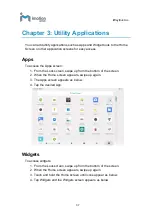
Page 37: ...rom the Lock screen swipe up from the bottom of the screen 2 When the Home screen appears swipe up again 3 The Apps screen appears as below 4 Tap the desired App Widgets To access widgets 1 From the Lock screen swipe up from the bottom of the screen 2 When the Home screen appears swipe up again 3 Touch and hold the Home screen until icons appear as below 4 Tap Widgets and the Widgets screen appear...

Page 38: ...cuts to the Home Screen You can add frequently used Widgets and App shortcuts to your Home screen for easy access Adding Widgets 1 Touch and hold the Home screen until the Widget icon appears 2 Tap the Widgets icon and the Widgets screen appears ...

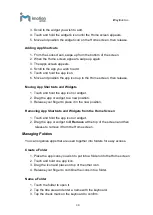
Page 39: ... app or widget to a new position 3 Release your finger to place it in the new position Removing App Shortcuts and Widgets from the Home Screen 1 Touch and hold the app icon or widget 2 Drag the app or widget to X Remove at the top of the screen and then release to remove it from the Home screen Managing Folders You can organize apps that are used together into folders for easy access Create a Fold...

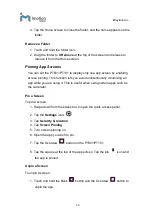
Page 40: ...id unintentionally minimizing an app while you are using it This is useful when using certain apps such as the calculator Pin a Screen To pin a screen 1 Swipe down from the status bar to open the quick access panel 2 Tap the Settings icon 3 Tap Security location 4 Tap Screen Pinning 5 Turn screen pinning on 6 Open the app you wish to pin 7 Tap the Overview button on the PT801 PT101 8 Tap the squar...

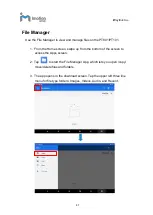
Page 41: ...m the Home screen swipe up from the bottom of the screen to access the Apps screen 2 Tap to start the File Manager App which lets you open copy move delete files and folders 3 The app opens in the download screen Tap the upper left three line menu for file type folders Images Videos Audio and Recent ...

Page 42: ...iWaylink Inc 42 4 Select a folder and tap the icon at the top of the screen This panel lets you manage folders and files ...

Page 43: ...iWaylink Inc 43 5 Organize your folders and files by name modified date size and type ...

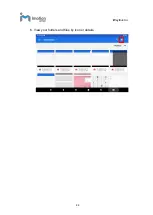
Page 44: ...iWaylink Inc 44 6 View your folders and files by icon or details ...

Page 45: ...ipe right from the left of the screen to choose camera or video function Taking a Photo 1 Frame the subject or scene in the screen 2 Zoom in or out by touching two fingers to the screen and pinching inward or spreading outward 3 Press to take a photo The camera shutter sound plays as it takes a photo The photo s thumbnail appears in the top right corner 4 Tap the icon at the top of the screen Then...

Page 46: ... Recording a Video 1 Frame the start of the capture 2 Tap to start recording the video The elapsed time appears at the top of the screen 3 Tap to end the recording The video s thumbnail appears in the top right corner ...

Page 47: ...iWaylink Inc 47 4 Tap the icon at the top of the screen Then you can set the details for recording a video ...

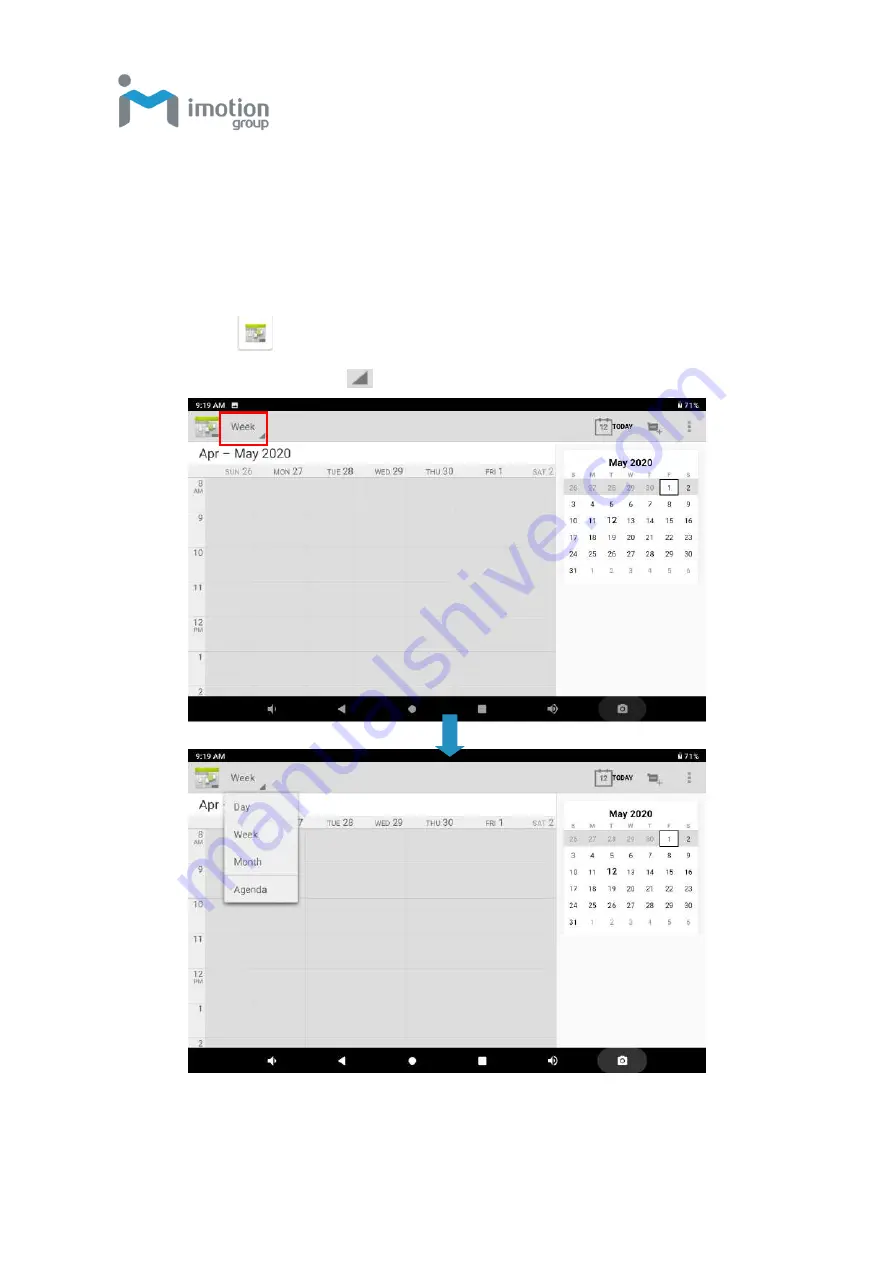
Page 48: ...lendar app to view your events meetings and appointments 1 From the Home screen swipe up from the bottom of the screen to access the Apps screen 2 Tap to start the Calendar app 3 Tap the upper left and choose the calendar view to display ...

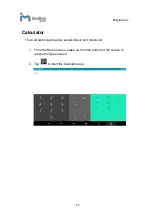
Page 49: ...iWaylink Inc 49 Calculator The Calculator App has two panels Basic and Advanced 1 From the Home screen swipe up from the bottom of the screen to access the Apps screen 2 Tap to start the Calculator app ...

Page 50: ...aces The PT801 PT101 s touchscreen is glass Do not scratch the screen Clean the PT801 PT101 housing with a soft dry lens cloth Clean the touchscreen with a soft cloth and diluted window cleaning solution Product Storage When storing the PT801 PT101 make sure it is kept at a reasonable temperature in a dry location Make sure the battery is charged at least 50 Cleaning Clean the PT801 PT101 as frequ...

Page 51: ...rn on 1 Battery depleted 2 System crash 1 Charge the battery 2 Reset the device Battery does not charge 1 Device disconnected from the charge cable 2 Ambient temperature out of range 1 Reconnect the charge cable 2 Charge battery with ambient temperature between 0 C 32 F and 40 C 104 F No characters in the display Device not on or it falls into sleep mode Press the power button Data not transmittin...

Page 52: ...4800mAh 17 76Wh rechargeable li ion polymer battery Storage 16GB default 32GB OS Support Android 9 0 Display 8 TFT LCD with LED backlight 1280 x 800 10 TFT LCD with LED backlight 1280 x 800 Touch Screen Projected Capacitive touch with multi touch support Wireless Connectivity WiFi IEEE 802 11 a b g n ac dual band 2 4GHz 5GHz BT 4 x Optional M 2 4G LTE module Power Supply 5V 15W 2 pin plug power ad...

Page 53: ...iWaylink Inc 53 Dimension 212 L x 157 W x 16 8 D in mm 260 7 L x 175 W x 16 8 D in mm Weight 580g 980g Operating Conditions 5 40 20 RH 90 RH Storage Conditions 20 70 10 RH 90 RH Regulatory FCC CE ...

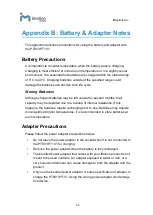
Page 54: ...depleted due to a buildup of internal resistance If this happens the batteries require recharging prior to use Batteries may deplete more rapidly at higher temperatures It is recommended to store batteries at room temperature Adapter Precautions Please follow the power adapter precautions below Do not leave the power adapter in the socket when it is not connected to the PT801 PT101 for charging Re...

Page 55: ...hium battery types Disposal of a battery into fire or a hot oven or mechanically crushing or cutting of a battery that can result in an explosion Leaving a battery in an extremely high temperature surrounding environment that can result in an explosion or the leakage of flammable liquid or gas A battery subjected to extremely low air pressure that may result in an explosion or the leakage of flamm...

Reviews: