PAGE 18
Tie bar
PN10786
Wall channel
PN10754
OPTION 6 -
SINGLE CURVED PANEL WITH TIE BAR
3
2
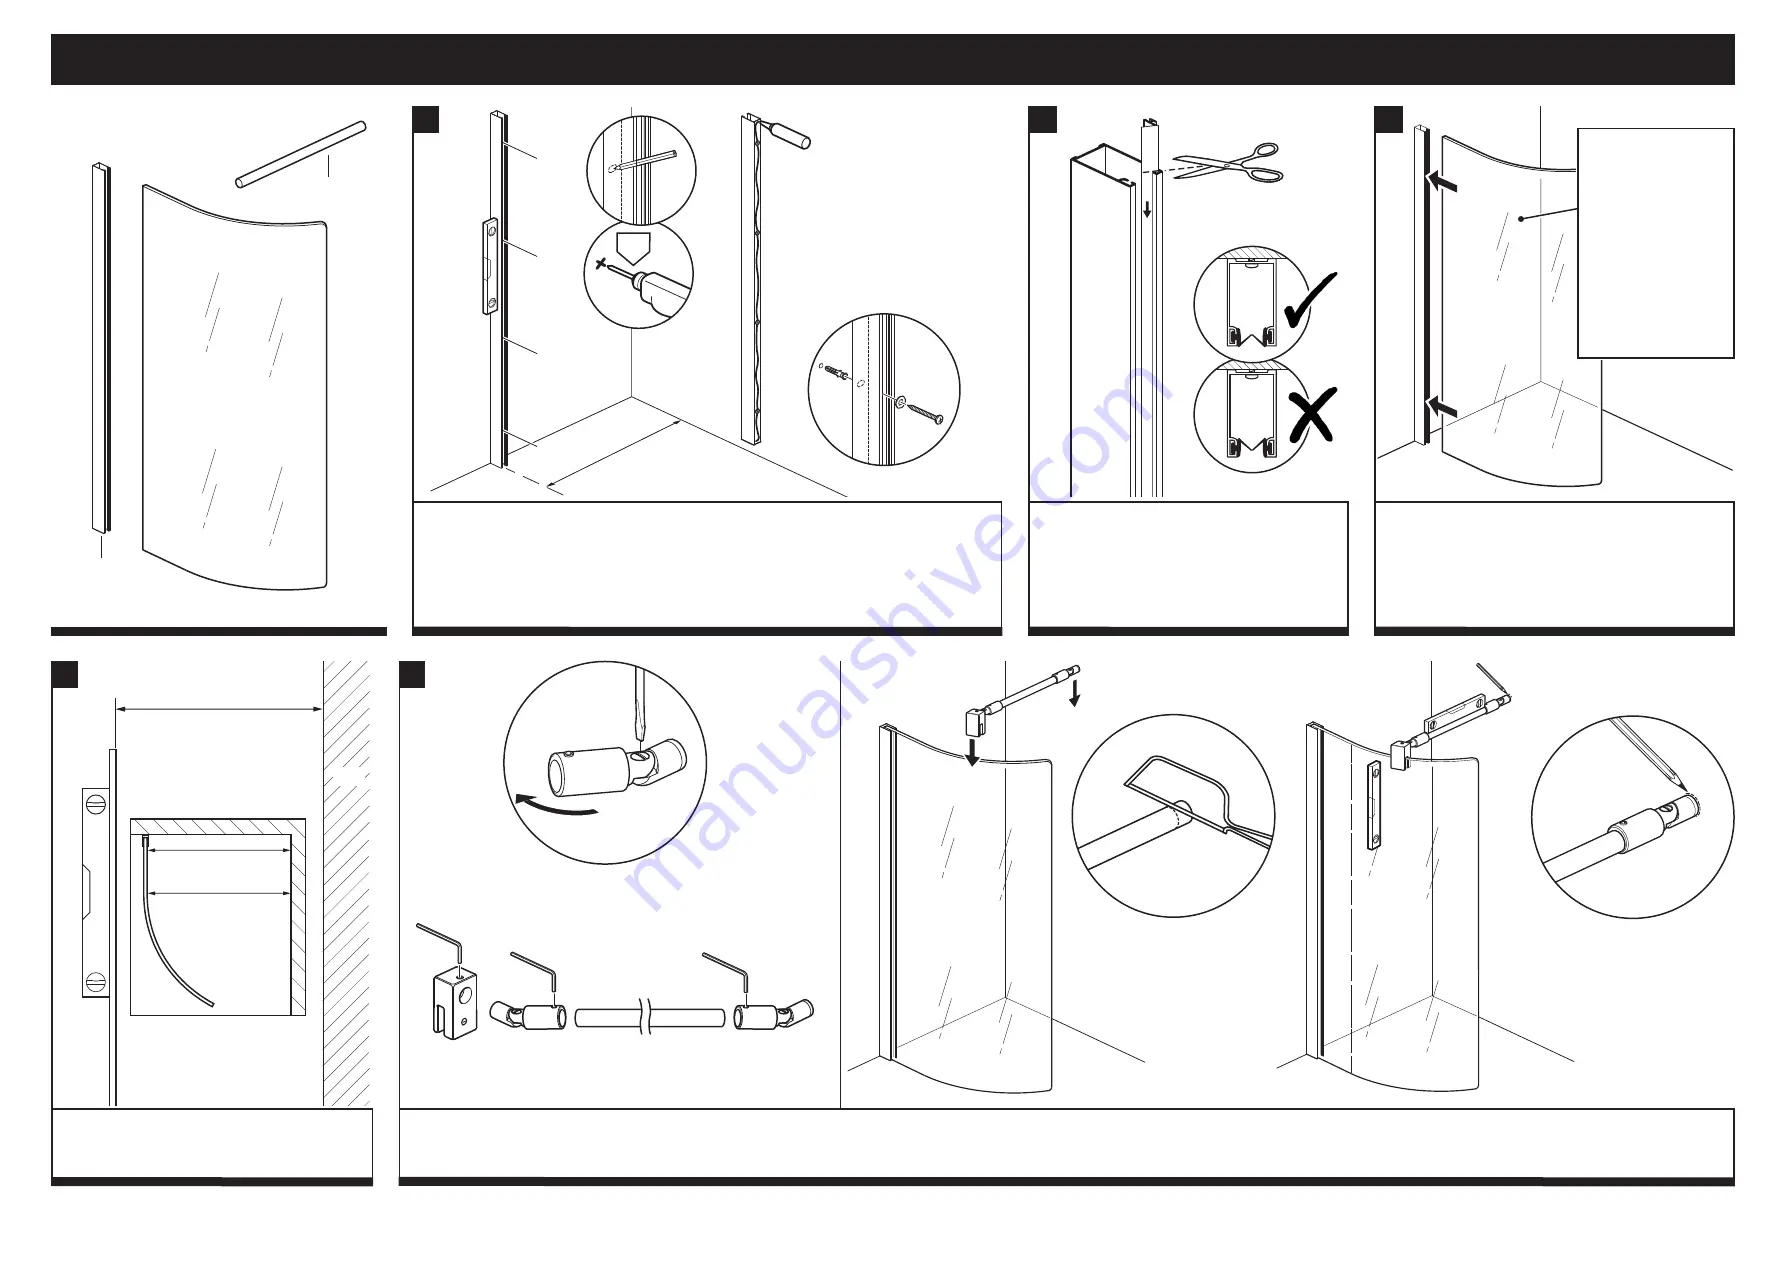
Slide both seals down into the wall channel and
cut off any excess.
Note
the orientation of the soft flippers.
1
Place the wall channel in position against the wall at the required distance from the opposite
wall, as shown (a maximum of 1180mm).
a:
Ensure the wall channel is vertical and mark the four holes onto the wall.
b:
Drill the four positions marked using a 6mm drill bit.
c:
Apply silicone sealant to the back of the wall channel.
d:
Insert the wall plugs. Place washers over the 32mm screws and fix the wall channel to the
wall. If necessary, slight adjustment is available in the wall channel.
Carefully
push the panel (the correct way around) into
the wall channel.
Note:
Wetting the edge of the panel with water will
help the panel insert.
ø 6
mm
a
b
d
32
mm
1180mm
max.
c
PN80499
=
=
PN80499
PN80506
5
4
Ensure that the open end of the panel is vertical
and the panel is parallel with the opposite wall.
Wall
Opening
a:
Loosen the large screw on both tie bar brackets.
b:
Slide a tie bar bracket onto both ends of the tie bar and position the top panel bracket onto tie bar bracket (PN80506). Lightly tighten the fitted grub screws.
c:
Carefully place the tie bar assembly onto the glass, where required (depending on your installation), angle the tie bar brackets as required.
d:
If required, trim the tie bar to length
e
&
f:
Ensure the panel is vertical and the tie bar is level, mark the position of the tie bar bracket onto the wall.
PN80499 &
PN80506
3mm
2mm
2mm
a
b
c
e
f
d
IMPORTANT
Ensure Glass Guard
H2o label is to the
outside of the panel.
Satin glass patterns
MUST be installed
to the outside of the
panel.
Note:
The Glass
Guard coating is on
the opposite side to
the label or satin glass
patterns.


