10.
7.
8.
IMPORTANT:
Please check for leaks before the tray is fully fitted
9.
11.
12.
DETAIL
SCALE 1 : 8
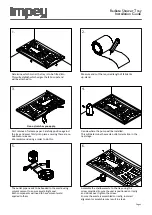
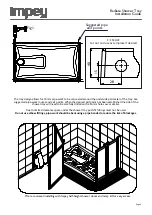
Apply tile adhesive to the wall ready for the tile up-stand.
If the floor is not level this may be corrected by bedding
down on sand and cement or tile adhesive.
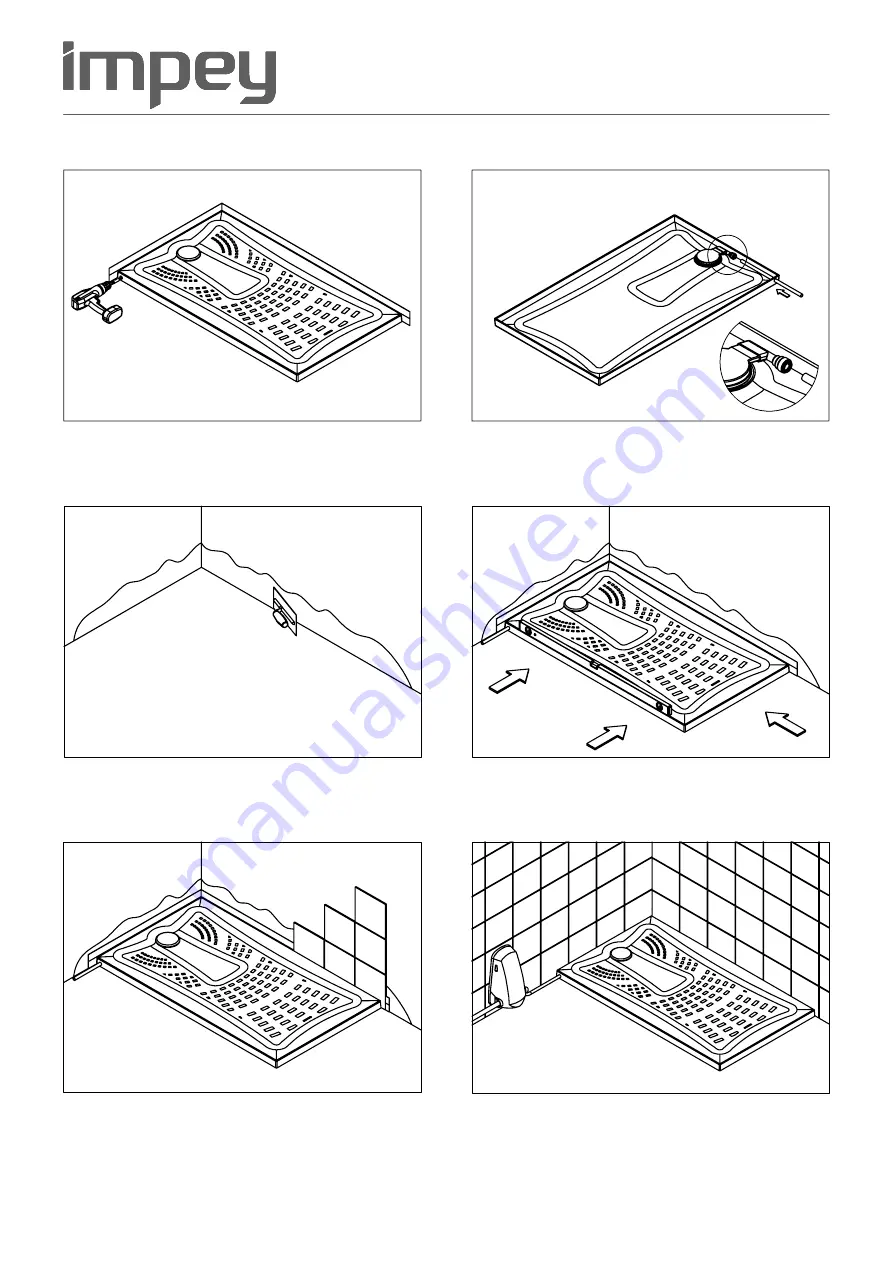
Put the tray into position and press the up-stand into
the tile adhesive ensuring there are no air gaps.
Check the tray is level on all four sides.
Allow 24 hours before exposing to water.
The tiling can now be completed.
Radiate Shower Tray
Installation Guide
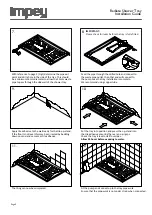
Fit the pump and connect up to the tray pipe-work.
Ensure that the pipe-work is not under strain when connected.
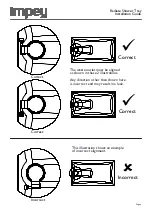
With reference to page 5 (Fig1) determine the pipe exit
point and drill a hole in the side of the tray. This should
be a minimum 16mm diameter to allow the 15mm waste
pipe to pass through the side wall of the shower tray.
Feed the pipe through the drilled hole and connect to
the waste pipe outlet, the other end will connect to
the pump once the tray installation is complete.
We recommend using copper tube.
Page 5

