ImpulseRadar
CrossOver® User Manual V1.4
Page 14 (31)
GPS-symbols and function
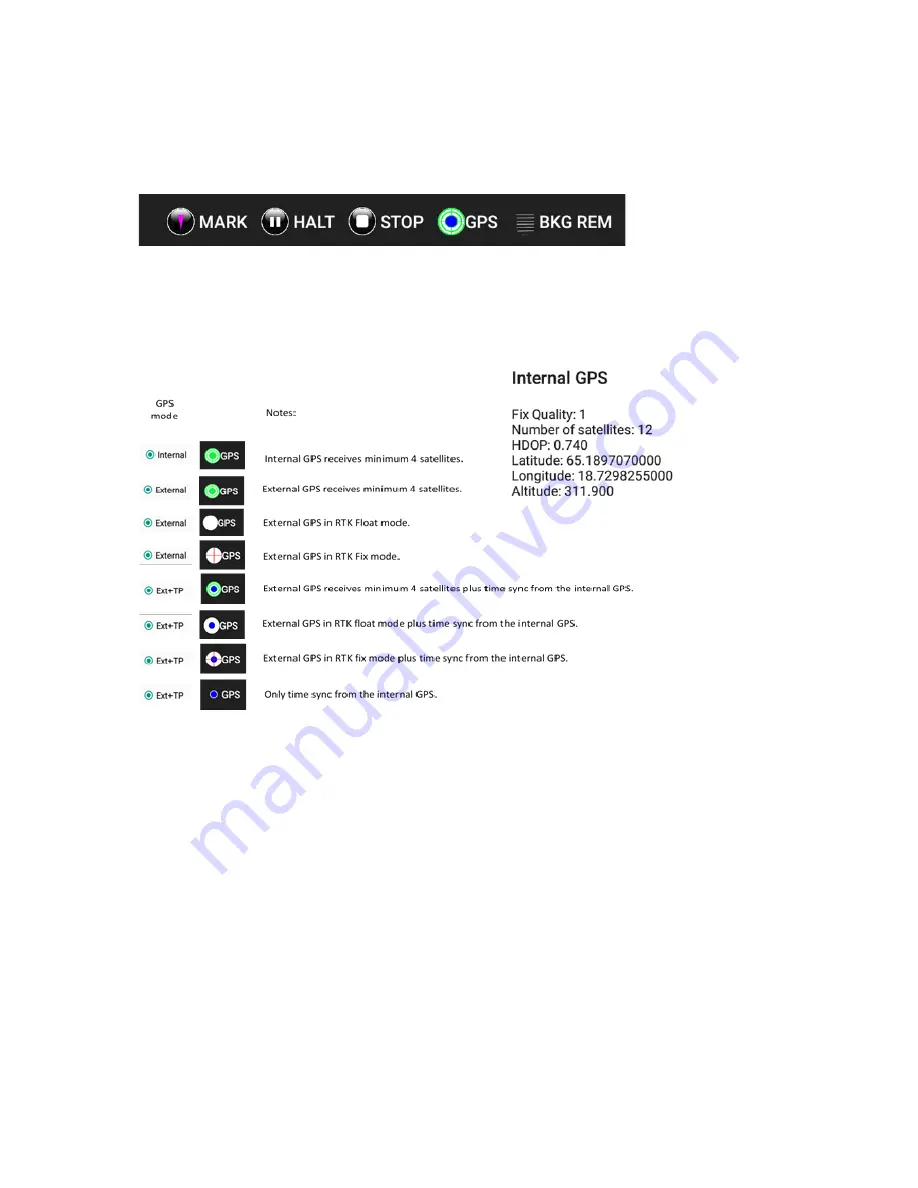
In Figure 13 below the menu bar during data collection is shown. The GPS is shown as a green circle
with a blue centre, this symbol will change, dependent on what type of fix is available and from what
source the GPS-coordinates are coming.
Figure 13, Menu bar during data collection
By pressing the GPS-symbol a, static view on the present satellites and coordinates can be viewed,
see Figure 14, below.
As mentioned the GPS symbol will change with the solutions at hand, the symbols we use to show
this are given in Figure 14.
Figure 14, GPS-symbols and their meaning and GPS information shown when the symbol is pressed
Note that when an RTK-GPS is used, hooked up to the system, the positing file generated is adjusted
for the time lag in the RTK, so no further data manipulation is needed. The timing-file is provided for
the rare occasion when the RTK is run separated from the system, for example; in a multi-sensor
setup.
Wheels
You may create additional wheels and/or adjust wheel calibration settings as required. The associated
dialogue for these functions is shown above in Figure 12, above.
A common situation involving the creation of a new wheel, is when using a CrossOver® antenna in
conjunction with a vehicle. This typically requires a wheel encoder to be attached to a wheel on the
survey vehicle itself, for trig and distance measuring purposes.
Calibration of a wheel is done by entering the calibration distance, hitting the <START CALIBRATION>
button and then moving over that distance. Press the <Stop button> once the calibration distance has
been reached. This measures the number of tics/m that the wheel produces and saves this as a


