5 - 8
99906549 rev 00 (JANUARY-2020)
SECTION 5: MAINTENANCE
IOWA MOLD TOOLING CO., INC.
(641) 923-3711
CAS40PL, CAS40PL-CW, CAS40PLE, CAS40PLE-CW
NOTE
Wipe o
ff
any soil or debris from the
fi
lter cover
and housing base before accessing the air
fi
lter
element.
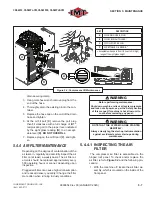
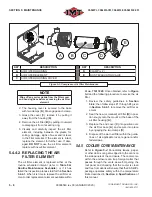
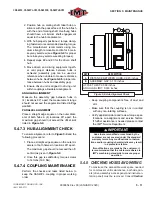
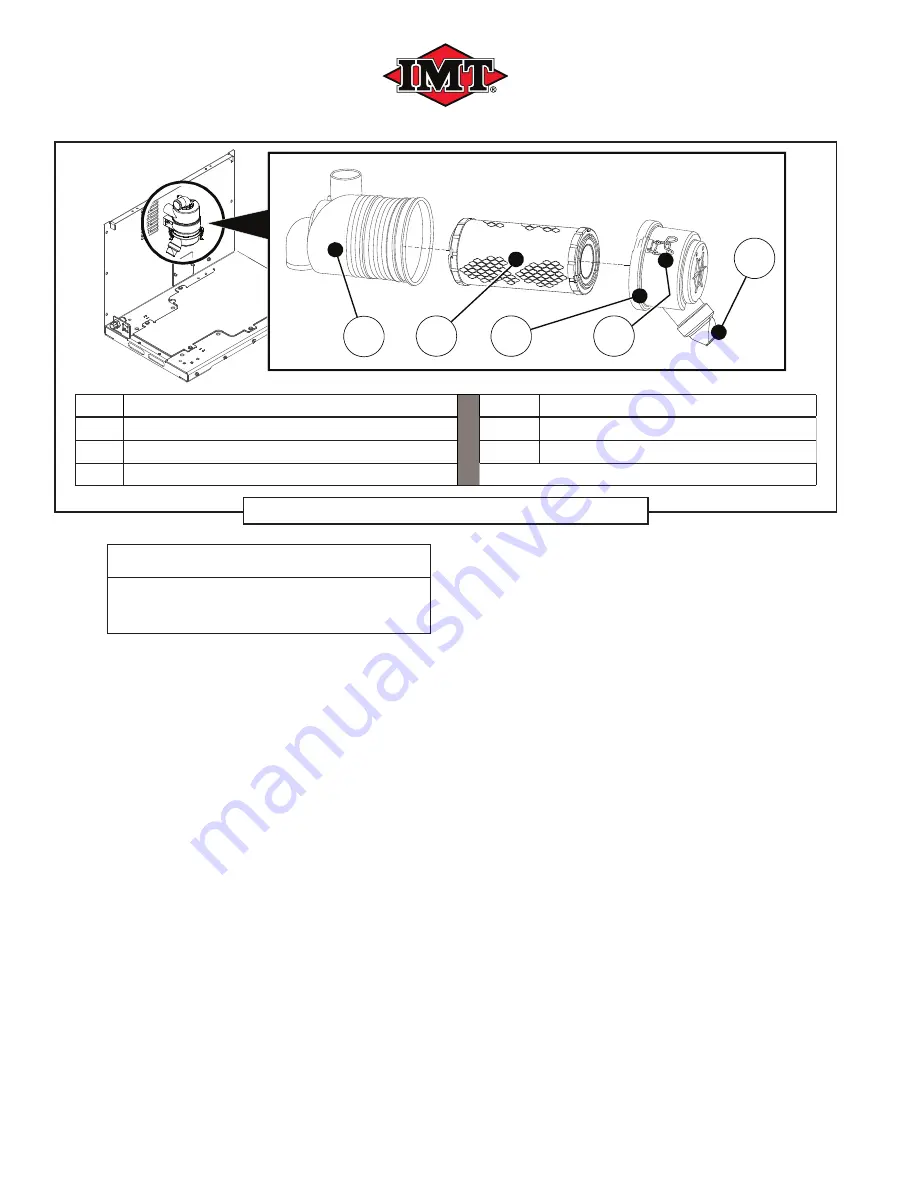
2. The housing cover is secured to the base
with two clamps [
D
]. Dis-engage each clamp.
3. Grasp the cover [
C
]; remove it by pulling it
away from the housing [
A
].
4. Remove the air
fi
lter [
B
] by pulling it outward
to disegage it from its seating ring.
5. Visually and carefully inspect the air
fi
lter
element, including between the pleats, for
soiling, damage, signs of wear and/or tears
in the
fi
lter material. If the element is intact,
replace the element for further use. If dam-
aged,
DO NOT
reuse the air
fi
lter element;
replace with new
fi
lter element.
5.4.4.2 REPLACING THE AIR
FILTER ELEMENT
The air
fi
lter element is replaced either at the
routine scheduled interval (refer to
Table 5A:
Routine Maintenance Scehdule
), or if it has
failed the inspection process laid forth in
Section
5.4.4.1
. When it is time to replace the air
fi
lter el-
ment, order replacement element available within
kit
no. 71417220
. Once obtained, refer to
Figure
5-3
and the following procedure to service the air
fi
lter.
1. Review the safety guidelines in
Section
5.4.4
; then follow steps #1 through #4 given
in
Section 5.4.4.1
, to remove the air
fi
lter el-
ement.
2. Seat the new (or cleaned) air
fi
lter [
B
] in posi-
tion snugly onto the mount at the base of the
air
fi
lter housing [
A
].
3. Replace the end cover [
C
] into position over
the air
fi
lter base [
A
], and secure into place
by engaging the two clamps [
D
].
4. Dispose of the worn air
fi
lter within the guide-
lines of all applicable local, regional and/or
federal laws.
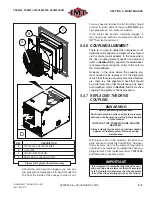
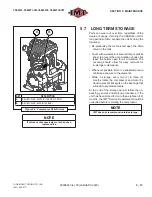
5.4.5 COOLER CORE MAINTENANCE
Refer to
Figure 5-4
. Periodically leaves, paper,
or other debris can get wedged into the vents on
the side panels of the enclosure. The cooler core
within the enclosure can trap foreign matter that
passes through the vents as well. Opening the
roof panel and checking that the cooler is clean
and free from debris will ensure that the CAS40PL
package operates safely within the temperature
limits described in
Section 2, Speci
fi
cations
of
this manual.
A
B
C
D
E
KEY
DESCRIPTION
KEY
DESCRIPTION
A
AIR FILTER HOUSING
D
CLAMP (x 2)
B
AIR FILTER ELEMENT
E
DUST EVACUATOR VALVE
C
AIR FILTER HOUSING COVER
Figure 5-3: Compressor Air Filter Maintenance
Summary of Contents for CAS40PL
Page 2: ...BLANK PAGE...
Page 81: ...BLANK PAGE...


