7
- Cuando la pintura se ablande, raspe la pintura con un raspador de mano.
No decapar los marcos metálicos de la ventana, ya que el calor puede ser conducido sobre el vidrio y
agrietarlo. Cuando se decapen otros marcos de ventana, utilice la boquilla protectora de vidrio.
No mantenga la herramienta dirigida en un lugar demasiado tiempo para evitar que se dañe la superficie.
Evite recolectar pintura en el accesorio rascador, ya que puede encenderse. Si es necesario, quite
cuidadosamente los desechos de pintura del accesorio rascador con un cuchillo.
Uso estacionario
Esta herramienta también se puede utilizar en modo estacionario.
- Coloque la herramienta sobre el Banco de trabajo.
- Asegure el cable para evitar que tire de la herramienta del Banco de trabajo.
- Encienda la herramienta con cuidado.
Asegúrese de que la boquilla siempre apunte lejos de usted y de cualquier persona.
Asegúrese de no dejar caer nada en la boquilla.
Enfriamiento
La boquilla y el accesorio se calienta mucho durante el uso. Déjelos enfriar antes de intentar mover o almacenar la
herramienta.
- Para reducir el tiempo de enfriamiento, coloque el interruptor de encendido/apagado en la posición I. y déjelo
funcionar durante unos minutos.
- Apague la herramienta y deje que se enfríe durante al menos 30 minutos.
GB – Instructions for use
•
Always observe the safety instructions and applicable regulations.
•
Use only one hand to hold the tool, do not place your other hand over the air vents
•
Prior to operation :
o
Mount the correct accessory for the application.
o
Set the desired air temperature.
1-Turn on and turn off
- To switch the tool on, set the on/off switch to position I / II. Some smoke may be emitted after switching on;
this does not indicate a problem.
- To switch the tool off, adjust the lowest temperature to cool off, then set the on/off switch to position 0. Let the
tool cool down before moving or storing it.
2-Temperature adjustment
-Turn ON/OFF Switch to I or II, and the heat gun will start to buzz.
-Turn ON/OFF Switch to II.
- Increase or decrease the output temperature by clicking the Buttons
,
.
-Temperature adjusts at scale of 10
℃
.
- The Flasher 4.2 will keep flashing before output temperature reaches the setting temperature.
- Adjust air flow by clicking the Buttons
,
.
-Turn ON/OFF Switch to I, the temperature is fixed at 50
℃
for cooling down.
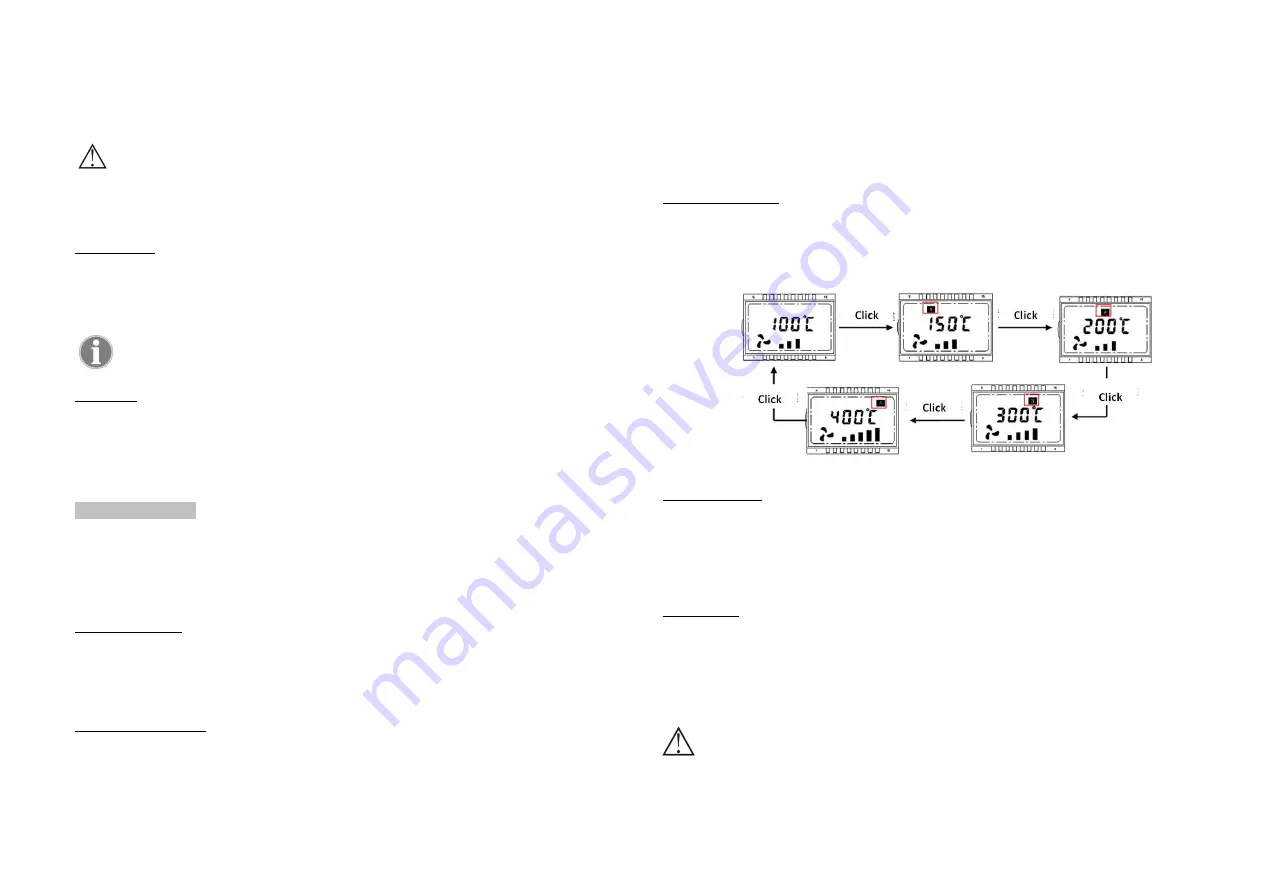
3-Preset mode selection
- 4 preset modes are available for quick slection of temperature and airflow setting for most frequent and defined
applications.
- Turn on the tool. Click the button the Mode Selection Button
to select one desired mode of preset
temperature and air flow.
4-Preset mode input
-Select one preset mode according (see 3)
-Set desired temperature and airflow by clicking buttons
,
,
,
(see 2). During the process, the symbol of
Preset Input (4.1) keeps flashing.
-Then keep the Storage Button
pressed for 2 seconds until the the symbol of Preset Input (4.1) disappear. The
new temperature and airflow setting is stored into the preset mode for quick selction.
5-Paint stripper
- Apply an appropriate accessory.
- Set a high temperature.
- Turn on the tool.
- Direct the hot air to the paint to be removed.
- When the ink softens, scrape the ink with a hand scraper
Do not remove the metal structures from the windows as heat can be drawn into the glass and
broken. When removing other structures from the window, use the glass protection nozzle.
Do not keep the tool in place for a long time to prevent the surface from being ignited.
Avoid picking up paint on the scraper attachment as it may combust. If necessary, gently remove ink residue

