background image


MAINTENANCE 

Cleaning Tank and Spray Gun 

When spraying is finished rinse the tank with clean water and pump the contents out 
through the spray gun. A triple rinse is recommended. The tank may also be drained 
by removing the drain plug at the lid end. 
 

Filter Maintenance 

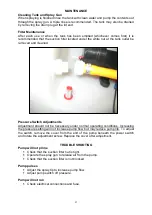
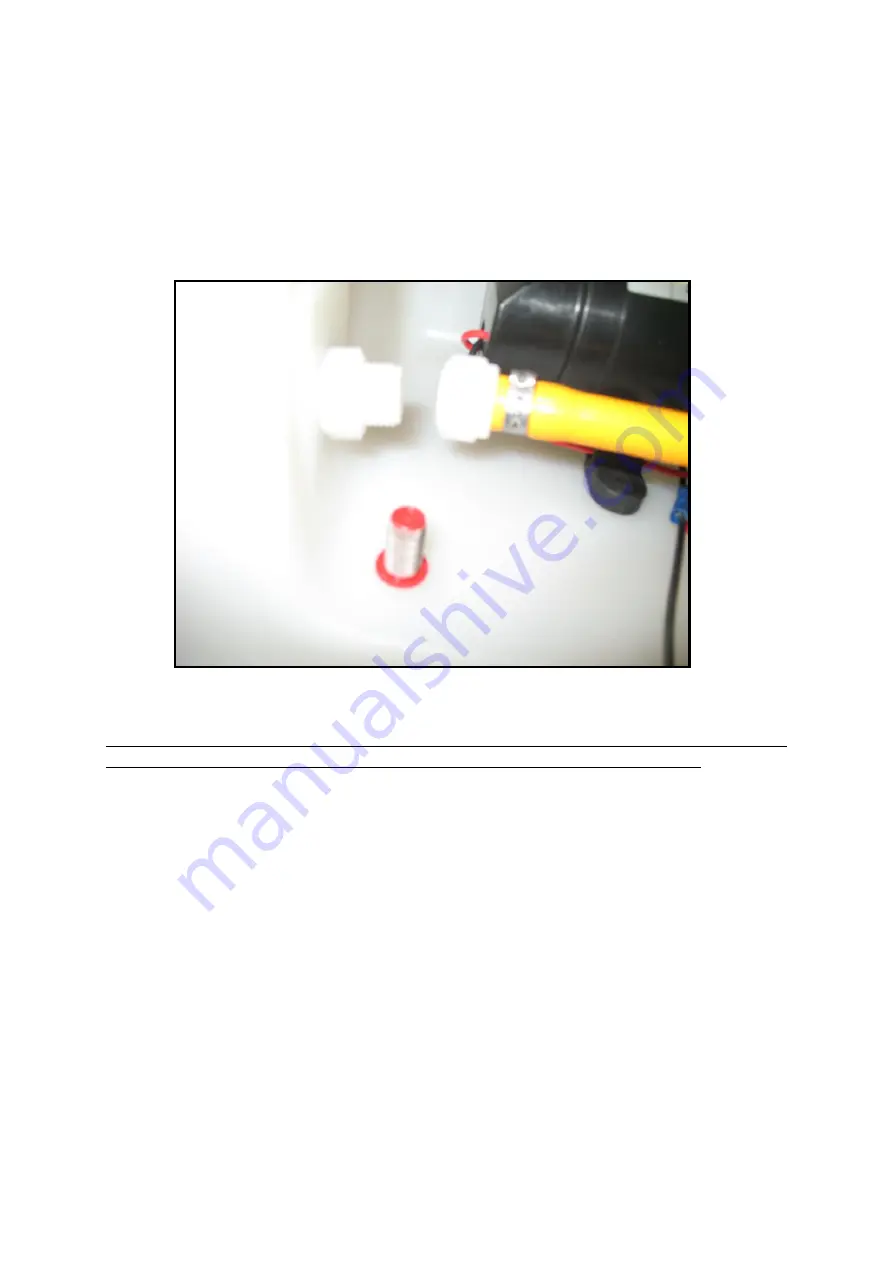
After  each  use  or  when  the  tank  has  been  emptied  (whichever  comes  first)  it  is 
recommended that the suction filter located under the white nut at the tank outlet be 
removed and cleaned. 


Pressure Switch Adjustments 

Adjustment  should  not  be  necessary  under  normal  operating  conditions.  Increasing 
the pressure setting will not increase pump flow but may reduce pump life. To adjust 
the  switch,  remove  the  cover  from  the  end  of  the  pump  beneath  the  power  switch 
and rotate the adjustment screw. Replace the cover after adjustment.    


TROUBLE SHOOTING 

Pump will not prime 

  Check that the suction filter nut is tight. 

  Operate the spray gun to release air from the pump. 

  Check that the suction filter is not blocked. 

 
Pump pulses 

  Adjust the spray tip to increase pump flow.  

  Adjust pump switch off pressure. 

 
Pump will not run 

  Check electrical connections and fuse. 

Summary of Contents for SPRAYER 50

Page 1: ...x warrants to the original purchaser that the equipment is sold free from defects in materials and workmanship for a period of 12 months from date of first retail sale 6 months from date of first retail sale if the equipment is sold in the U K subject to the terms set out below 1 4 C Dax will at its option repair or replace the defective equipment or part of the equipment or notify the retailer of...

Page 2: ...ireage or the damage arises from fair wear and tear battery damage or chemical attack ii has been built to a customer s specifications or iii has been dismantled repaired or serviced other than by an authorised service agent of C Dax d for loss or damage caused by any factors beyond C Dax s control or e for any loss of profit or revenue or for any special indirect incidental or consequential damag...

Page 3: ...strap is then run under the carrier frame and connected with the ratchet so that the ratchet is on top of the tank Pull the strap tight and apply tension using the ratchet Connect the cable assembly to the male connector on the pump then attach to the vehicle battery ensuring that the red wire is connected to the positive terminal OPERATING INSTRUCTIONS Place fluid in the tank then turn the switch...

Page 4: ...ressure Switch Adjustments Adjustment should not be necessary under normal operating conditions Increasing the pressure setting will not increase pump flow but may reduce pump life To adjust the switch remove the cover from the end of the pump beneath the power switch and rotate the adjustment screw Replace the cover after adjustment TROUBLE SHOOTING Pump will not prime Check that the suction filt...

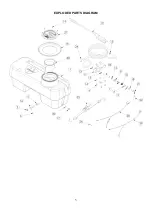
Page 5: ...5 EXPLODED PARTS DIAGRAM ...

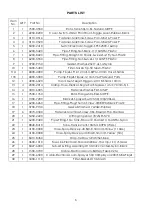
Page 6: ...14 Clamp Hose Oetiker Single Ear Stepless 14 5 7 0mm S S 14 4 3310 6005 Fastener Washer Flat M5 ZP 15 1 7500 1760 Rota Flange 50L Red MDPE 16 1 1300 7200 Bracket Sprayer Switch 50 100 200L AL 17 1 6200 6260 Pipe Fitting Plug Thumb Screw 3 8BSPM Black Plastic 18 1 3700 9130 Gasket Washer 17x23x2 Rubber 19 6 3070 0300 Fastener Machine Screw CSK 8Gx3 4 Pozi Stainless 20 1 5450 2220 O Ring Imperial 1 ...

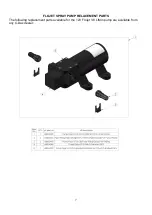
Page 7: ...7 FLOJET SPRAY PUMP RELACEMENT PARTS The following replacement parts available for the 12V Flojet 3 8 L Min pump are available from any C Dax dealer ...

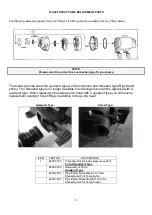
Page 8: ... longer available for ordering and should be replaced with a quadport type When replacing a threaded pump head with a quadport type you will require replacement quadport hose fittings in addition to the pump head Quadport Type Screw Type ITEM PART NO DESCRIPTION 1 6800 5160 Pumphead Kit includes pressure switch To Suit Quadport Type 6800 5000 Replacement Pump Quadport Type 6200 2980 Pipe Fitting F...

Reviews: