30
Testing the RS232 Port
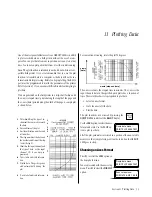
A special RS232 port test feature is available in the dump data menu
that will allow you to test your port configurations without having to
collect and dump data.
Access the dump data menu by pressing the
DUMP DATA
key while at the
READY
display.
Press
F4
to select the
TEST
option
from the menu.
Make certain that all cables are con-
nected and that the printer or com-
puter is switched on. Press
ENTER
to
start the test.
The HERMIT 2000 will prompt you
to double check the connections if it
does not detect that a device is con-
nected to the RS232 port. You will also get this message if the print
device is not turned on.
Dump data menu:
PRINT PLOT AXES TEST
DUMP
DATA
Press ENTER to start
Press ENTER to start
Not connected?
Dump data menu:
PRINT PLOT AXES TEST
OUTPUT TEST LINE
OUTPUT TEST LINE
OUTPUT TEST LINE
OUTPUT TEST LINE
OUTPUT TEST LINE
Press CLEAR to abort
This section will describe the procedures necessary to generate tabu-
lar printouts of test data on a field printer. These same procedures
can be used to transfer test data to a personal or portable computer.
You can print data from any test at any time. You can even print the
partial data from a test that is still running.
Note
: Before you can begin to print data, the RS232 port must be
programmed to match the parameters of the printer or computer.
Refer to Section 9 if you encounter difficulties while attempting to
print data.
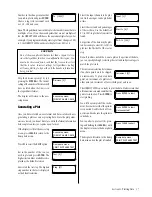
While at the
READY
display, press the
DUMP DATA
key to access the dump data menu.
The dump data menu contains op-
tions for printing and plotting data.
Plotting data will be discussed in Sec-
tion 11.
Press
F1
to select the PRINT option.
Key in the number of the test you
wish to print and press
ENTER
. The
highest test number available is displayed as the default selection.
Several single-spaced test lines will be
output to the print device. If the lines
are not single-spaced or appear garbled
in any way, check the RS232 param-
eter settings of the HERMIT 2000 and
the print device.
Press and hold the
CLEAR
key to
abort the test output early.
The display will return to the dump
data menu when the test is complete.
10 Printing Data
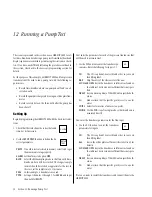
Next select the test step. The highest
step number in the test is displayed
as the default selection.
You are then prompted for the num-
ber of the input channel you wish to
have printed in the first column. In-
put channel 1 is the default.
Next key in the number of columns
of input channel data you wish to
print.
The default is the maximum number of columns available based
on the number of input channels used in the test and the print width
available (see p. 29). If you wish to print the data for a single input
channel, key in a column value of 1.
Select the start and end percentages
of the test data. Use the defaults of
0% to 100% to print data from start
to finish.
Dump data menu:
PRINT PLOT AXES TEST
DUMP
DATA
Test [0]?
_
Step [0]?
_
Start at input# [1]?
_
Columns [4]?
_
Start % [0]?
_
End % [100]?
_
Section 10: Printing Data


