background image

26

Other convenient functions

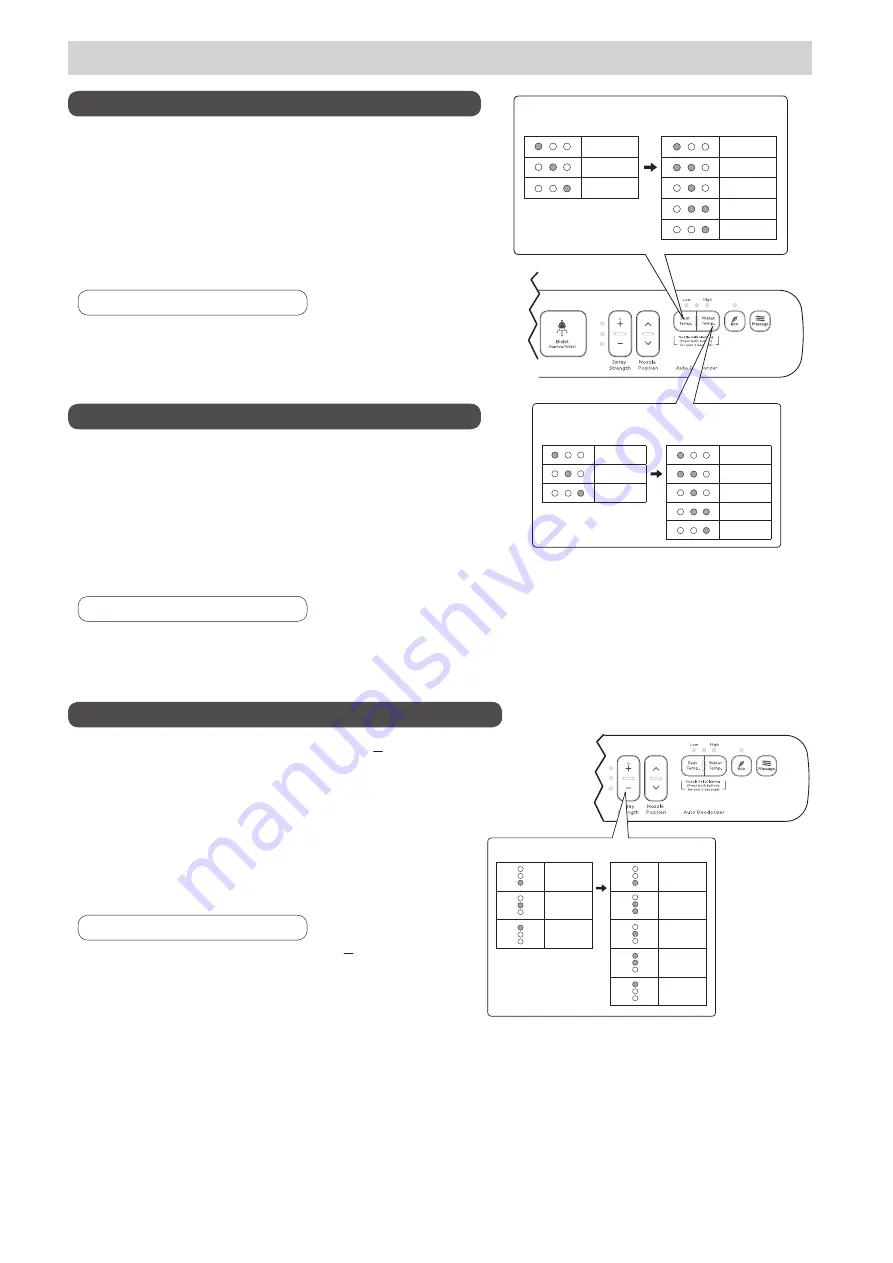
Press Seat Temp. and Nozzle position UP (arrow up) for 

2 seconds to expand the seat temperature adjustments 

from 3 to 5 modes.

Press Water Temp. and Nozzle position DOWN (arrow down) 

for 2 seconds to expand the water temperature adjustments 

from 3 to 5 modes.

 Resume initial setting

 Resume initial setting

 Resume initial setting

•  After setting, all indicators will flash once.
•  The Low and Mid indicator will both light up when seat 

temperature is in the middle of Low and Mid. 

  Mid and High indicator will both light up when seat 

temperature is in the middle of Mid and High temperature.

•  After setting, all indicators will flash once.
•  The Low and Mid indicator will both light up when water 

temperature is in the middle of Low and Mid. 

  Mid and High indicator will both light up when water 

temperature is in the middle of Mid and High temperature.

Press Seat Temp and Nozzle Position UP for 2 seconds. 
•  After setting, all indicators will flash once.

Press Water Temp. and Nozzle Position DOWN for 2 seconds. 
•  After setting, all indicators will flash once.

Press Water Temp. and Spray Strength

 "  " for 2 seconds. 

•  After setting, all indicators will flash once.

Seat Temp. expand from 3 to 5 modes

Water Temp. expand from 3 to 5 modes

Press Water Temp. and Spray Strength "  " 

for 2 seconds to expand the spray strength 

adjustments from 3 to 5 modes.

•  After setting, all indicators will flash once.
•  The Low and Mid indicator will both light up when spray 

strength is in the middle of Low and Mid flow. 

  Mid and High indicator will both light up when spray 

strength is in the middle of Mid and High flow.

Spray Strength expand from 3 to 5 modes

* The seat heater automatically turns ON when you stand up.

Press the buttons simultaneously for 2 seconds.

3 modes

Indicator

Spray Strength

Indicator

Spray Strength

5 modes

Low

Mid

High

Low

Mid

High

Low mid

Mid high

5 modes

Indicator

Seat temp.

Indicator

Seat temp.

Low

Low

Mid

Low mid

High

Mid

Mid high

High

3 modes

5 modes

3 modes

Indicator

Warm Water temp.

Indicator

Warm Water temp.

Low

Mid

High

Low

Mid

High

Low mid

Mid high

(For side panel version of bidet seat only)

Summary of Contents for SpaLet Series

Page 1: ...ccidents in some circumstances Each of these items are extremely important for safety and should be strictly observed In the event that an accident occurs as a result of improper usage INAX will assum...

Page 2: ...Ground Fault Circuit Breaker 7 Power Supply 7 Grounding 7 Installation Location 7 Water Supply 7 Checking the Bathroom 7 Measure the size of the Toilet 8 Conditions for using Water Supply Hose 8 Illu...

Page 3: ...e to set the seat temperature to Off when they are using this product Children elderly persons persons with illness persons with limited mobility persons with sensitive skin persons who are taking med...

Page 4: ...plastic parts our company recommends the use of a mild liquid or an all purpose cleaner Avoid using abrasive products such as powdered cleansers and chlorine based products such as bleach as these pr...

Page 5: ...user s manual This product incorporates the following features rear cleansing with water flow strength controls front cleansing with water flow strength controls seat heater with heat level control r...

Page 6: ...and bushings 2 pieces each Seat unit water supply hose with 1 clip and 1 washer FOR REMOTE VERSION ONLY Remote control Bracket Batteries Wood screw Plastic anchors 3 Installing This Product Installati...

Page 7: ...properly installed and grounded DANGER Improper use of the grounding plug can result in a risk of electric shock If repair or replacement of the cord or plug is necessary do not connect the grounding...

Page 8: ...supply hose included The length of the water supply hose included with this product is 37 3 8 950 mm but a length of 31 1 2 800 mm from the junction fitting to the seat unit s water supply socket is a...

Page 9: ...t in Seat Nozzle Shutter Nozzle feminine cleansing Nozzle posterior cleansing Toilet Tank Control Panel Water Valve Water Hose with T Junction Overview Strainer Strainer The strainer removes impuritie...

Page 10: ...e for Posterior Cleansing BIDET Use for Feminine Cleansing SPRAY STRENGTH Adjusts Feminine and Posterior spray strength NOZZLE POSITION There are 5 modes for nozzle position adjustment STOP Stops clea...

Page 11: ...he tank inlet side and remove it 4 Place the packing in the junction fitting box nut and connect the tank inlet to the junction fitting 5 Insert the packing in the tank water supply hose box nut and c...

Page 12: ...The attachment clip can be attached in any direction CAUTION Firmly insert the clip If the clip is not firmly inserted it may cause water leaks 4 Bend the clip end and firmly clip together both the f...

Page 13: ...use the mounting bolts to attach the slide plate to the seat 2 Install the slide plate onto the seat 1 Place the bidet on the toilet and align the seat to the mounting plate 2 Slightly raise the fron...

Page 14: ...on the wall in the location you chose for the remote control unit Mark the location of the mounting holes on the wall Fasten the bracket to the wall drilling holes and using the fasteners appropriate...

Page 15: ...urn at first then gradually get easier to turn and then are hard to turn again If mounted in concrete 1 Drill holes with a diameter of 0 24 in 6 mm and a depth of approximately 1 30 in 33 mm 2 Using a...

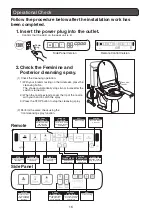
Page 16: ...e cleansing spray 2 Perform the same check using the front cleansing spray function Power plug POWER Controls power to the seat and stops cleansing functions ECO Power saving MASSAGE Massage cleaning...

Page 17: ...se the Convenient Functions 24 Maintaining This Product 28 Cleaning the Seat Unit 28 Cleaning the Nozzles 28 Changing the Nozzle Tip 28 Cleaning Maintenance of the Deodorizing Screen 29 Cleaning the I...

Page 18: ...perature range is preset to the following temperatures Low Approx 90 F 32 C Medium Approx 93 F 34 C High Approx 97 F 36 C It takes approximately 10 minutes to heat cold water at about 41 F 5 C to the...

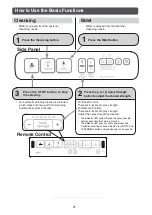
Page 19: ...ngth for cleansing and bidet settings NOZZLE POSITION Nozzle position adjustment for optimal cleansing SEAT TEMPERATURE Adjust warm seat temperature WATER TEMPERATURE Adjust warm water temperature BID...

Page 20: ...vel 2 additional settings above default for side panel only For Side Panel The seat temperature can be set to one of 3 default settings HI MID and LO For Remote Control The seat temperature can be set...

Page 21: ...rength button to adjust the shower strength 2 For Panel Control There are 3 levels of spray strength For Remote Controlt There are 6 levels of spray strength Adjust the spray strength as desired The i...

Page 22: ...el Remote Control Water pressure alternates between high and low during rear cleansing providing a massaging effect Press the Massage button during posterior cleansing 1 To stop the massage spray pres...

Page 23: ...disable the deodorizer Press the STOP and Bidet buttons simultaneously for 2 seconds When the deodorizer feature is disabled the power LED on the seat unit flashes momentarily At this point the deodor...

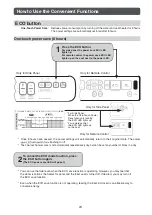
Page 24: ...he water is cold as the heater for water and the toilet seat is turned off If desired you may turn off the ECO save function Even when the ECO save function is not operating leaving the toilet lid clo...

Page 25: ...hs once activated When the product is not in use it lowers the temperature of warm water and seat to control power consumption until the product is put back into use Press Water Temp and Power Saving...

Page 26: ...ill flash once Press Water Temp and Nozzle Position DOWN for 2 seconds After setting all indicators will flash once Press Water Temp and Spray Strength for 2 seconds After setting all indicators will...

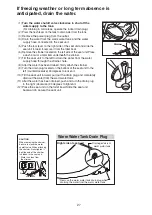
Page 27: ...he strainer 9 Turn the drain plug located on the bottom of the seat unit to the left counterclockwise 90 degrees to loosen it 10 Tilt the seat unit forward pull out the drain plug and completely drain...

Page 28: ...onge to clean any accumulated debris Cleaning the Seat Unit Cleaning the Nozzles Periodically wipe off the seat unit with a soft cloth dampened with water a Ensure bidet is powered ON b For side panel...

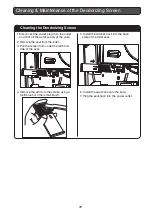
Page 29: ...om the toilet 3 Pull the screen from under the left hand side of the seat 4 Remove the dirt from the screen using a toothbrush or other small brush 5 Install the strainer back into the base plate of t...

Page 30: ...the strainer is removed a small amount of water will pour out Place a wash bowl or similar container underneath to catch the water 4 Install the strainer tightening it fully with a screwdriver or simi...

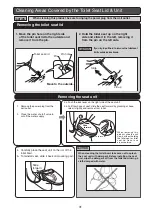
Page 31: ...ve to cut off the water supply Removing the seat unit When removing this product slide the unit slowly without holding the toilet seat or toilet seat lid Do not use excessive force 3a Push the lock le...

Page 32: ...used in testing of product and may not have the normal lifecycle Cautions The and of the battery shall comply with the marks on the remote control Do not mix the new battery with the used ones Use al...

Page 33: ...r plug is not plugged into the wall outlet Plug the power plug into the wall outlet Cause Remedy Symptom Posterior cleansing and Feminine cleansing Water does not spray out The water shutoff valve is...

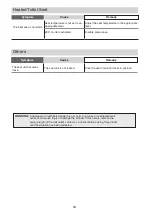
Page 34: ...Symptom Others WARNING A damaged or overheated power plug or cord or a loose or overheated wall outlet could cause injury or damage the product If this occurs remove the power plug from the wall outle...

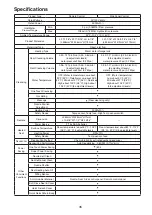
Page 35: ...C Mid about 97 F 36 C Relatively High about 100 F 38 C High about 104 F 40 C 5 adjustment levels OFF Water temperature Low about 90 F 32 C Mid about 97 F 36 C High about 104 F 40 C 3 5 adjustment lev...

Page 36: ...id if the product has been moved from its initial place of installation if it has been subjected to faulty maintenance abuse misuse accident or other damages if it was not installed in accordance with...

Page 37: ...ntos es de suma importancia para la seguridad y debe cumplirse estrictamente En caso en que ocurriera un accidente como resultado de uso inapropiado INAX no asumir ninguna responsabilidad por los da o...

Reviews: