background image


10 


9.


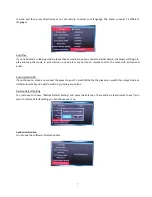
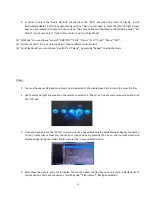
In  order  to  select  the  “Audio  Options”  please  press  the  “OSD”  key  when  the  music  is  playing,  it  will 
immediately display a list of all audio setting options. Then you just need to press the left and right arrows 
keys on your remote to choose the option need. The audio options will be listed in the following order: “EQ 
Mode”, “Lyric Focus Color”, “Lyric Unfocus Color” and “Lyric Play Mode” 

 
(1) “EQ Mode” You can choose “normal” “DBB “POP” “Rock” “Classic” “Jazz” “Vocal” “Dance” “Soft” ; 
(2) “Lyric Focus Color” & “Lyric Unfocus Color”, choose different color for lyric.   
(3) “Lyric Play Mode”, you can choose “Line Roll” or “Kalaok”; by pressing “Repeat” to loop the music   


Photo   


1.


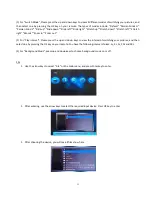
You must have your USB device or Smart card connected to the media player first in order to access the files. 


2.


Use the left and right arrow keys on the remote to select the “Photo” icon on the main menu screen and click 
the “OK” key. 


3.


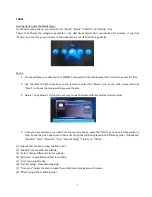
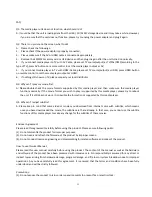
Once you have entered the “Photo” icon you will see a page displaying the available input devices connected 
to  your  media  player.  Next  you  choose  your  input  device  by  pressing  OK  key  on  your  remote  which  will 
display a page listing the folders and/or picture files in your selected device.   


4.


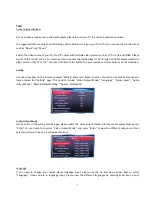
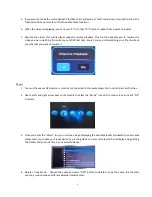
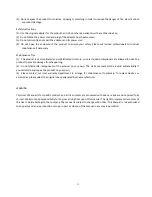
After chose the picture, press OK to display. You can then press the OSD key on your remote to display a list of 
picture options. You have the options: “Switch Mode” “Play Interval” “Background Music”. 

Summary of Contents for IMP150

Page 1: ...fications 3 Remote control guide 4 Connection ports 5 TWO Activating media player 6 Setting 6 Video Output Mode 6 Language 6 Auto Play 7 Restore Default Setting 7 System information 7 THREE Getting started with the Media Player 8 Movie 8 Music 9 Photo 10 File 11 FOUR FAQ 12 ...

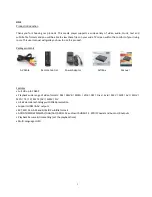
Page 2: ... this product Package contents AV Cable Remote Control Power Adaptor Gift Box Manual Features Full HD up to 1080P Playback wide range of video formats RM RMVB MPEG VOB DAT Divx Xvid MKV MP4 AVI MOV MPG TS TP M2TS AVI WMV FLV H 264 decode technology with 1080p resolution Supports HDMI AV outputs SRT SMI SSA ASS and SUB IDX subtitle formats AC3 DTS MP3 WMA WAV OGG AAC APE FLAC audio with HDMI 1 3 SP...

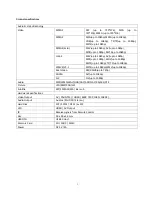
Page 3: ...to 1080p M2TS up to 1080p TS TP up to 1080p WMV9 VC 1 M2TS up to 1080p WMV up to 1080p Real Video RM RMVB up to 720p MJPEG AVI up to 1080p FLV FLV up to 1080p Audio MP3 WMA WAV OGG AAC APE FLAC RA AC3 DTS Picture JPG BMP PNG GIF Subtitle SRT SMI ASS SSA idx sub Hardware Specifications Video Output AV PAL NTSC HDMI 480P 720P 1080i 1080P Audio Output Audio L R HDMI Stereo Hard Disk FAT FAT32 NTFS ex...

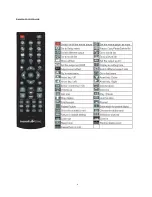
Page 4: ...4 Remote Control Guide ...

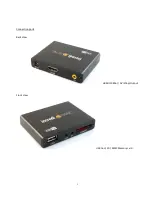
Page 5: ...5 Connection ports Back View HDMI 1080p AV 576p Output Front View USB host SD MMC Memory card ...

Page 6: ... on the television Setting Use the arrow keys on the remote to select Setting and press Enter to enter You will see a list of items once you have entered the Setting page The options include Video Output Mode Language Screen Saver Audio Output Mode Restore Default Setting System Information Video Output Mode Once you are in the setting options page please switch the video output standard for the m...

Page 7: ...button on remote control the same with picture and audio Auto Detect HDMI If you choose on when you connect the player to your TV via HDMI Cable the player can switch the output mode as HDMI automatically no need to switch by pressing any button Restore Default Setting You just need to choose Restore Default Setting and press the Enter key There will be a text prompt to ask if you want to restore ...

Page 8: ... choose the movie which you want to play 3 Delete Copy Movie This function can copy movies between different external memory disks 4 Once you have selected your video from the memory device press the OSD key on your remote control in order to see the video options and then a list of options will be displayed in the following order Subenable Subtitle Color Rimcolor Size Text Encoding Time Sync Offs...

Page 9: ...ether you want to resume it Music 1 You must have your USB device or smart card connected to the media player first in order to access the files 2 Use the left and right arrow keys on the remote to select the Music icon on the main screen and click OK to access 3 Once you enter the Music icon you will see a page displaying the available inputs connected to your media player Next you choose your in...

Page 10: ...oll or Kalaok by pressing Repeat to loop the music Photo 1 You must have your USB device or Smart card connected to the media player first in order to access the files 2 Use the left and right arrow keys on the remote to select the Photo icon on the main menu screen and click the OK key 3 Once you have entered the Photo icon you will see a page displaying the available input devices connected to y...

Page 11: ... out 2 For Play Interval Please press the up and down keys to view the interval of switching your pictures and then select one by pressing the OK key on your remote You have the following interval choices 1s 3s 5s 10s and 30s 3 For Background Music press up and down keys to choose background music on or off File 1 Use the arrow keys to select File on the main menu and press Enter key to enter 2 Af...

Page 12: ...this media player please try to reboot the unit If it still does not work It is possible the format is not supported by this media player Q4 Why can t I adjust subtitle A Please keep in mind that some video or movies you download from internet come with subtitles which means once you have downloaded the movie the subtitles are there already In that case you cannot use the subtitle functions of thi...

Page 13: ... the product to prevent damage from happening 2 Do not dismantle components of the product on your own The warranty mark will be invalid automatically if you dismantle and repair the product on your own 3 Please contact our local warranty department to arrange for maintenance if necessary To replace devices or accessories please select the original ones designated by the manufacturer WARNING This ...

Reviews: