22
GB
Installation
!
Before placing your new appliance into operation please read
these operating instructions carefully. They contain important
information for safe use, for installation and for care of the
appliance.
!
Please keep these operating instructions for future reference.
Pass them on to possible new owners of the appliance.
Positioning and connection
Positioning
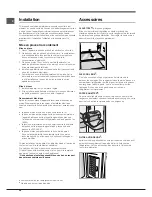
1. Place the appliance in a well-ventilated humidity-free room.
2. Do not obstruct the rear fan grills. The compressor and
condenser give off heat and require good ventilation to
operate correctly and save energy.
3. Leave a space of at least 10 cm between the top part of the
appliance and any furniture above it, and at least 5 cm
between the sides and any furniture/side walls.
4. Ensure the appliance is away from any sources of heat (direct
sunlight, electric stove, etc.).
5. In order to maintain the correct distance between the
appliance and the wall behind it, fit the spacers supplied in
the installation kit, following the instructions provided.
Levelling
1. Install the appliance on a level and rigid floor.
2. If the floor is not perfectly horizontal, adjust the refrigerator by
tightening or loosening the front feet.
Electrical connections
After the appliance has been transported, carefully place it
vertically and wait at least 3 hours before connecting it to the
electricity mains. Before inserting the plug into the electrical
socket ensure the following:
• The appliance is earthed and the plug is compliant with the law.
• The socket can withstand the maximum power of the
appliance, which is indicated on the data plate located on the
bottom left side of the fridge (e.g. 150 W).
• The voltage must be in the range between the values
indicated on the data plate located on the bottom left side
(e.g. 220-240V).
• The socket is compatible with the plug of the appliance. If the
socket is incompatible with the plug, ask an authorised
technician to replace it (
see Assistance
). Do not use
extension cords or multiple sockets.
!
Once the appliance has been installed, the power supply cable
and the electrical socket must be easily accessible.
!
The cable must not be bent or compressed.
!
The cable must be checked regularly and replaced by
authorised technicians only (see Assistance).
!
The manufacturer declines any liability should these safety
The manufacturer declines any liability should these safety
The manufacturer declines any liability should these safety
The manufacturer declines any liability should these safety
The manufacturer declines any liability should these safety
measures not be observed.
measures not be observed.
measures not be observed.
measures not be observed.
measures not be observed.
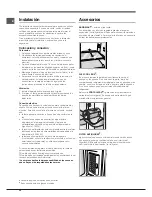
Accessories
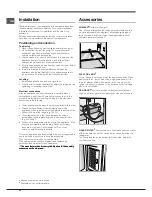
SHELVES
•
:
with or without grill.
Due to the special guides the shelves are removable and the
height is adjustable (
see diagram
), allowing easy storage of
large containers and food. Height can be adjusted without
complete removal of the shelf.
FLEX COOL BOX
*
This is the new box to keep meat, fish and cheese fresh.
When
positioned in the “lower” part of the fridge compartment, it is
ideal for meat and fish; when moved to the “top” part of the
fridge, it is perfect for cheese.
It can be taken out of the fridge
when it is not needed.
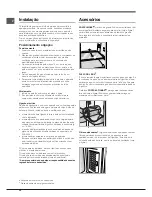
CAN RACK
•
shelf: stores cans horizontally (
see diagram
).
Yoghurt, butter or general containers may also be stored here.
ODOUR FILTER
*
: Some models are fitted with a new odour filter
with active carbons, which ensures better air quality inside the
refrigerator.
The filter is located on the bottom right-hand side, inside the
ventilation opening.
• Varies by number and/or position.
*
Available only on certain models.
Summary of Contents for 3DA Series
Page 10: ...10 1 2 3 4 5 6 7 271eps...
Page 15: ...15 2 9 8 1 3 4 6 7 11 5 10 646eps...
Page 38: ...38 GR 1 2 3 10 cm 5 cm 4 5 1 2 3 150 W 220 240 V FLEX COOL BOX...
Page 40: ...40 GR holiday 15 C 1 HOLIDAY 6 8 A B 10 W 73 23 CEE 19 02 73 89 336 CEE 03 05 89 2002 96 CE H...
Page 41: ...GR 41 2002 96 EK a a b b c c b c 0 C SUPER FREEZE SUPER FREEZE...
Page 42: ...42 PL...
Page 43: ...PL 43...
Page 44: ...44 PL...
Page 45: ...PL 45...
Page 46: ...46 RO...
Page 47: ...RO 47...
Page 48: ...48 RO...
Page 49: ...RO 49...
Page 50: ...50 RU...
Page 51: ...RU 51...
Page 52: ...52 RU...
Page 53: ...RU 53...
Page 54: ...54 RU...
Page 59: ...TR 59...
Page 60: ...60 TR 195076354 02 12 2010...

