background image

GB

23

Start-up and use

Starting the appliance

! Before starting the appliance, follow the installation
instructions (

see Installation

).

!

 Before connecting the appliance, clean the compartments and

accessories well with lukewarm water and bicarbonate.

!

 The appliance comes with a motor protection control system

which makes the compressor start approximately 8 minutes after
being switched on. The compressor also starts each time the
power supply is cut off whether voluntarily or involuntarily
(blackout).

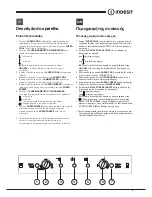
1. Set the FREEZER OPERATION knob on  .
2. Insert the plug into the socket and ensure that the green

POWER indicator light illuminates.

3. Turn the FREEZER OPERATION knob to an average value and

press the SUPER FREEZE button (rapid freezing): the SUPER
FREEZE indicator light will illuminate. Once the refrigerator
has reached the optimal temperature, the indicator light goes
out and you can begin food storage.

4. Turn the REFRIGERATOR OPERATION knob to an average

value. After a few hours you will be able to put food in the
refrigerator.

Chiller system

No Frost

The No Frost system circulates cold air continuously to collect
humidity and prevent ice and frost formation. The system
maintains an optimal humidity level in the compartment,
preserving the original quality of the food, preventing the food
from sticking together and making defrosting a thing of the past.
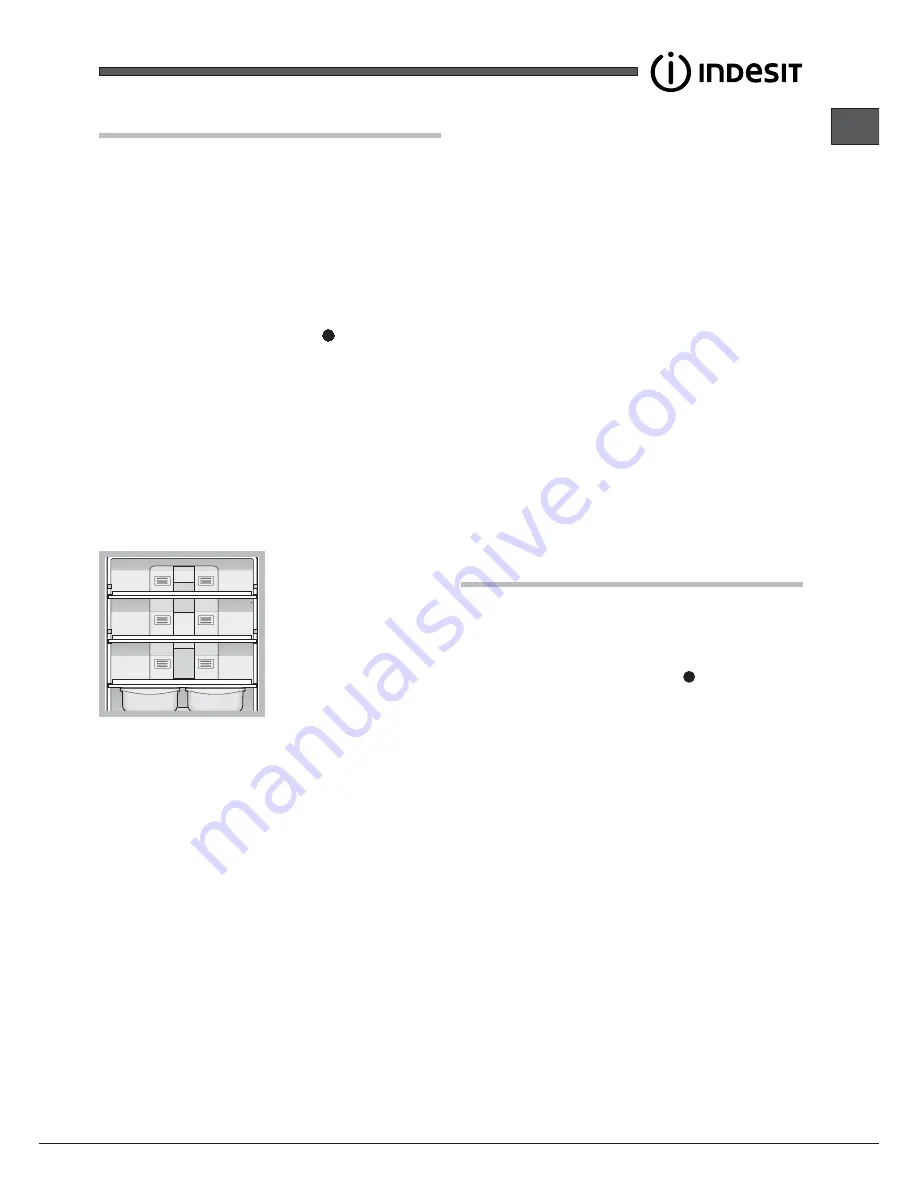
Do not block the aeration cells by placing food or containers in
direct contact with the refrigerating back panel. Close bottles
and wrap food tightly.

Using the refrigerator to its full potential

• Use the REFRIGERATOR OPERATION knob to adjust the

temperature (

see Description

).

• Press the SUPER COOL button (rapid cooling) to lower the

temperature quickly. For example, when you place a large
number of new food items inside a fridge the internal
temperature will rise slightly. The function quickly cools the
groceries by temporarily reducing the temperature until it
reaches the ideal level.

• Place only cold or lukewarm foods in the compartment, not

hot foods (

see Precautions and tips

).

• Remember that cooked foods do not last longer than raw

foods.

• Do not store liquids in open containers. They will increase

humidity in the refrigerator and cause condensation to form.

Using the freezer to its full potential

• Use the FREEZER OPERATION knob to adjust the

temperature (

see Description

).

• Do not re-freeze food that is defrosting or that has already

been defrosted. These foods must be cooked and eaten
(within 24 hours).

• Fresh food that needs to be frozen must not come into contact

with food that has already been defrosted.

• Do not place glass bottles which contain liquids, and which

are corked or hermetically sealed in the freezer because they
could break.

• The maximum quantity of food that may be frozen daily is

indicated on the plate containing the technical properties
located on the bottom left side of the refrigerator compartment
(for example: Kg/24h: 4).

• To freeze (if the freezer is already operating): press the rapid

freezing SUPER FREEZE button (corresponding yellow
indicator light illuminates), insert the food and close the door.
The function is disabled automatically after 24 hours or when
optimal temperatures have been reached (indicator light goes
out);

!

 To avoid blocking the air circulation inside the freezer

compartment, it is advisable not to obstruct the ventilation holes
with food or containers.

!

 Do not open the door during freezing.

!

 If there is a power cut or malfunction, do not open the freezer

door. This will help maintain the temperature inside the freezer,
ensuring that foods are conserved for at least 9 -14 hours.

Maintenance and care

Switching the appliance off

During cleaning and maintenance it is necessary to disconnect
the appliance from the electricity supply:

1. set the FREEZER OPERATION knob on 
2. pull the plug out of the socket

!

 If this procedure is not followed, the alarm may sound.

This alarm does not indicate a malfunction. To restore normal
operation, it is sufficient to set the 

FREEZER OPERATION

 knob

on the desired value. To disconnect the appliance, follow point 1
and 2.

Cleaning the appliance

• The external and internal parts, as well as the rubber seals

may be cleaned using a sponge that has been soaked in
lukewarm water and bicarbonate of soda or neutral soap. Do
not use solvents, abrasive products, bleach or ammonia.

• The removable accessories may be soaked in warm water

and soap or dishwashing liquid. Rinse and dry them carefully.

• The back of the appliance may collect dust which can be

removed by delicately using the hose of a vacuum cleaner set
on medium power. The appliance must be switched off and
the plug must be pulled out before cleaning the appliance.

Avoiding mould and unpleasant odours

• The appliance is manufactured with hygienic materials which

are odour free. In order to maintain an odour free refrigerator
and to prevent the formation of stains, food must always be
covered or sealed properly.

• If you want to switch the appliance off for an extended period

of time, clean the inside and leave the doors open.

Summary of Contents for 3DA Series

Page 1: ...6 Installazione 17 Accessori 17 Avvio e utilizzo 18 Manutenzione e cura 18 Precauzioni e consigli 19 Anomalie e rimedi 20 English Operating Instructions REFRIGERATOR FREEZER COMBINATION Fran ais Mode...

Page 2: ...URUCU KOMB NE SO UTUCU DONDURUCU KOMB NE SO UTUCU DONDURUCU KOMB NE SO UTUCU DONDURUCU KOMB NE SO UTUCU DONDURUCU indekiler indekiler indekiler indekiler indekiler Kullan m talimatlar 2 Teknik Servis...

Page 3: ...riffe potrebbero essere soggette a variazione da parte dell operatore telefonico per maggiori informazioni consultare il sito www indesit com Assistance Before calling for Assistance Check if the malf...

Page 4: ...obertura total adicional de Piezas y componentes Mano de obra de los t cnicos Desplazamiento a su domicilio de los t cnicos Y NO PAGUE AVERIAS NUNCA MAS Servicio de asistencia t cnica SAT Llame al 902...

Page 5: ...umaras S N Bu bilgiler so utucu b lmesi i inde a a da solda bulunan teknik veriler etiketi zerinde bulunmaktad r Kesinlikle sadece yetkili teknik elemanlara ba vurunuz ve her Kesinlikle sadece yetkili...

Page 6: ...M a rka IN D IN D M o d el 3 D A S 3D A 3D A NX 3D AA N X klim S n f S N N S T SN N S T T E n e rji T ke tim i 3 9 8kW h y l 3 1 8kW h y l E ne rji S n f A A D o nd u rucu B l m 7 5 lt 7 5 lt So utucu...

Page 7: ...l temperature increase in the freezer compartment see Troubleshooting Descrizione dell apparecchio Pannello di controllo 1 Tasto SUPER COOL raffreddamento rapido per abbassare velocemente la temperatu...

Page 8: ...igo sirven tambi n para indicar un an malo aumento de temperatura en el compartimiento congelador ver Anomal as y soluciones Description de l appareil Tableau de bord 1 Touche SUPER COOL refroidisseme...

Page 9: ...elho estiver ligado rede el ctrica 5 Indicador luminoso amarelo de SUPER FREEZE congela o r pida acende se quando for premida a tecla de SUPER FREEZE 6 Selector de FUNCIONAMENTO DO CONGELADOR para reg...

Page 10: ...10 1 2 3 4 5 6 7 271eps...

Page 11: ...nksiyonudur Bak m ve onar m b l m ne bak n z 3 Sar SUPER COOL h zl so utma uyar lambas SUPER COOL tu una bas ld nda yanar 4 Ye il BESLEME uyar lambas cihaz elektrik ebekesine ba l oldu u zaman a l r 5...

Page 12: ...sition Available only on certain models Descrizione dell apparecchio Vista d insieme Le istruzioni sull uso valgono per diversi modelli per cui possibile che la figura presenti particolari differenti...

Page 13: ...nnet BOUTEILLES Leur nombre et ou leur emplacement peut varier N existe que sur certains mod les Descripci n del aparato Vista en conjunto Las instrucciones sobre el uso son v lidas para distintos mod...

Page 14: ...imento para CONGELA O e CONSERVA O 3 Gaveta para FRUTAS e HORTALI AS 4 Caixa FLEX COOL BOX para CARNE e QUAIJO 5 WINE RACK 6 PRATELEIRA 7 L MPADA veja a Manuten o 8 Prateleira extra vel da porta com t...

Page 15: ...15 2 9 8 1 3 4 6 7 11 5 10 646eps...

Page 16: ...SAKLAMA SAKLAMA SAKLAMA b lmesi 3 3 3 3 3 MEYVE MEYVE MEYVE MEYVE MEYVE ve SEBZE SEBZE SEBZE SEBZE SEBZE ekmecesi 4 4 4 4 4 ARAP RAFI ARAP RAFI ARAP RAFI ARAP RAFI ARAP RAFI 5 5 5 5 5 WINE RACK WINE...

Page 17: ...Reversibilidad de la apertura de las puertas Reversibilidade da abertura das portas Kap lar n a l y n n n de i tirilmesi Kap lar n a l y n n n de i tirilmesi Kap lar n a l y n n n de i tirilmesi Kap l...

Page 18: ...grado di sopportare il carico massimo di potenza della macchina indicato nella targhetta caratteristiche posta nel vano frigorifero in basso a sinistra es 150 W la tensione di alimentazione sia compr...

Page 19: ...crizione Non ricongelare alimenti che stanno per scongelare o scongelati tali alimenti devono essere cotti per essere consumati entro 24 ore Gli alimenti freschi da congelare non devono essere posti a...

Page 20: ...stallato all aperto nemmeno se lo spazio riparato perch molto pericoloso lasciarlo esposto a pioggia e temporali Non toccare l apparecchio a piedi nudi o con le mani o i piedi bagnati o umidi Non tocc...

Page 21: ...enti potrebbe essere necessario gettarli segnale acustico Riscaldamento eccessivo c Suona l allarme e lampeggiano le due spie gialle e quella verde c L apparecchio segnala un riscaldamento pericoloso...

Page 22: ...es indicated on the data plate located on the bottom left side e g 220 240V The socket is compatible with the plug of the appliance If the socket is incompatible with the plug ask an authorised techni...

Page 23: ...sted These foods must be cooked and eaten within 24 hours Fresh food that needs to be frozen must not come into contact with food that has already been defrosted Do not place glass bottles which conta...

Page 24: ...ly dangerous to leave the appliance exposed to rain and storms Do not touch the appliance with bare feet or with wet or moist hands and feet Do not touch the internal cooling elements this could cause...

Page 25: ...ty of the food products and dispose if necessary buzzer Heating is excessive c The alarm sounds and the two yellow indicator lights as well as the green one flash c The temperature in the freezer has...

Page 26: ...ndiqu e sur la plaquette signal tique plac e l int rieur du compartiment r frig rateur en bas gauche ex 150 W la tension d alimentation est bien comprise entre les valeurs indiqu es sur la plaquette s...

Page 27: ...liquides ces derniers entra neraient une augmentation de l humidit et la formation d eau condens e Pour profiter plein de votre cong lateur Pour r gler la temp rature utilisez le bouton FONCTIONNEMEN...

Page 28: ...iqu conform ment aux normes internationales de s curit Ces conseils sont fournis pour des raisons de s curit et doivent tre lus attentivement Cet appareil est conforme aux Directives Communautaires su...

Page 29: ...r Mise en marche et utilisation Les voyants sont faiblement clair s D branchez la fiche et rebranchez la dans la prise de courant apr s l avoir retourn e sens dessus dessous a L alarme sonne a La port...

Page 30: ...de la m quina indicada en la placa de caracter sticas ubicada en la parte inferior izquierda del frigor fico ej 150 W la tensi n de alimentaci n est comprendida entre los valores indicados en la placa...

Page 31: ...s con l quidos producir a un aumento de humedad con la consiguiente formaci n de condensado Uso ptimo del congelador Para regular la temperatura utilice la perilla de FUNCIONAMIENTO DEL CONGELADOR ver...

Page 32: ...nformidad con las normas internacionales sobre seguridad Estas advertencias se suministran por razones de seguridad y deben ser le das atentamente Este equipamiento es conforme con las siguientes Dire...

Page 33: ...n funcionamiento y uso Las luces testigo est n d bilmente encendidas Desconecte el enchufe y vuelva a introducirlo en el tomacorriente despu s de haberlo girado sobre s mismo a Suena la alarma a La pu...

Page 34: ...r o carga m xima de pot ncia da m quina indicada na placa de identifica o situada no compartimento frigor fico em baixo esquerda p ex 150 W a tens o de alimenta o seja entre os valores indicados na pl...

Page 35: ...ondensa o Utilize melhor o congelador Para regular a temperatura utilize o selector de FUNCIONAMENTO DO CONGELADOR veja a Descri o N o congele novamente alimentos que estiverem a descongelar se ou des...

Page 36: ...selhos Este aparelho foi projectado e fabricado em conformidade com as regras internacionais de seguran a Estas advert ncias s o fornecidas para raz es de seguran a e devem ser lidas com aten o Esta a...

Page 37: ...e protec o para o motor veja In cio e utiliza o Os indicadores luminosos est o acesos fracos Desligue a ficha e ligue a novamente na tomada depois da t la rodada para inverter os pinos a O alarme est...

Page 38: ...38 GR 1 2 3 10 cm 5 cm 4 5 1 2 3 150 W 220 240 V FLEX COOL BOX...

Page 39: ...GR 39 8 black out 1 2 3 4 SUPER FREEZE SUPER FREEZE No Frost No Frost SUPER COOL 24 Kg 24h 4 SUPER FREEZE 24 9 14 1 2 1 2...

Page 40: ...40 GR holiday 15 C 1 HOLIDAY 6 8 A B 10 W 73 23 CEE 19 02 73 89 336 CEE 03 05 89 2002 96 CE H...

Page 41: ...GR 41 2002 96 EK a a b b c c b c 0 C SUPER FREEZE SUPER FREEZE...

Page 42: ...42 PL...

Page 43: ...PL 43...

Page 44: ...44 PL...

Page 45: ...PL 45...

Page 46: ...46 RO...

Page 47: ...RO 47...

Page 48: ...48 RO...

Page 49: ...RO 49...

Page 50: ...50 RU...

Page 51: ...RU 51...

Page 52: ...52 RU...

Page 53: ...RU 53...

Page 54: ...54 RU...

Page 55: ...n n a a s nda bulunan zellik etiketinde belirtilen de erler kapsam nda olmal d r r 220 240 V priz ve cihaz n fi i birbiriyle uyumlu olmal d r Aksi takdirde fi in yenisi ile de i tirilmesi i in yetkili...

Page 56: ...ucuyu en iyi ekilde kullan n z Dondurucuyu en iyi ekilde kullan n z Is derecesini ayarlamak i in DONDURUCU KONTROL ayar d mesini kullan n z A klama b l m ne bak n z Erimi veya erimek zere olan yiyecek...

Page 57: ...kullan m ama l de ildir Cihaz sadece yeti kin ki iler taraf ndan ve bu kitap kta aktar lan talimatlara g re g dalar saklamak ve dondurmak i in kullan lmal d r Cihaz zeri kapal bile olsa a k alanlara m...

Page 58: ...nma A r s nma A r s nma A r s nma c c c c c Alarm al yor ve sar ve ye il uyar lambas yan p s n yor Alarm al yor ve sar ve ye il uyar lambas yan p s n yor Alarm al yor ve sar ve ye il uyar lambas yan p...

Page 59: ...TR 59...

Page 60: ...60 TR 195076354 02 12 2010...

Reviews: