GB
19
Using the freezer to its full potential
• Use the FREEZER OPERATION knob to adjust the
temperature (
see Description).
• Do not re-freeze food that is defrosting or that has already
been defrosted. These foods must be cooked and eaten
(within 24 hours).
• Fresh food that needs to be frozen must not come into
contact with food that has already been defrosted.
Fresh food must be stored in the top FREEZER and
STORAGE compartment where the temperature drops
below -18°C and guarantees rapid freezing.
!
To avoid blocking the air circulation inside the
freezer compartment, it is advisable not to obstruct
the ventilation holes with food or containers.
• Do not place glass bottles which contain liquids, and
which are corked or hermetically sealed in the freezer
because they could break.
• The maximum quantity of food that may be frozen daily is
indicated on the plate containing the technical properties
located on the bottom left side of the refrigerator
compartment (for example: Kg/24h: 4).
• To freeze (if the freezer is already operating):
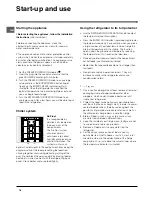
press the rapid freezing SUPER FREEZE button
(corresponding yellow indicator light illuminates), insert the
food and close the door. The function is disabled
automatically after 24 hours or when optimal temperatures
have been reached (indicator light goes out);
!
Do not open the door during freezing.
!
If there is a power cut or malfunction, do not open the
freezer door. This will help maintain the temperature inside
the freezer, ensuring that foods are conserved for at least 9
-14 hours.
WATER LEVEL
MAX
W
A
TER LEVEL
MAX
W
A
TER LEVEL
MAX
Ice
3
ice tray
The fact that they are situated on the top part of the
freezer drawers ensures greater cleanliness: the ice no
longer comes into contact with the food placed inside
the freezer compartment; furthermore, the dripping of
the water during filling is avoided (a lid to cover up the
hole after filling with water is also provided).
1. Pull out the tray by pushing it up.
Check that the tray is ompletely empty and fill it with
water through the opening provided.
2. Take care not to exceed the level indicated (MAX
WATER LEVEL). Excess water prevents the ice cubes
from dispensing (if this happens, wait for the ice to
melt and empty the tray).
3. Turn the tray 90°: due to the connected compartments
each mould fills with water (
see diagram).
4. Close the opening with the lid provided and put the
tray back, placing the top part in the corresponding
housing and allowing it to drop in again.
5. When the ice has formed (minimum time
approximately 8 hours) knock the tray against a hard
surface and wet the outside so that the ice cubes
come loose and take them out through the opening.
Summary of Contents for BAN 34 NF P
Page 12: ...12 I 195052168 00 06 2005 Xerox Business Services ...
Page 24: ...24 GB 195052168 00 06 2005 Xerox Business Services ...
Page 36: ...36 F 195052168 00 06 2005 Xerox Business Services ...
Page 48: ...48 NL 195052168 00 06 2005 Xerox Business Services ...
Page 60: ...60 E 195052168 00 06 2005 Xerox Business Services ...

