background image

5

breaker with a minimum opening of 3 mm between the
contacts, suitable for the load indicated and complying
with current directives, must be installed between the
appliance and the mains (the earthing wire must not be
interrupted by the circuit-breaker). The power supply cable
must be positioned so that it does not exceed room tem-
perature by 50°C at any point of its length. Before making
the connection check that:

the limiter valve and the home system can support
appliance load (see data plate);

the power supply system has an efficient earthing
connection which complies with the provisions of
current regulations and the law;

there is easy access to the socket or the omnipolar
circuit-breaker once the cooker has been installed.

N.B.: do not use reducers, adapters or shunts as these
could cause heating or burning.

Connection n° 2
Disposing of the plug.
WARNING: THIS APPLIANCE MUST BE EARTHED.
Ensure that before disposing of the plug itself, you make
the pins unusable so that it cannot be accidentally inserted
into a socket. Instructions for connecting cable to an alter-
native plug:
Important: the wires in the mains lead are coloured in
accordance with the following code:

Green & Yellow

-Earth

Blue

-Neutral

Brown

-Live

If the colours of the wires in the mains lead do not
correspond with the coloured markings identifying the
terminals in your plug, proceed as follows.

Connect Green & Yellow wire to terminal marked “E” or 
or coloured Green or Green & Yellow.
Connect Brown wire to terminal marked “L” or coloured
Red. Connect Blue wire to terminal marked “N” or coloured
Black. If a 13 amp plug (BS 1363) is used it must be fitted
with a 13 amp fuse.
A 15 amp plug must be protected by a 15 amp fuse, either
in the plug or adaptor or at the distribution board.If you
are in any doubt about the electrical supply to your
machine, consult a qualified electrician before use.

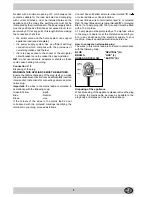
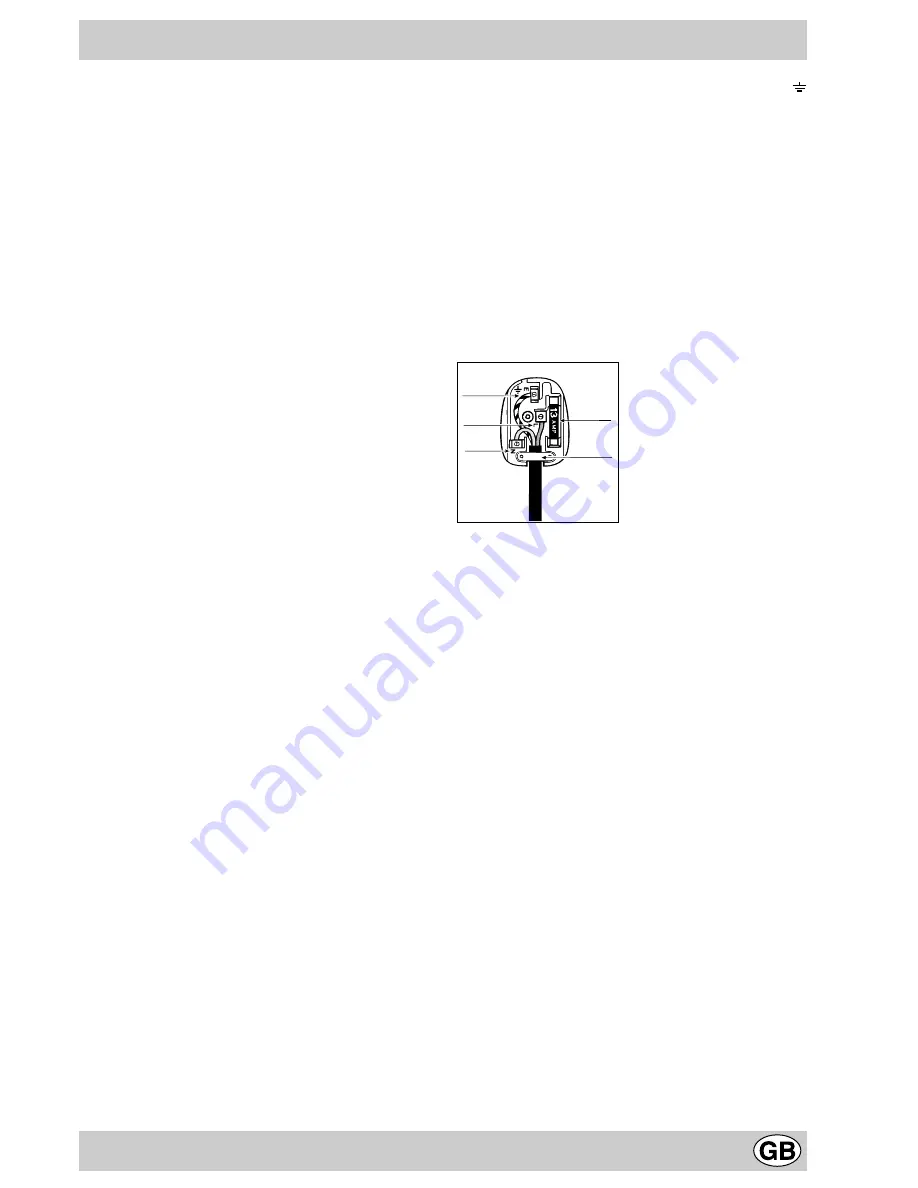
How to connect an alternative plug
The wires in this mains lead are coloured in accordance
with the following code:
BLUE

“NEUTRAL” (N)

BROWN

“LIVE” (L)

GREEN AND YELLOW

“EARTH” (E)

GREEN &
YELLOW

BROWN

BLUE

13 amp fuse

CROSS-BAR
CORD GRIP

Disposing of the appliance
When disposing of the appliance please remove the plug
by cutting the mains cable as close as possible to the
plug body and dispose of it as described above.

Summary of Contents for FE 10 K GB

Page 1: ...Electric built in oven Instructions for installation and use FE 10 K GB ...

Page 2: ...Electric built in oven Instructions for installation and use ...

Page 3: ...onnected unnecessarily Always switch off at the mains when the appliance is not in use 11 The ventilation and heat dispersion outlets should never be obstructed 12 Never replace the power supply cable yourself Damaged cables may be replaced only by an authorised servicing centre 13 This appliance must only be used for the purpose for which it was designed Any other use for example heating the room...

Page 4: ... the oven and fasten it by inserting the 4 wood screws into the 4 holes locate on the perimeter of the frame The panels of the adjacent cabinets must be made of heat resistant material In particular cabinets with a veneer exterior must be assembled with glues able to withstand temperatures of up to 100 C Once the appliance has been installed the electrical parts must be totally protected from all ...

Page 5: ...ctions for connecting cable to an alter native plug Important the wires in the mains lead are coloured in accordance with the following code Green Yellow Earth Blue Neutral Brown Live If the colours of the wires in the mains lead do not correspond with the coloured markings identifying the terminals in your plug proceed as follows Connect Green Yellow wire to terminal marked E or or coloured Green...

Page 6: ... caracteristics Oven size width cm 40 depth cm 39 height cm 34 Oven size 53 lt Voltage and frequency 230V 50 60Hz Power supply 2300 W Oven description This appliance conforms with the following European Economic Communitary directives 73 23 EEC of 19 02 73 Low Voltage and subsequent 89 336 EEC of 03 05 89 Electromagnetic Compatibility and subsequent 93 68 EEC of 22 07 93 and subsequent ...

Page 7: ...of foods placed in pans that are well done on the outside but still not done inside or for desserts covered with fruit or jam which require a light browning on top Note that this function does not permit reaching the maximum 250 C temperature inside for cooking foods always on this oven setting unless the foods are cakes which only require temperatures below or equal to 180 C 3 The grill Knob E se...

Page 8: ...hat the cooking time is not excessive In general Pastry is too dry Increase the temperature by 10 C and reduce the cooking time Pastry dropped Use less liquid or lower the temperature by 10 C Pastry is too dark on top Place it on a lower rack lower the temperature and increase the cooking time Cooked well on the inside but sticky on the outside Use less liquid lower the temperature and increase th...

Page 9: ...with a lamp resistant to high temperatures 300 C with the following characteristics Voltage 230V Wattage 25W Type E14 Replace the glass over and connect the oven to the mains Routine maintenance and oven cleaning Pratical advice for oven cooking Knob Setting Food to be Prepared Weight Kg Rack Position from the Bottom Preheating Time minutes Thermostat Knob Setting Cooking Time minutes 1 Convention...

Page 10: ...10 ...

Page 11: ...11 ...

Page 12: ...loni Elettrodomestici Viale Aristide Merloni 47 60044 Fabriano Italy Tel 39 0732 6611 Fax 39 0732 662501 www merloni com Forno incasso elettrico Spec GB 12 00 195028672 00 Xerox Business Services Docutech ...

Reviews: