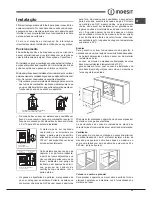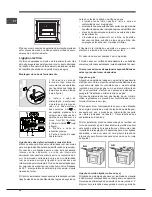
background image

GB

19

supply ramp and this is fitted with a seal in order to prevent 

leaks. The seal must always be replaced after rotating the pipe 

fitting (the seal is provided with the appliance). The gas supply 

pipe fitting is a threaded 1/2 gas cylindrical male attachment.

Connecting a flexible jointless stainless steel pipe to a 

threaded attachment

The gas supply pipe fitting is a threaded 1/2 gas cylindrical male 

attachment. These pipes must be installed so that they are never 

longer than 2000 mm when fully extended. Once connection has 

been carried out, make sure that the flexible metal pipe does 

not touch any moving parts and is not compressed.

!

 Only use pipes and seals that comply with current National 

regulations.

Checking the tightness of the connection

!

 When installation has been completed, check the pipe 

fittings for leaks using a soapy solution. Never use a flame.

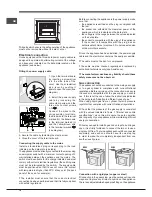
Adapting to different types of gas

In order to adapt the oven to a type of gas other than the 

type for which it was manufactured (indicated on the label), 

follow these simple steps:

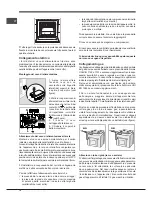
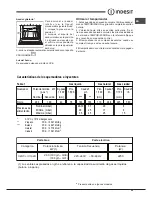
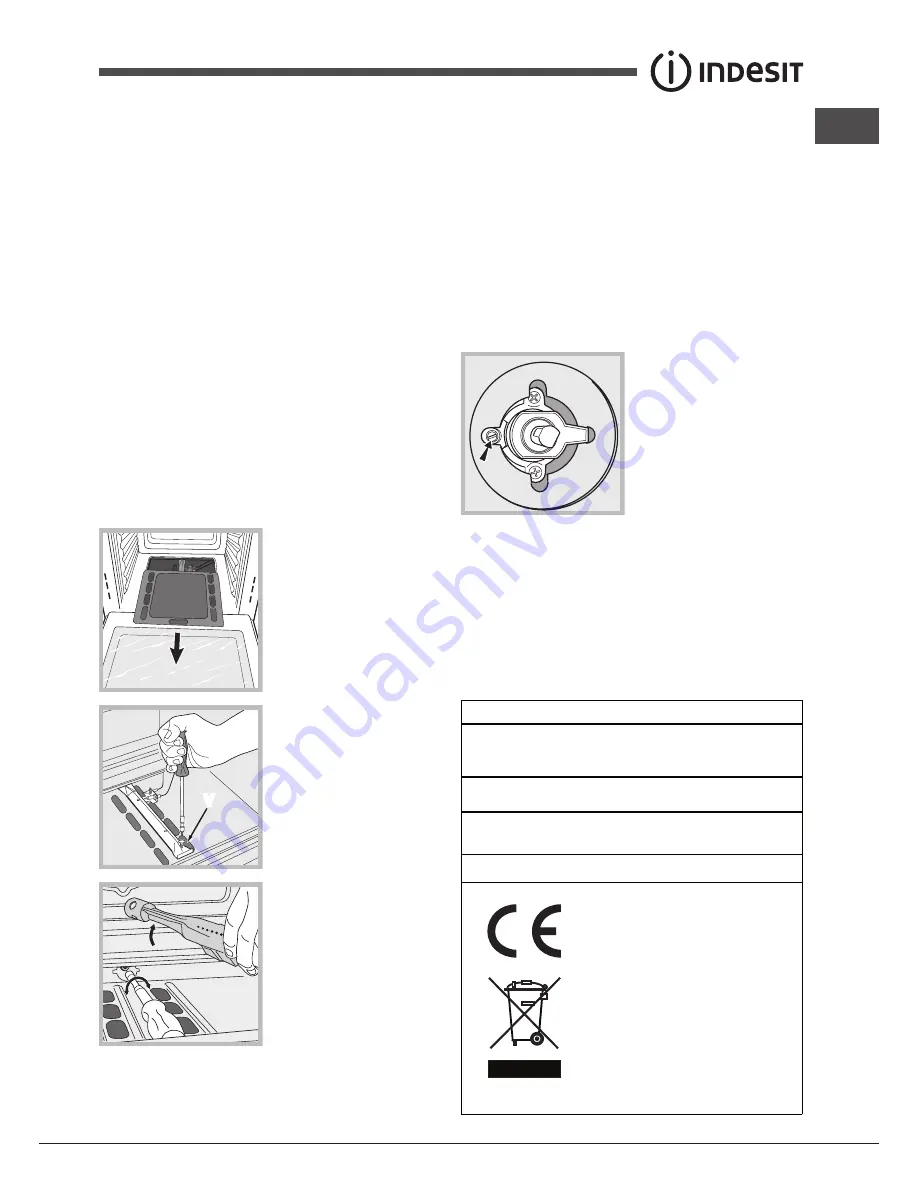
•  Replacing the oven burner nozzle

1. Open the oven door fully.

2. Slide out the bottom of the 

oven.

V

3. Unscrew the burner 

fastening screws.

4. Remove screw “

V

” and 

then the oven burner.

5. Unscrew the oven burner 

nozzle using the special 

socket spanner for the 

nozzles, or better still a 7 mm 

socket spanner, and replace 

it with a nozzle suited to the 

new type of gas (see Table 1).

6. Replace all the parts, following the steps described above 

in the reverse order.

!


Take particular care when handling the spark plug 

wires and the thermocouple pipes.

•  Primary air regulation for the oven burner

The burner was designed not to need any adjustments to 

the primary air.

•  Setting the oven burner to minimum

1. Turn the knob first to the Max setting for about 10 minutes 

and then to Min.

2. Remove the knob.

3. Remove the disk fastened to the control panel.

4. Adjust the screw located outside the thermostat cock pin 

until the flame is small but steady (the flame can be seen 

through the slots on the oven bottom).

5. Make sure the burner does 

not switch off when you turn 

the knob from Max to Min 

quickly, or when you open 

and close the oven door 

quickly.

!

 If the appliance is connected to liquid gas, the regulation 

screw must be fastened as tightly as possible.

!

  Once  this  procedure  is  finished,  replace  the  old  rating 

sticker with one indicating the new type of gas used. This 

sticker is available from any of our Service Centres.

!

 If the gas pressure is different from the recommended 

pressure, a suitable pressure regulator must be fitted to the 

inlet pipe in accordance with current National Regulations.

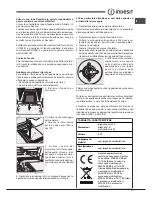
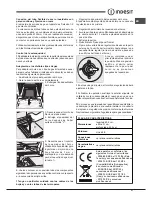
DATA PLATE

Dimensions

width 43.5 cm

height 31 cm

depth 43.5 cm

Volume

58 l

Electrical

connections

see data plate

Gas features

see data plate

This appliance conforms to the

following European Economic

Community directives:

2006/95/EEC dated 12/12/06

(Low Voltage) and subsequent

amendments - 2004/108/EEC

dated 15/12/04 (Electromagnetic

compatibility) and subsequent

amendments - 93/68/EEC dated

22/07/93 and subsequent

amendments. 2009/142/EEC

dated 30/11/09 (Gas) and

subsequent amendments.

2012/19/EC and subsequent

amendments.

Summary of Contents for FGIM K (BK) S

Page 1: ...des 22 Precautions and tips 23 Maintenance and care 23 Sumario Manual de instrucciones 1 Advertencias 3 Asistencia 5 Descripción del aparato 7 Descripción del aparato 8 Instalación 25 Puesta en funcionamiento y uso 28 Programas 30 Precauciones y consejos 31 Mantenimiento y cuidados 31 Índice Instruções para a utilização 1 Advertências 3 Assistência 6 Descrição do aparelho 7 Descrição do aparelho 8...

Page 2: ...rimadisostituire la lampada per evitare la possibilità di scosse elettriche Quando si inserisce la griglia assicurarsi che il fermo sia rivolto verso l alto e nella parte posteriore della cavità Warnings WARNING The appliance and its accessible parts become hot during use Care should be taken to avoid touching heating elements Children less than 8 years of age shall be kept away unless continuousl...

Page 3: ...parrilla controle que el tope esté dirigido hacia arriba y en la parte posterior de la cavidad Advertências ATENÇÃO Este aparelho e as suas partes acessíveis aquecem muito durante a utilização É preciso ter atenção e evitar tocar os elementos que aquecem Manter afastadas as crianças com menos de 8 anos caso não estejam a ser vigiadas O presente aparelho pode ser utilizado por crianças com mais de ...

Page 4: ...ють під постійним контролем або проінструктовані щодо правил з небезпечного користування приладу і усвідомлюють ступені ризику Не дозволяйте дітям гратися з приладом Операції з очищення і догляду не повинні виконуватися дітьми без належного контролю Не використовувати абразивні засоби ані металеві загострені шпателі для очищення скляних дверцях духовки тому що вони можуть пошкрябати поверхню призв...

Page 5: ...ro al minuto iva inclusa dal Lun al Ven dalle 18 30 alle 08 00 il Sab dalle 13 00 alle 08 00 e i giorni festivi per chi chiama dal telefono fisso Per chi chiama da radiomobile le tariffe sono legate al piano tariffario dell operatore telefonico utilizzato Le suddette tariffe potrebbero essere soggette a variazione da parte dell operatore telefonico per maggiori informazioni consultare il sito www ...

Page 6: ... Mod o número de série S N Estas últimas informações encontram se na placa de identificação situada no aparelho Допомога Не звертайтеся по допомогу до не уповноваженого персоналу Повідомити Тип несправності Модель приладу Mod Серійний номер S N Ці дані знаходяться на табличці з даними на самому приладі ...

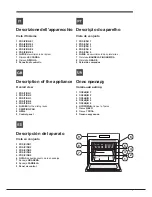
Page 7: ...ripción del aparato Vista en conjunto 1 POSICIÓN 1 2 POSICIÓN 2 3 POSICIÓN 3 4 POSICIÓN 4 5 POSICIÓN 5 6 GUÍAS de deslizamiento de las bandejas 7 Bandeja GRASERA 8 Bandeja PARRILLA 9 Panel de control Descrição do aparelho Vista de conjunto 1 POSIÇÃO 1 2 POSIÇÃO 2 3 POSIÇÃO 3 4 POSIÇÃO 4 5 POSIÇÃO 5 6 GUIAS de escorrimento das prateleiras 7 Prateleira BANDEJA PINGADEIRA 8 Prateleira GRADE 9 Painel ...

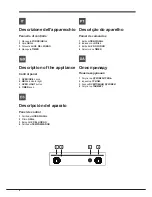
Page 8: ... 3 OVEN LIGHT button 4 TIMER knob Descripción del aparato Panel de control 1 Perilla del HORNO GRILL 2 Piloto GRILL 3 Botón LUZ DEL HORNO 4 Perilla del TEMPORIZADOR 2 3 4 1 Descrição do aparelho Painel de comandos 1 Botão HORNO GRILL 2 Indicador do GRILL 3 Botão LUZ DO FORNO 4 Selector dos TIMER Опис приладу Панель керування 1 Регулятор ДУХОВКА ГРИЛЬ 2 Індикатор ГРИЛЮ 3 Кнопка ОСВІТЛЕННЯ ДУХОВКИ 4...

Page 9: ...no parti comuni dell immobile o ambienti con pericolo di incendio o camere da letto I gas di petrolio liquefatti più pesanti dell aria ristagnano verso il basso Quindi i locali contenenti bidoni di GPL debbono prevedere delle aperture verso l esterno così A Esempi di aperture di ventilazione per l aria comburente Maggiorazione della fessura fra porta e pavimento Locale adiacente Locale da ventilar...

Page 10: ...iche vedi sotto la presa sia compatibile con la spina dell apparecchio In caso contrario sostituire la presa o la spina non usare prolunghe e multiple Ad apparecchio installato il cavo elettrico e la presa della corrente devono essere facilmente raggiungibili Il cavo non deve subire piegature o compressioni Il cavo deve essere controllato periodicamente e sostituito solo da tecnici autorizzati ved...

Page 11: ...ai tubi delle termocoppie Regolazione aria primaria del bruciatore forno Il bruciatore è progettato in modo tale che non necessita di alcuna regolazione dell aria primaria Regolazione del minimo del bruciatore forno 1 Portare la manopola sulla posizione Min dopo aver lasciato la stessa per 10 minuti circa in posizione Max 2 Togliere la manopola 3 Togliere il dischetto fissato al frontalino 4 Agire...

Page 12: ...ax 140 145 160 200 230 240 La temperatura impostata viene automaticamente raggiunta e mantenuta costante dall organo di controllo il termostato comandato dalla manopola Accensione manuale del forno Nel caso di mancanza momentanea di energia elettrica si può accendere il bruciatore del forno manualmente 1 Aprire la porta del forno F 2 Avvicinare un fiammifero o un accenditore all asola F come in fi...

Page 13: ... a tempo scaduto emette un segnale acustico Il timer non controlla l accensione e lo spegnimento del forno Tabella 1 Gas liquido Gas naturale Gas città Bruciatore Potenza Termica kW p c s By pass 1 100 Ugello 1 100 Portata g h Ugello 1 100 Portata l h Ugello 1 100 Portata l h Nominale Ridotta mm mm mm Forno 2 60 1 00 49 78 189 186 119 248 245 589 Pressioni di alimentazione Nominale mbar Minima mba...

Page 14: ...dicativi e possono essere modificati in base ai propri gusti personali Nelle cotture al grill la leccarda va posta sempre al 1 ripiano a partire dal basso Tabella cottura Programmi Programmi di cottura Programma GRILL Si accende l elemento riscaldante superiore La temperatura assai elevata e diretta del grill consente la immediata rosolatura superficiale dei cibi che ostacolando la fuoriuscita dei...

Page 15: ...e i bambini giochino con l apparecchio Non è previsto che l apparecchio venga utilizzato da persone bambini compresi con ridotte capacità fisiche sensoriali o mentali da persone inesperte o che non abbiano familiarità con il prodotto a meno che non vengano sorvegliate da una persona responsabile della loro sicurezza o non abbiano ricevuto istruzioni preliminari sull uso dell apparecchio L apparecc...

Page 16: ...le due cerniere vedi figura 3 Afferrare la porta ai due lati esterni richiudendola lentamente ma non del tutto Poi tirare la porta verso di sé estraendola dalla sua sede vedi figura Rimontare la porta seguendo il procedimento in senso contrario Controllare le guarnizioni Controllare periodicamente lo stato della guarnizione attorno alla porta del forno In caso risulti danneggiata rivolgersi al Cen...

Page 17: ...rculation tubes as described above However these rooms must not be communal rooms bedrooms or rooms that may present a fire hazard Liquid petroleum gas sinks to the floor as it is heavier than air Therefore rooms containing LPG cylinders must also be equipped with vents to allow gas to escape in the event of a leak As a result LPG cylinders whether A Examples of ventilation holes for comburant air...

Page 18: ...is compliant with the law the socket can withstand the maximum power of the appliance which is indicated on the data plate the voltage is in the range between the values indicated on the data plate the socket is compatible with the plug of the appliance If the socket is incompatible with the plug ask an authorised technician to replace it Do not use extension cords or multiple sockets Once the app...

Page 19: ...e reverse order Take particular care when handling the spark plug wires and the thermocouple pipes Primary air regulation for the oven burner The burner was designed not to need any adjustments to the primary air Setting the oven burner to minimum 1 Turn the knob first to the Max setting for about 10 minutes and then to Min 2 Remove the knob 3 Remove the disk fastened to the control panel 4 Adjust...

Page 20: ... which is controlled by the knob will keep the temperature constant Switching the oven on manually In the event of a power failure the oven burner can be lit manually 1 Open the oven door F 2 Hold a match or lighter near the burner hole as shown in the figure press knob F see figure in fully and turn it anticlockwise setting it to the Max position 3 Once the burner is lit shut the oven door The ov...

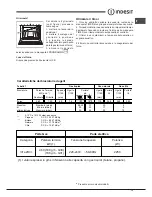
Page 21: ...ff Burner and Nozzle specifications At 15 C and 1013 25 mbar dry gas Propane P C S 50 37 MJ Kg Butane P C S 49 47 MJ Kg Natural P C S 37 78 MJ m3 Table 1 Liquid gas Natural gas Burner Thermal Power kW gross heat value By pass 1 100 Nozzle 1 100 Flow g h Nozzle 1 100 Flow l h Nominal Reduced mm mm Oven 2 60 1 00 49 78 189 186 119 248 Supply pressures Nominal mbar Minimum mbar Maximum mbar 28 30 20 ...

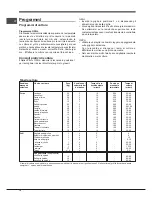
Page 22: ...gh the cooking process Selector knob setting Food to be cooked Weight in kg Cooking rack position from oven bottom Preheating time minutes Thermostat knob setting Cooking time minutes Oven Lasagne Cannelloni Pasta bakes Veal Chicken Turkey roll Duck Rabbit Pork loin Leg of lamb Mackerels Dentex Trout baked in foil Neapolitan style pizza Dry biscuits Tart Chocolate cake Leavened cakes 2 5 2 5 2 2 1...

Page 23: ...ice Centre see Assistance Do not rest objects on the open oven door Do not let children play with the appliance The appliance should not be operated by people including children with reduced physical sensory or mental capacities by inexperienced individuals or by anyone who is not familiar with the product These individuals should at the very least be supervised by someone who assumes responsibili...

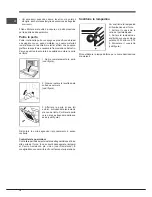
Page 24: ... For more thorough cleaning purposes the oven door may be removed 1 Open the oven door fully see diagram 2 Lift up and turn the small levers located on the two hinges see diagram 3 Grip the door on the two external sides and close it approximately half way Pull the door towards you lifting it out of its slot see diagram To replace the door reverse this sequence Inspecting the seals Check the door ...

Page 25: ...eble ambientescon peligro de incendio o dormitorios A Ejemplos de aperture de ventilación para aire comburente Maggiorazione della fessura fra porta e pavimento Locale adiacente Locale da ventilare Los gases de petróleo licuados más pesados que el aire se depositan en las partes más bajas Por lo tanto los ambientes que contienen botellas de GPL deben tener aberturas hacia el exterior para permitir...

Page 26: ...de características la tensión de alimentación eléctrica esté comprendida dentro de los valores indicados en la placa de características la toma sea compatible con el enchufe del aparato Si no es así sustituya la toma o el enchufe no utilice prolongaciones ni conexiones múltiples Una vez instalado el aparato el cable eléctrico y la toma de corriente deben ser fácilmente accesibles El cable no debe ...

Page 27: ...ión aire primario del quemador del horno El quemador está proyectado de modo tal que no necesita regulación de aire primario Regulación del mínimo del quemador del horno 1 lleve la perilla a la posición Min después de haber dejado la misma durante 10 minutos aproximadamente en la posición Max 2 Extraiga la perilla 3 Quite el disco fijado al panel frontal 4 Opere sobre el tornillo de regulación ubi...

Page 28: ...60 200 230 240 La temperatura seleccionada se alcanza automáticamente y es mantenida constante por el órgano de control el termostato accionado por la perilla Encendido manual del horno En el caso de un corte momentáneo de energía eléctrica se puede encender el quemador del horno manualmente 1 Abra la puerta del horno F 2 Acerque una cerilla o un encendedor al orificio F como se indica en la figur...

Page 29: ... 50 37 MJ Kg Butano P C S 49 47 MJ Kg Natural P C S 37 78 MJ m3 Ciudad P C S 15 87 MJ m3 Tabla 1 Gas líquido Gas natural Gas ciudad Quemador Potencia térmica kW p c s By pass 1 100 Pico 1 100 Caudal g h Pico 1 100 Caudal l h Pico 1 100 Caudal l h Nominal Reducida mm mm mm Horno 2 60 1 00 49 78 189 186 119 248 245 589 Presiones de alimentación Nominal mbar Mínima mbar Máxima mbar 28 30 20 35 37 25 ...

Page 30: ...se a sus gustos personales En las cocciones al grill la grasera se coloca siempre en el 1 piso contando desde abajo Tabla de cocción Programas Programas de cocción Programa GRILL Se enciende el elemento calentador superior La temperatura muy elevada y directa del asador eléctrico permite el inmediato tostado superficial de los alimentos que obstaculizando la salida de los líquidos los mantiene más...

Page 31: ...niños jueguen con el aparato No está previsto que el aparato sea utilizado por personas incluidos los niños con capacidades físicas sensoriales o mentales disminuidas por personas inexpertas o que no tenganfamiliaridadconelproducto salvoqueesténvigiladas por una persona responsable de su seguridad o que hayan recibidoinstruccionespreliminaressobreelusodelaparato El aparato no se debe poner en func...

Page 32: ...das en las dos bisagras ver la figura 3 Sujete la puerta de los costados externos y ciérrela lenta pero no completamente Luego tire la puerta hacia sí extrayéndola de su lugar ver la figura Vuelva a colocar la puerta siguiendo el mismo procedimiento pero en sentido contrario Controlar las juntas Controle periódicamente el estado de la junta que rodea la puerta del horno Si se encontrara dañada lla...

Page 33: ...ossuam um conduto de ventilação comunicadora com a parte externa Os gases de liquefeitos de petróleo mais pesados do que o ar estagnam se embaixo Portanto as salas que contiverem cilindros de GLP devem possuir aberturas A Exemplos de abertura de ventilação para ar comburente Aumento da fenda entre porta e soalho Local adjacente Local a ser ventilado para fora de maneira que possibilitem o escoamen...

Page 34: ...e de suportar a carga máxima de potência da máquina indicada na placa de identificação a tensão de alimentação seja entre os valores da placa de identificação a tomada seja compatível com a ficha do aparelho Em caso contrário substitua a tomada ou a ficha não empregue extensões nem tomadas múltiplas Depois de ter instalado o aparelho o acesso ao cabo eléctrico e à tomada da corrente deve ser fácil...

Page 35: ...cialmente nos cabos das velas e nos tubos dos terminares Regulação do ar primário do queimador do forno O queimador é projectado de maneira que nenhuma regulação do ar primário será necessária Regulação do mínimo do queimador do forno 1 Coloque o botão na posição Min depois de ter deixado o mesmo aproximadamente 10 minutos na posição Max 2 Tire o botão 3 Tire o disco preso no pequeno painel fronta...

Page 36: ... logo a seguir Min 150 180 220 Max 140 145 160 200 230 240 Chega se à temperatura definida automaticamente e a mesma é mantida constante pelo componente de controlo o termostato comandado pelo botão Acender manualmente o forno No caso falta momentânea de energia eléctrica é possível acender o queimador do forno manualmente 1 Abra a porta do forno F 2 Aproxime um fósforo ou isqueiro aceso ao bocal ...

Page 37: ...25 mbars gás seco Propano P C S 50 37 MJ Kg Butano P C S 49 47 MJ Kg Natural P C S 37 78 MJ m3 Tabela 1 Gás Líquido Gás Natural Queimador Potência térmica kW p c s By pass 1 100 Bico 1 100 Vazão g h Bico 1 100 Vazão l h Nominal Reduzida mm mm Forno 2 60 1 00 49 78 189 186 119 248 Pressões de alimentação Nominal mbar Mínima mbar Máxima mbar 28 30 20 35 37 25 45 20 17 25 Utilizar o contador de minut...

Page 38: ...tade da cozedura Posição do botão de selecção Alimento a ser cozido Peso Kg Posição de cozedura prateleiras baixas Tempo de pré aquecimento minutos Posição do botão do termostato Tempo de cozedura minutos Forno Lasanha Cannellone Massa ao forno Vitela Frango Rollé de peru Pato Coelho Lombo de porco Coxa de cordeiro Cavala Peixe dentão Truta no cartucho Pizza Napolitana Biscoitos secos Tortas Bolo ...

Page 39: ...s sobre a porta do forno aberta Evite que as crianças brinquem com o aparelho Não é previsto que este aparelho seja utilizado por pessoas incluso crianças com reduzidas capacidades físicas sensoriais ou mentais por pessoas inexperientes ou que não tenham familiaridade com o produto a não ser que seja vigiadas por uma pessoa responsável pela sua segurança ou que tenham recebido instruções prelimina...

Page 40: ...a porta inteiramente veja a figura 2 Levante e rode as alavancas situadas nas duas dobradiças veja a figura 3 Segure a porta dos dois lados exteriores e feche a novamente devagar mas não inteiramente Em seguida puxe a porta para a frente e retire a do seu lugar veja a figura Vuelva a colocar la puerta siguiendo el mismo procedimiento pero en sentido contrario Verificação das guarnições Verifique p...

Page 41: ...ікном і підлогою Сусіднє приміщення Приміщення що має вентилюватися Система може такожзабезпечити необхіднийповітрообмін для не місцевогозгоряння у випадку к ол и з а б р уд н е н е п о в і т р я надходитьз сусідніх кімнат які м а ю т ь в и т я ж н і т р у б и з циркуляцієюповітря як описано вище Однак ці кімнати не повиннібути комунальними спальними або кімнатами якіможуть представляти небезпеку ...

Page 42: ...знаходиться в межах значень вказаних на табличці з характеристиками див нижче розетка сумісна з вилкою приладу В іншому випадку замініть розетку або вилку не використовуйте подовжувачі й трійники У встановленому приладі має бути забезпечений легкий доступ до електричного шнуру і розетки Шнур не повинен мати згинів або утисків Шнур має періодично перевірятися і замінюватися тільки вповноваженими фа...

Page 43: ...и термопар Регулювання первинного повітря у пальнику духовки Завдяки власній конструкції пальник не потребує ніяких регулювань первинного повітря Регулювання мінімальної потужності на пальнику духовки 1 Перевести регулятор в положення Min Мін попередньо залишивши його на 10 хвилин в положенні Max Макс 2 Зняти регулятор 3 Зняти закріплений до передньої планки диск 4 За допомогою регулювального гвин...

Page 44: ...20 Max 140 145 160 200 230 240 Задана температура досягається автоматично і постійно підтримується термостатом який керується регулятором Увімкнення духовки уручну При тимчасовому зникненні електроенергії пальник духовки можна увімкнути уручну 1 відчинити дверцята духовки F 2 наблизити сірник або запальничку до отвору F як вк азано на малюнк у натиснути до упору й обернути регулятор FORNO проти го...

Page 45: ...улятор ТАЙМЕРУ на повний оберт за годинниковою стрілкою 2 Обертаючи назад проти годинникової стрілки задайте бажаний час стикуючи хвилини вказані на регуляторі ТАЙМЕРУ з нерухомою відміткою на панелі керування 3 Таймер це лічильник хвилин про вичерпання часу сповіщає звуковий сигнал Таймер не контролює увімкнення та вимкнення духовки Характеристики пальників і форсунок При 15 C і 1013 25 мбар сухи...

Page 46: ...иготування Положення регулятору для вибору Продукти для готування Вага кг Позиція полиці відраховуючи знизу Час попереднього нагрівання у хвилинах Положення ручки термостату Час приготування у хвилинах Духовка Лазан я Каннеллоні Запечена у духовці паста Телятина Курка Рулет з індичого м яса Качка Кріль Огузок свинини Ягняче стегно Скумбрія Зубатка Форель в обгортці Неаполітанська піцца Печиво Пирi...

Page 47: ...ерніться у сервісний центр див Допомога Не ставте важкі предмети на відкриті дверцята духовки Не передбачається використання приладу особами включаючидітей зобмеженимифізичними сенсорними або розумовими здібностями недосвідченими особами або такими що не ознайомилися з виробом за виключенням випадків нагляду з боку особи відповідальної за їхню безпеку не передбачається використання приладу особами...

Page 48: ...льного очищення можна зняти дверцята духовки 1 повністю відкрийте дверцята див малюнок 2 підведіть і оберніть маленькі важелі які знаходяться на двох завісах див малюнок 3 візьміться за дверцята з двох зовнішніх боків зачиняючи їх неповністю Потім потягніть дверцята на себе виймаючи їх з завіс див малюнок Поверніть дверцята на місце виконуючи процедуру у зворотному порядку Перевірка ущільнювачів П...

Reviews: