background image

FM 70 P.1 MR

Built-in oven
Instructions for installation and use

Summary of Contents for FM 70 P.1 MR

Page 1: ...FM 70 P 1 MR Built in oven Instructions for installation and use ...

Page 2: ...rer cannot be held responsible for any damages caused by the improper use of the appliance 8 The use of any electric appliance requires compliance with a few basic safety rules as follows Never touch the appliance with wet or damp hands or feet Never use the appliance when barefoot Avoid using extension cords If you must use one take every precaution Never try to disconnect the plug from the elect...

Page 3: ...3 GB Front View A Function selector B Temperature Selector C Heat indicator light D Locking display E Programmer 12 30 0 220 120 200 160 80 280 240 180 140 100 60 300 260 0 P A B C D E 40 ...

Page 4: ... remove each dish once it is cooked For cooking on two levels for example the enamel tray should be used to support the dish on tier 1 and the rack on tier 3 Pre heating the oven is recommended Pizza The heaters oven floor and circular are used to heat the oven up quickly Your pizzas and tarts will benefit from stronger bottom heat so as to guarantee that the dough or pastry is cooked through duri...

Page 5: ...tray 137 834 ENAMEL TRAY It is used to support the dish for all one level and bain marie cooking to support preparations petits fours etc to catch juices and fat from cooking when com bined with the big rack BIG RACK It is always used detached at the bottom combined with the enamel tray Put on tier 2 it is used to take meat the enamel tray being on tier 1 to catch fat and juices Put on the upper t...

Page 6: ...ming the performance of the opera tion The accessories can easily be cleaned like regular dishes even in a dishwasher 3 Do not leave dish towels on the oven handle Important During pyrolysis the surfaces may become hot Keep young children away How to start pyrolysis Remove all accessories from the oven Elimi nate large spills in order to avoid any risk of producing fumes or flames Close the door S...

Page 7: ...or light Press the knob flashes Turn the knob to display the desired cooking time After 3 seconds your choice is vali dated remains on at half power Ignore the flashing of the light Set the Function Selector to the desired position If desired change the temperature using the Temperature Selector To cancel the cooking time select the function Press and turn the programmer knob to display 0 00 When ...

Page 8: ...rill 210 C 1 hour for 1kg 2 1 Meat on grill No Roast veal Fan grill 210 C 1 hour for 1kg 2 1 Meat on grill No Stuffed tomatoes Traditional assisted 200 C 20 25 2 Dish on enamel tray Yes Brioche Baking 160 C 35 45 2 Aluminium mould on enamel tray Yes Cake Baking 160 C 60 2 Aluminium mould on enamel tray Yes Choux pastry Baking 200 C 20 25 2 Small non sweetened profiteroles on enamel tray Yes Crème ...

Page 9: ...inium foil We strongly advise you not to Aluminium foil in direct contact with the hot enamel may melt and irreparably damage the enamel SAFETY Accessible hot parts In pyrolysis self cleaning the outer surfaces are hot ter than during cooking keep young children well clear DO NOT WORRY IF Minor operating problems may occur but these are gen erally due to a mistaken setting or a wrong assessment of...

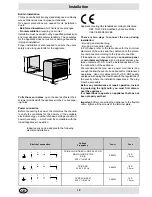
Page 10: ... DBT 73 23 CEE modified by directive 93 68 CEE CEM 89 336 CEE There are two ways to connect the oven during installation By using an electrical plug By using a connection panel In both cases refer to the table above for the minimum diameters of the wires and the calibration of the protec tive components according to the type of connection If the appliance is connected using a connection panel an o...

Page 11: ...11 GB ...

Page 12: ...Merloni Electroménager S A BP 80048 57101 Thionville Cedex tel 03 82 55 75 00 fax 03 82 55 77 80 03 01 19502801201 Xerox Business Services Docutech ...

Reviews: