background image

4

I

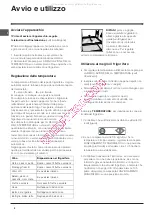
Avvio e utilizzo

Avviare l’apparecchio

!


Prima di avviare l’apparecchio, seguire

le istruzioni sull’installazione

 (

vedi Installazione

).

!

 Prima di collegare l’apparecchio pulire bene i vani

e gli accessori con acqua tiepida e bicarbonato.

1. Inserire la spina nella presa e accertarsi che

si accenda la lampada di illuminazione interna.

2. Ruotare la manopola per LA REGOLAZIONE DELLA

TEMPERATURA su un valore medio. Dopo qualche ora

sarà possibile inserire alimenti nel frigorifero.

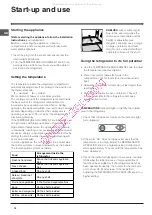
Regolazione della temperatura

La temperatura all'interno del reparto frigorifero si regola

automaticamente in base alla posizione della manopola

del termostato.

    1

 = meno freddo      

4

 = più freddo

Si consiglia, comunque, una posizione media

Per aumentare lo spazio e disposizione e migliorare

l'aspetto estetico, questo apparecchio ha la "parte

raffreddante" posizionata all'interno della parete

posteriore del reparto frigo. Tale parete, durante il

funzionamento, si presenterà coperta di brina, oppure di

goccioline di acqua a secondo se il compressore è in

funzione o in pausa. Non preoccupatevi di questo! Il

frigorifero sta lavorando in modo normale.

Se si imposta la manopola per LA REGOLAZIONE

DELLA TEMPERATURA su valori alti, con grossi

quantitativi di alimenti e con una temperatura ambiente

elevata, l’apparecchio può funzionare di continuo,

favorendo un’eccessiva formazione di brina ed eccessivi

consumi elettrici: ovviare spostando la manopola verso i

valori più bassi (verrà effettuato uno sbrinamento

automatico).

Negli apparecchi statici l’aria circola in modo naturale:

quella più fredda tende a scendere perché più pesante.

Ecco come sistemare gli alimenti:

Cibo

Disposizione nel frigorifero

'EVRIITIWGITYPMXS

7STVEMGEWWIXXMJVYXXEIZIVHYVE

*SVQEKKMJVIWGLM

7STVEMGEWWIXXMJVYXXEIZIVHYVE

'MFMGSXXM

7YUYEPWMEWMVMTMERS

7EPEQMTERIMR

GEWWIXXEGMSGGSPEXE

7YUYEPWMEWMVMTMERS

*VYXXEIZIVHYVE

2IMGEWWIXXMJVYXXEIZIVHYVE

9SZE

2IPPkETTSWMXSFEPGSRGMRS

&YVVSIQEVKEVMRE

2IPPkETTSWMXSFEPGSRGMRS

&SXXMKPMIFMFMXIPEXXI

2IKPMETTSWMXMFEPGSRGMRM

1

2

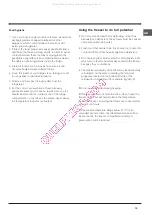
RIPIANI

: pieni o a griglia.

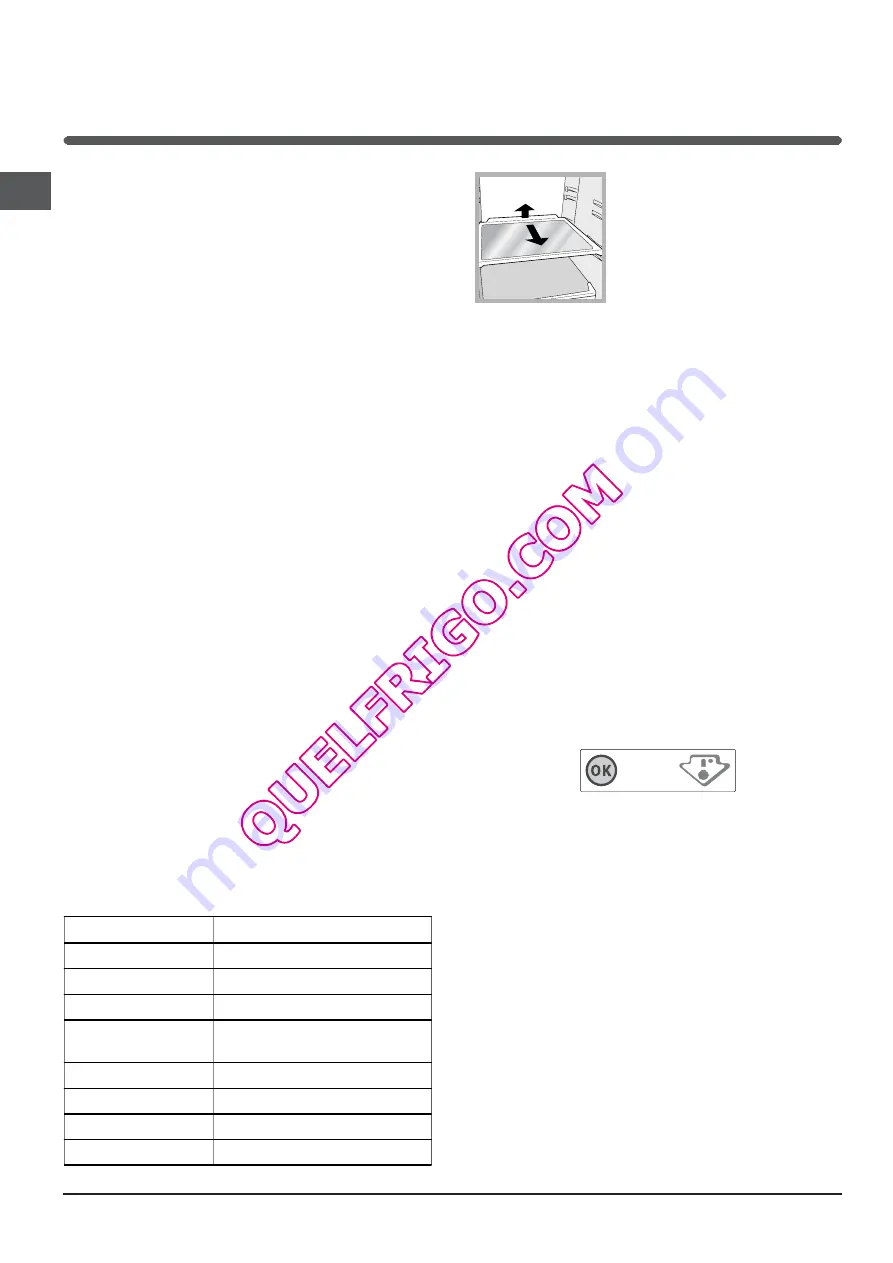
Sono estraibili e regolabili in

altezza grazie alle apposite

guide (

vedi figura

), per

l’inserimento di contenitori

o alimenti di notevole

dimensione. Per regolare

l’altezza non è necessario

estrarre completamente il ripiano.

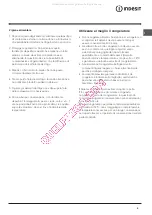
Utilizzare al meglio il frigorifero

• Per regolare la temperatura utilizzare la manopola per

LA REGOLAZIONE DELLA TEMPERATURA (

vedi

Descrizione

).

• Inserire soltanto alimenti freddi o appena tiepidi, non

caldi (

vedi Precauzioni e consigli

).

• Ricordarsi che gli alimenti cotti non si mantengono più

a lungo di quelli crudi.

• Non inserire liquidi in recipienti scoperti:

provocherebbero un aumento di umidità con

conseguente formazione di condensa.

Indicatore

 TEMPERATURA

: per individuare la zona più

fredda del frigorifero.

1. Controllare che sull’indicatore risulti ben evidente OK

(

vedi figura

).

2. Se non compare la scritta OK significa che la

temperatura è troppo elevata: regolare la manopola

FUNZIONAMENTO FRIGORIFERO su una posizione

più alta (più freddo) e attendere circa 10 h finché la

temperatura si sia stabilizzata.

3. Controllare nuovamente l’indicatore: se necessario,

procedere con una nuova regolazione. Se si sono

introdotte grosse quantità di alimenti o si è aperta

frequentemente la porta del frigorifero, è normale che

l’indicatore non segni OK. Attendere almeno 10 h

prima di regolare la manopola FUNZIONAMENTO

FRIGORIFERO su una posizione più alta.

All manuals and user guides at all-guides.com

Summary of Contents for IN SZ 2311

Page 1: ...e l apparecchio Regolazione della temperatura Utilizzare al meglio il frigorifero Utilizzare al meglio il congelatore Manutenzione e cura 6 Escludere la corrente elettrica Pulire l apparecchio Evitare muffe e cattivi odori Sbrinare l apparecchio Sostituire la lampadina Precauzioni e consigli 7 Sicurezza generale Smaltimento Risparmiare e rispettare l ambiente Anomalie e rimedi 8 Assistenza 8 Assis...

Page 2: ... almeno 3 ore prima di collegarlo all impianto elettrico Prima di inserire la spina nella presa della corrente accertarsi che la presa abbia la messa a terra e sia a norma di legge la presa sia in grado di sopportare il carico massimo di potenza della macchina indicato nella targhetta caratteristiche posta nel vano frigorifero in basso a sinistra es 150 W la tensione di alimentazione sia compresa ...

Page 3: ...tato La descrizione degli oggetti più complessi si trova nelle pagine seguenti Variabili per numero e o per posizione Presente solo in alcuni modelli Balconcino estraibile PORTAOGGETTI Scomparto per una BOTTIGLIA da 2 LITRI Balconcino BOTTIGLIE RIPIANO Cassetto FRUTTA e VERDURA Manopola REGOLAZIONE DELLA TEMPERATURA Vano congelatore CONGELAMENTO e CONSERVAZIONE All manuals and user guides at all g...

Page 4: ...ibo Disposizione nel frigorifero EVRI I TIWGI TYPMXS 7STVE M GEWWIXXM JVYXXE I ZIVHYVE SVQEKKM JVIWGLM 7STVE M GEWWIXXM JVYXXE I ZIVHYVE MFM GSXXM 7Y UYEPWMEWM VMTMERS 7EPEQM TERI MR GEWWIXXE GMSGGSPEXE 7Y UYEPWMEWM VMTMERS VYXXE I ZIVHYVE 2IM GEWWIXXM JVYXXE I ZIVHYVE 9SZE 2IPPkETTSWMXS FEPGSRGMRS YVVS I QEVKEVMRE 2IPPkETTSWMXS FEPGSRGMRS SXXMKPMI FMFMXI PEXXI 2IKPM ETTSWMXM FEPGSRGMRM 1 2 RIPIAN...

Page 5: ...gelare alimenti che stanno per scongelare o scongelati tali alimenti devono essere cotti per essere consumati entro 24 ore Gli alimenti freschi da congelare non devono essere posti a contatto con quelli già congelati vanno sistemati sopra la griglia del reparto freezer possibilmente a contatto delle pareti laterali e posteriore dove la temperatura scende sotto i 18 C e garantisce una buona velocit...

Page 6: ... il circuito refrigerante Sbrinare il vano frigorifero Il frigorifero è dotato di sbrinamento automatico l acqua viene convogliata verso la parte posteriore da un apposito foro di scarico vedi figura dove il calore prodotto dal compressore la fa evaporare L unico intervento da fare periodicamente consiste nel pulire il foro di scarico affinché l acqua possa defluire liberamente Sbrinare il vano co...

Page 7: ...entare il consumo di energia L apparecchio è stato progettato e costruito in conformità alle norme internazionali di sicurezza Queste avvertenze sono fornite per ragioni di sicurezza e devono essere lette attentamente Questa apparecchiatura è conforme alle seguenti Direttive Comunitarie 73 23 CEE del 19 02 73 Bassa Tensione e successive modificazioni 89 336 CEE del 03 05 89 Compatibilità Elettroma...

Page 8: ... corrente o non abbastanza da fare contatto oppure in casa non c è corrente La porta non chiude bene o la guarnizione è rovinata La porta viene aperta molto spesso La manopola per LA REGOLAZIONE DELLA TEMPERATURA non è in posizione corretta Il frigorifero è stato riempito eccessivamente La manopola per LA REGOLAZIONE DELLA TEMPERATURA non è in posizione corretta Gli alimenti sono a contatto con la...

Page 9: ...l Maintenance and care 14 Switching the appliance off Cleaning the appliance Avoiding mould and unpleasant odours Defrosting the appliance Replacing the light bulb Precautions and tips 15 General safety Disposal Respecting and conserving the environment Troubleshooting 16 Assistance 16 Operating Instructions Français 17 Italiano 1 English 9 GB I F NL Nederlands 33 Deutsch 25 D IN SZ 2311 IN SZ 231...

Page 10: ...electricity mains Before inserting the plug into the electrical socket ensure the following The appliance is earthed and the plug is compliant with the law The socket can withstand the maximum power of the appliance which is indicated on the data plate located on the bottom left side of the fridge e g 150 W The voltage must be in the range between the values indicated on the data plate located on ...

Page 11: ...ams may not directly represent the appliance purchased For more complex features consult the following pages Varies by number and or position Removable multipurpose SHELVES Compartment for a 2 LITRE BOTTLE BOTTLE shelf SHELVES FRUIT and VEGETABLE bin TEMPERATURE control FREEZER and STORAGE compartment All manuals and user guides at all guides com ...

Page 12: ...UHIULJHUDWRU Fresh fish and meat Above the fruit and vegetable bins Fresh cheese Above the fruit and vegetable bins Cooked food On any shelf Salami bread loaf chocolate On any shelf Fruit and vegetables In the fruit and vegetable bins Eggs On the shelf provided Butter and margarine On the shelf provided Bottles drinks milk On the shelf provided SHELVES with or without grill Due to the special guid...

Page 13: ...d period of time the ideal temperature will not be reached in the freezer compartment and food preservation will be reduced Food hygiene 1 Once you have bought your food remove all external packaging made of paper cardboard or other wrappers which could introduce bacteria or dirt inside your refrigerator 2 Protect the food especially easily perishable items and those that have a strong smell in or...

Page 14: ... the refrigeration circuit beyond repair The refrigerator has an automatic defrosting function water is ducted to the back of the appliance by a special discharge outlet see diagram where the heat produced by the compressor causes it to evaporate It is necessary to clean the discharge hole regularly so that the water can flow out easily Defrosting the freezer compartment If the frost layer is grea...

Page 15: ... the controls or play with the appliance Under no circumstance should they be allowed to sit on the bins or to hang from the door Keep packaging material out of the reach of children It can become a choking or suffocation hazard Disposal Observe local environmental standards when disposing packaging material for recycling purposes The European Directive 2002 96 EC on Waste Electrical and Electroni...

Page 16: ...e contact or there is no power in the house The doors do not close properly or the seals are damaged The doors are opened too frequently The TEMPERATURE ADJUSTMENT knob is not in the correct position The refrigerator or the freezer have been over filled The TEMPERATURE ADJUSTMENT knob is not in the correct position The food is in contact with the back inside wall of the refrigerator The door is no...

Page 17: ... Pour profiter à plein de votre réfrigérateur Pour profiter à plein de votre congélateur Entretien et soins 22 Mise hors tension Nettoyage de l appareil Contre la formation de moisissures et de mauvaises odeurs Dégivrage de l appareil Remplacement de l ampoule d éclairage Précautions et conseils 23 Sécurité générale Mise au rebut Economies et respect de l environnement Anomalies et remèdes 24 Assi...

Page 18: ...oins 3 heures avant de le raccorder à l installation électrique Avant de brancher la fiche dans la prise de courant assurez vous que la prise est bien munie d une terre conforme à la loi la prise est bien apte à supporter la puissance maximale de l appareil indiquée sur la plaquette signalétique placée à l intérieur du compartiment réfrigérateur en bas à gauche ex 150 W la tension d alimentation e...

Page 19: ... l appareil que vous avez acheté Vous trouverez dans les pages suivantes la description des objets plus complexes Leur nombre et ou leur emplacement peut varier Balconnet amovible PORTE OBJETS Compartment for a 2 LITRE BOTTLE Balconnet BOUTEILLES CLAYETTE Bac FRUITS et LEGUMES Compartiment CONGELATION et CONSERVATION Compartiment CONGELATION et CONSERVATION All manuals and user guides at all guide...

Page 20: ... aliments 1 2 Alim ents Rangement à l intérieur du réfrigérateur Viande et poisson évidé Au dessus des bacs à fruits et légum es From ages frais Au dessus des bacs à fruits et légum es Alim ents cuits Sur n im porte quelle clayette Saucissons pain de m ie chocolat Sur n im porte quelle clayette Fruits et légum es Dans les bacs à fruits et à légum es Œ ufs Dans le balconnet prévu Beurre et m argari...

Page 21: ...z pas des aliments décongelés ou en cours de décongélation il faut les faire cuire et les consommer dans les 24 heures Les aliments frais à congeler ne doivent pas être placés au contact d aliments déjà congelés il faut les stocker sur la clayette du compartiment freezer et de préférence tout contre ses parois latérales et arrière où la température qui descend au dessous de 18 C garantit une vites...

Page 22: ...ement le circuit réfrigérant Dégivrage du compartiment réfrigérateur Le réfrigérateur est muni d un système de dégivrage automatique l eau est acheminée vers la paroi arrière par un trou d évacuation voir figure où la chaleur produite par le compresseur la fait évaporer Il vous suffit de nettoyer périodiquement le trou d évacuation pour permettre à l eau de s écouler normalement Dégivrage du compa...

Page 23: ... et en bon état pour qu ils adhèrent bien aux portes et ne laissent pas le froid s échapper voir Entretien L appareil a été conçu et fabriqué conformément aux normes internationales de sécurité Ces conseils sont fournis pour des raisons de sécurité et doivent être lus attentivement Cet appareil est conforme aux Directives Communautaires suivantes 73 23 CEE du 19 02 73 Basse Tensione et modificatio...

Page 24: ... s allume pas Le réfrigérateur a un rendement insuffisant Les aliments gèlent à l intérieur du réfrigérateur Le moteur est branché en permanence L appareil est très bruyant Formation de givre ou de gouttelettes d eau sur la paroi arrière du compartiment réfrigérateur Il y a de l eau dans le fond du réfrigérateur Causes Solution possibles La fiche n est pas branchée dans la prise de courant ou pas ...

Page 25: ...emperatureinstellung Optimaler Gebrauch des Kühlschranks Optimaler Gebrauch des Gefrierfachs Wartung und Pflege 30 Abschalten Ihres Gerätes vom Stromnetz Reinigung Ihres Gerätes Vermeidung von Schimmelpilz und Geruchsbildung Abtauen Ihres Gerätes Lampenaustausch Vorsichtsmaßregeln und Hinweise 31 Allgemeine Sicherheit Entsorgung Energie sparen und Umwelt schonen Störungen und Abhilfe 32 Kundendien...

Page 26: ... Sie nach dem Transport etwa 3 Stunden bevor Sie das Gerät an das Elektronetz anschließen Vor Einfügen des Steckers in die Steckdose ist sicherzustellen dass die Steckdose über eine normgerechte Erdung verfügt die Steckdose die auf dem Typenschild befindlich im Kühlschrank unten links angegebene max Leistungsaufnahme des Gerätes trägt z B 150 W die Netzspannung den auf dem Typenschild befindlich i...

Page 27: ...über die Ihr Gerät nicht verfügt Die Beschreibung weiterer Komponenten ersehen Sie auf nachfolgender Seite Unterschiedliche Anzahl und Platzierung Abnehmbare Ablage für TUBEN UND DOSEN Fach für eine 2 LITER FLASCHE Ablage für FLASCHEN ABLAGE Schale für OBST und GEMÜSE TEMPERATURREGLER Gefrierfach GEFRIEREN und LAGERN All manuals and user guides at all guides com ...

Page 28: ...he Installation Bevor Sie das Gerät anschließen müssen die Fächer und das Zubehör gründlich mit lauwarmem Wasser und Bikarbonat gereinigt werden 1 Stecken Sie den Netzstecker in die Steckdose und stellen Sie sicher dass sich die Innenbeleuchtung einschaltet 2 Drehen Sie den TEMPERATURSCHALTER auf einen mittleren Wert Nach einigen Stunden können die Lebensmittel in den Kühlschrank eingeräumt werden...

Page 29: ...zu dicht aneinander an sodass die Luft im Inneren des Geräts frei zirkulieren kann 4 Reinigen Sie das Innere des Kühlschranks regelmäßig Verwenden Sie dazu keine Oxidations oder Scheuermittel 5 Nehmen Sie die Nahrungsmittel deren max Haltbarkeitsdatum verstrichen ist aus dem Kühlschrank 6 Bewahren Sie leicht verderbliche Nahrungsmittel Weichkäse roher Fisch Fleisch etc im kühlsten Bereich des Kühl...

Page 30: ...ie den Kühlkreis hoffungslos beschädigen könnten Abtauen des Kühlschranks Der Kühlschrank taut automatisch ab Das Tauwasser wird nach hinten durch eine kleine Ablauföffnung siehe Abbildung abgeleitet wo es dank der vom Kompressor erzeugten Wärme verdampft Diese kleine Öffnung sollte jedoch regelmäßig gereinigt werden damit das Tauwasser unbehindert ablaufen kann Abtauen des Gefrierfachs Ist die Re...

Page 31: ...ehe Wartung Das Gerät wurde nach den strengsten internationalen Sicherheitsvorschriften entworfen und gebaut Nachstehende Hinweise werden aus Sicherheitsgründen geliefert und sollten aufmerksam gelesen werden Dieses Gerät entspricht den folgenden EG Richtlinien 73 23 EWG vom 19 02 73 Niederspannung und nachfolgenden Änderungen 89 336 EWG vom 03 05 89 elektromagnetische Verträglichkeit und nachfolg...

Page 32: ...t nicht in der Steckdose oder er sitzt nicht fest so dass kein Kontakt hergestellt wird oder es besteht ein Stromausfall Die Türen schließen nicht gut bzw die Dichtungen sind verschlissen Die Türen werden zu oft geöffnet Der TEMPERATURSCHALTER ist nicht richtig eingestellt Der Kühlschrank oder das Gefrierfach wurde zu sehr beladen Die Geräte Betriebsraumtemperatur liegt unter 14 C Der TEMPERATURSC...

Page 33: ...n Optimaal gebruik van de koelkast Optimaal gebruik van de diepvrieskast Onderhoud en verzorging 38 De elektrische stroom afsluiten Het apparaat reinigen Het vermijden van schimmel en vervelende luchtjes Het apparaat ontdooien Het lampje vervangen Voorzorgsmaatregelen en advies 39 Algemene veiligheid Afvalverwijdering Het milieu sparen en respecteren Storingen en oplossingen 40 Service 40 IN SZ 23...

Page 34: ...t aan het elektriciteitsnet Voordat u de stekker in het stopcontact steekt dient u zich ervan te verzekeren dat het stopcontact geaard is en voldoet aan de geldende normen het stopcontact in staat is het maximale vermogen van het apparaat te dragen zoals aangegeven op het typeplaatje dat zich onderin links in het koelgedeelte bevindt bv 150 W de spanning zich bevindt tussen de waarden die staan aa...

Page 35: ...et door u aangeschafte apparaat De beschrijving van de meest complexe elementen vind u terug in de volgende pagina s Deze kunnen variëren voor wat betreft aantal of positie Uitneembaar vak voor VARIA Ruimte voor een 2 LITER FLES Vak voor FLESSEN DRAAGPLATEAU GROENTE en FRUITLADE TEMPERATUURKNOP Diepvriesgedeelte INVRIES en BEWAARGEDEELTE All manuals and user guides at all guides com ...

Page 36: ...p de volgende wijze te rangschikken 1 2 WHQVZDUHQ 3ODDWVLQJ LQ GH NRHONDVW Vlees en vis Op de laden voor groente en fruit Verse kaas Op de laden voor groente en fruit Gekookte etensw aren W aar u m aar wilt Vleesw aren brood chocolade W aar u m aar wilt Groente en fruit In de groente en fruitladen Eieren In het speciale rek Boter en m argarine In het speciale rek Flessen frisdrank m elk In het spe...

Page 37: ...roide où est situé l indicateur de température Optimaal gebruik van de diepvrieskast Vries nooit etenswaar in die op het punt staat te ontdooien of al is ontdooid dergelijke etenswaar moet gelijk worden gekookt en gegeten binnen 24 uur Verse etenswaren die moeten worden ingevroren mogen nooit in contact raken met etenswaren die al bevroren zijn Plaats nooit glazen flessen met vloeistof in de diepv...

Page 38: ...r kunnen beschadigen Het ontdooien van het koelgedeelte De koelkast is voorzien van een automatische ontdooifunctie het water wordt door een speciale afvoeropening zie afbeelding naar de achterkant geleid waar de warmte van de compressor het doet verdampen Het enige wat u af en toe moet doen is de opening reinigen en controleren of het water vrijuit kan afvloeien Het ontdooien van het diepvriesged...

Page 39: ...ingen efficiënt en schoon zodat ze goed aan de deuren sluiten en de kou niet laten ontsnappen zie Onderhoud Het apparaat is ontworpen en vervaardigd volgens de geldende internationale veiligheidsvoorschriften Deze aanwijzingen zijn geschreven voor uw veiligheid en u dient ze derhalve goed door te nemen Dit apparaat voldoet aan de volgende EU Richtlijnen 73 23 EEG van 19 02 73 Laagspanning en daaro...

Page 40: ...ssingen De stekker zit niet in het stopcontact of niet voldoende om contact te maken Wellicht zit het hele huis zonder stroom De deuren sluiten niet goed of de afdichtingen zijn versleten De deuren worden vaak geopend De knop van de TEMPERATUURREGELING staat niet op de goede stand De koelkast of de diepvrieskast zijn overmatig gevuld De knop van de TEMPERATUURREGELING staat niet op de goede stand ...

Reviews: