background image

GB

3

TABLE OF CHARACTERISTSICS


Dimensions 
Oven HxDxW


34x39x44


Volume


60 l


Useful 
measurements 
relating to the oven 
compartment


width 42 cm  
depth 44 cm  
height 18 cm


Voltage and 
frequency


see data plate


Electric Hob 

 
Rapid Ø 180 mm:                       2000 W 

Rapid Ø 145 mm:                       1500 W 
Max. Hob Power Absorption:     7000 W 

ENERGY LABEL


Directive 2002/40/EC on the label of 
electric ovens. 
Standard EN 50304 
 
Energy consumption for Natural 
convection – heating mode:


 Static 

mode;


This appliance conforms to the following 
European Economic Community 
directives: 2006/95/EC dated 12/12/06 
(Low Voltage) and subsequent 
amendments - 04/108/EC dated 
15/12/04 (Electromagnetic 
Compatibility) and subsequent 
amendments - 93/68/EEC dated 
22/07/93 and subsequent amendments.


2002/96/EEC 
1275/2008 (Stand-by/ Off mode)


V

Fig. A

Fig. B

Connecting the supply cable to the mains
WARNINGS: THIS APPLIANCE MUST BE EARTHED.
Important:

 The cooker must be connected to the mains by a

switched (double pole) cooker outlet correctly fused with a
capacity appropriate to that shown on the cooker Rating Plate.
All electrical wiring from the consumer unit to the cooker, via the
switched double pole cooker outlet, must be of an acceptable
type and current rating as above.

Note:

 the supply cable must be positioned so that it never

reaches at any point a temperature 50°C higher than the room

temperature. The cable must be routed away from the rear vents.

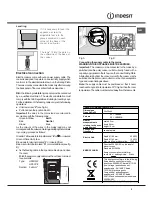
700 mm

HOT PARTS

Electrical connection

Electric cookers come without a power supply cable. The
cooker is designed to operate on an electricity supply which
conforms to the electrical data shown on the Rating Plate.
The cooker can be connected to the mains only after removing
the back panel of the cooker itself with a screwdriver.

N.B.:

 the following installation procedure must be carried out

by a qualified electrician. The electrical installation must
comply with the IEE Regulations, Building & local By-Lays.
For the installation of the feeding cable carry out the following
operations:

z

Unscrew screw “

V

” (see fig. A)

z

Pull and open the junction blok lid

Important:

 the wires in the mains lead are coloured in

accordance with the following code:

Green & Yellow

Earth

Blue

Neutral

Brown

Live

As the colours of the wires in the mains lead may not
correspond with the coloured markings identifying the terminals
in your plug, proceed as follows:

Green & Yellow wire to terminal marked “

E

” or 

6

6

6

6

6

 or coloured

Green or Green & Yellow.
Brown wire to terminal marked “

L

” or coloured Red.

Blue wire to terminal marked “

N

” or coloured Black (see fig.

B).

z

fix the feeding cable in the special cable stop and close
the cover.

N.B.:

 the power supply cable must have these minimum

requirements:
Type:

H05RR-F

                   H05VV-F

Section:

3x4 mm

2

Levelling

If it is necessary to level the
appliance, screw the
adjustable feet into the
places provided on each
corner of the base of the
cooker (

see figure).

The legs* fit into the slots on
the underside of the base of
the cooker.

IS50ES
IS50E1S

58 l


Summary of Contents for IS50E1S

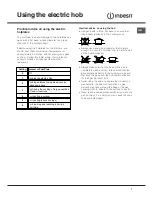
Page 1: ...e 5 Using the oven Cooking modes Practical cooking advice Oven cooking advice table Using the electric hob 7 Switching the cooking zones on and off Cooking zones Precautions and tips 9 General safety Disposal Respecting and conserving the environment Maintenance and care 10 Switching the appliance off Cleaning the appliance Replacing the oven light bulb Cleaning the hob Assistance IS50ES IS50E1S E...

Page 2: ...isted in the relevant operating manual Installation HOOD 420 Min min 650 mm with hood min 700 mm without hood mm 600 Min mm 420 Min mm WARNING The appliance and its accessible parts become hot during use Care should be taken to avoid touching heating elements Children less than 8 years of age shall be kept away unless continuously supervised This appliance can be used by children aged from 8 years...

Page 3: ...emustberoutedawayfromtherearvents 700 mm HOT PARTS Electrical connection Electric cookers come without a power supply cable The cookerisdesignedtooperateonanelectricitysupplywhich conforms to the electrical data shown on the Rating Plate Thecookercanbeconnectedtothemainsonlyafterremoving the back panel of the cooker itself with a screwdriver N B thefollowinginstallationproceduremustbecarriedout by...

Page 4: ...CTIVE HOTPLATE knobs THERMOSTAT indicator light ACTIVE HOTPLATE indicator light Timer knob Control panel GRILL rack DRIPPING PAN GUIDE RAILS for the sliding racks position 3 position 2 position 1 Electric hob Adjustable foot Adjustable foot position 5 position 4 Only available in certain models ...

Page 5: ...l coating being damaged Always place cookware on the rack s provided THERMOSTAT indicator light When this is illuminated the oven is generating heat It switches off when the inside of the oven reaches the selected temperature At this point the light illuminates and switches off alternately indicating that the thermostat is working and is maintaining the temperature at a constant level Oven light T...

Page 6: ...ces to keep them tender GRILL mode The top heating element is activated The grill is also highly recommended for dishes that require a high surface temperature beef steaks veal rib steak fillets hamburgers etc Important When using the grill the oven Important When using the grill the oven Important When using the grill the oven Important When using the grill the oven Important When using the grill...

Page 7: ...me cookware that is used on gas burners the heat concentration on gas burners may have warped the base of the pan causing it not to adhere to the surface correctly Never leave a cooking zone switched on without a pan on top of it as doing so may cause the zone to become damaged Practical advice on using the electric hotplates To avoid heat loss and damage to the hotplates use pans with a flat base...

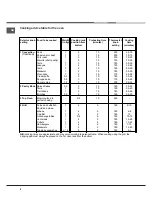
Page 8: ...6 18 96 76 78 78 6 86 6 76 78 6 86 76 78 96 98 76 78 2 Pastr o e aised Cakes arts Fruit cakes rioches 6 8 1 1 6 8 7 7 7 7 18 18 18 18 1 6 1 6 1 6 1 6 76 6 78 6 86 6 98 76 3 o en rowning food to perfect cooking 7 18 996 4 rill oles and cuttlefish quid and prawn kebabs Cod filet Drilled vegetables Jeal steak Cutlets Kamburgers ackerels oasted sandwiches 1 1 1 1 1 1 1 1 n M 7 8 8 8 8 8 8 8 8 8 1 6 1 ...

Page 9: ...ncebreaksdown undernocircumstancesshould youattempttorepairtheapplianceyourself Repairscarried outbyinexperiencedpersonsmaycauseinjuryorfurther malfunctioning of the appliance Contact Assistance Do not rest heavy objects on the open oven door If the cooker is placed on a pedestal take the necessary precautions to prevent the same from sliding off the pedestal itself Donotplaceflammablematerialsint...

Page 10: ...kewarm Use hot water and detergent then rinse well and dry with a soft cloth Do not use abrasive products Clean the glass part of the oven door using a sponge and a non abrasive cleaning product then dry thoroughly with a soft cloth Do not use rough abrasive material or sharp metal scrapers as these could scratch the surface and cause the glass to crack The accessories can be washed like everyday ...

Page 11: ...GB 1 1 ...

Page 12: ...1 2 GB 05 2012 195103808 01 XEROX FABRIANO ...

Reviews: