background image

GB

7

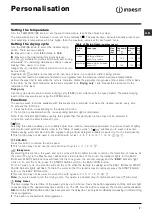
Setting the temperature

Turn  the  TEMPERATURE  knob  to  set  the  wash  temperature  (see 

Table  of  wash  cycles

).

The  temperature  may  be  lowered,  or  even  set  to  a  cold  wash 

.  The  washer-dryer  will  automatically  prevent  you

from  selecting  a  temperature  which  is  higher  than  the  maximum  value  set  for  each  wash  cycle.

Setting the drying cycle

Turn  the  DRYING  knob  to  select  the  desired  drying
option.  There  are  two  options:

A

  -  Based  on  time:  From 

40 

minutes  to 

180

.

B

  -  Based  on  the  desired  laundry  dryness  level:

Iron dry


: suitable for clothes which will need ironing

afterwards.  the  remaining  dampness  softens  creases,
making  them  easier  to  remove.

Hanger dry


: ideal for clothes which do not need to

be dried fully.

Cupboard dry 

:  suitable  for  laundry  which  can  be  put  back  in  a  cupboard  without  being  ironed.

If your laundry load to be washed and dried is much greater than the maximum stated load (see adjacent table),
perform  the  wash  cycle,  and  when  the  cycle  is  complete,  divide  the  garments  into  groups  and  put  some  of  them  back
in the drum. At this point, follow the instructions provided for a "

Drying only

" cycle. Repeat this procedure for the

remainder  of  the  load.

Drying  only

Use the cycle selector knob to select a drying cycle (

11-12

) in accordance with the type of fabric. The desired drying

level or time may also be set using the DRYING  knob.

Functions

The  various  wash  functions  available  with  this  washer-dryer  will  help  to  achieve  the  desired  results,  every  time.
To  activate  the  functions:
1.  Press  the  button  corresponding  to  the  desired  function;
2.  the  function  is  enabled  when  the  corresponding  indicator  light  is  illuminated.

Note:  If  the  indicator  light  flashes  rapidly,  this  signals  that  this  particular  function  may  not  be  selected  in
conjunction  with  the  selected  wash  cycle.

Selecting this option enables you to suitably adjust drum rotation, temperature and water to a reduced load of lightly
soiled cotton and synthetic fabrics (refer to the 

"Table of wash cycles"

). “

” enables you to wash in less time

thereby  saving  water  and  electricity.  We  suggest  using  a  liquid  detergent  suitably  measured  out  to  the  load  quantity.

 This function may not be used in conjunction with cycles 1, 2, 6, 7, 8, 9, 10, 11, 12, 13, 

,


.

 1000-500

Press  this  button  to  reduce  the  spin  speed


This  function  may  not  be  used  in  conjunction  with  cycles  7, 11,  12,  13, 

.

  Easy  iron

By  selecting  this  function,  the  wash  and  spin  cycles  will  be  modified  in  order  to  reduce  the  formation  of  creases.  At
the  end  of  the  cycle  the  Washer-dryer  will  perform  slow  rotations  of  the  drum;  the  indicator  lights  for  the  EASY
IRON  and  START/PAUSE  options  will  flash  (the  first  one  green,  the  second  orange)  and  the  "

END

"  indicator  light

turns  on.  To  end  the  cycle,  press  the  START/PAUSE  button  or  the  EASY  IRON  button.
For  the  7  wash  cycle,  the  machine  will  end  the  cycle  while  the  laundry  is  soaking  and  the  EASY  IRON  and  START/
PAUSE  indicator  lights  will  flash.  To  drain  the  water  so  that  the  laundry  may  be  removed,  press  the  START/PAUSE
button  or  the  EASY  IRON  button.


This function may not be used in conjunction with cycles 6, 9, 10, 11, 12, 13, 

,


.

Note:

  If  you  also  want  to  run  the  drying  cycle,  this  option  is  enabled  only  if  combined  with  level 

  (Iron  dry).

  Delay  timer

This timer delays the start time of the wash cycle by up to 9 hours. Press the button repeatedly until the indicator light
corresponding to the desired delay time switches on. The fifth time the button is pressed, the function will be disabled.

N.B.

 Once the START/PAUSE button has been pressed, the delay time can only be modified by decreasing it until launching

the  set  programme.

This option is enabled with all programmes.

Personalisation

Fabric

type

Load type

Max.
load
(kg)

Cupboard

dry

Hanger

dry

Iron

dry

Cotton

Clothing of different

sizes, Terry towels

5

180

170

140

Synthetics Sheets, Shirts, Pyjamas,

socks, etc.

3

140

120

100

Table of Drying times 

(guideline values)

Summary of Contents for IWDC 7105

Page 1: ...and laundry 8 Detergent dispenser drawer Preparing the laundry Garments requiring special care Load balancing system Precautions and tips 9 General safety Disposal Care and maintenance 10 Cutting off...

Page 2: ...resting it up against walls furniture cabinets or anything else 2 If the floor is not perfectly level compen sate for any unevenness by tightening or loosening the adjustable front feet see figure the...

Page 3: ...t be underwater We advise against the use of hose extensions if it is absolutely necessary the extension must have the same diameter as the original hose and must not exceed 150 cm in length Electrica...

Page 4: ...he door may be opened or not see next page START PAUSE button with indicator light starts or temporarily interrupts the wash cycles N B To pause the wash cycle in progress press this button the corres...

Page 5: ...oor locked indicator light When the indicator light is on the porthole door is locked to prevent it from being opened make sure the indicator light is off before opening the door wait approximately 3...

Page 6: ...ash cycle for cottons set wash cycle 4 with a temperature of 40 C Wash cycles Table of wash cycles Description of the wash cycle Max temp C Max speed rpm Drying Detergents Max load kg Cycle duration P...

Page 7: ...rum rotation temperature and water to a reduced load of lightly soiled cotton and synthetic fabrics refer to the Table of wash cycles enables you to wash in less time thereby saving water and electric...

Page 8: ...kg Delicate fabrics max 2 kg Wool max 1 5 kg Silk max 1 kg How much does your laundry weigh 1 sheet 400 500 g 1 pillow case 150 200 g 1 tablecloth 400 500 g 1 bathrobe 900 1200 g 1 towel 150 250 g Ga...

Page 9: ...from the electricity socket Hold the plug and pull Do not open the detergent dispenser drawer while the machine is in operation Do not touch the drained water as it may reach extremely high temperatu...

Page 10: ...rom forming Cleaning the pump The washer dryer is fitted with a self cleaning pump which does not require any maintenance Sometimes small items such as coins or buttons may fall into the pre chamber w...

Page 11: ...wall drainage system is not fitted with a breather pipe If the problem persists even after these checks turn off the water tap switch the appliance off and contact the Assistance Service If the dwelli...

Page 12: ...ised Technical Assistance Centre using the telephone number provided on the guarantee certificate Always request the assistance of authorised technicians Have the following information to hand the typ...

Page 13: ...CIS 13 CIS 19 14 15 16 17 18 19 20 21 22 23 24...

Page 14: ...14 CIS 1 2 3 4 4 5 1 2 2 1 3 4 gas 2 3...

Page 15: ...5 100 150 2 IWDC 7105 59 5 85 53 5 1 7 1 5 220 240 V 50 Hz K K I max 1 10 min 0 05 0 5 52 1000 K EN50229 2 60 7 2 K 5 K 2004 108 2006 95 CE 2002 96 CE cert rus indesit com S N XXXXXXXXX 1 S N 2 3 S N...

Page 16: ...16 CIS A A 30 A...

Page 17: ...CIS 17 0 3 1 2 3 4 5 6 7 8 9 C...

Page 18: ...000 l l l 7 3 5 130 104 K 3 40 1000 l l l 7 3 5 92 71 K 60 800 l l l 3 2 85 72 40 600 l l 1 5 55 K 30 0 l l 1 55 40 800 l l l 3 80 30 600 l l 3 68 30 600 l l 2 50 a K l 5 K l 3 a 30 1000 l l l 0 5 35...

Page 19: ...CIS 19 A 40 180 B 11 12 1 2 T 1 2 6 7 8 9 10 11 12 13 1000 500 7 11 12 13 END 7 6 9 10 11 12 13 9 5 180 170 140 C 3 140 120 100...

Page 20: ...20 CIS 1 2 3 7 3 2 1 5 1 1 400 500 1 150 200 1 400 500 1 900 1200 1 150 250 1 2 3 6 1 5 7 7 Jeans 8...

Page 21: ...CIS 21 2002 96...

Page 22: ...22 CIS 1 2 3 4 5...

Page 23: ...CIS 23 A 65 100 1 0...

Page 24: ...24 CIS Indesit Company 47 60044 01 01 2011 129223 46 01 01 2011 127018 12 1...

Page 25: ...ce Przygotowanie bielizny Tkaniny wymagaj ce szczeg lnego traktowania System r wnowa enia adunku Zalecenia i rodki ostro no ci 33 Og lne zasady bezpiecze stwa Utylizacja Utrzymanie i konserwacja 34 O...

Page 26: ...eble itp 2 Je li pod oga nie jest idealnie pozioma nale y skompensowa nier wno ci odkr caj c lub dokr caj c przednie n ki patrz rysunek k t nachylenia zmierzony na g rnym blacie pralki nie powinien pr...

Page 27: ...u pralki gniazdko elektryczne powinno by atwo dost pne Nie u ywa przed u aczy ani rozga nik w Przew d nie powinien by pozginany ani przygnieciony Przew d zasilania elektrycznego mo e by wymieniany wy...

Page 28: ...jest otwarcie okr g ych drzwiczek patrz strona obok Przycisk z kontrolk START PAUZA do uruchamiania program w lub ich chwilowego przerywania N B aby przerwa wykonywane pranie nale y nacisn ten przyci...

Page 29: ...zwiczki kontrolka musi by wy czona odczeka oko o 3 minuty Aby otworzy drzwiczki w trakcie wykonywania cyklu nale y nacisn przycisk START PAUZA je li kontrolka BLOKADY OKR G YCH DRZWICZEK jest wy czona...

Page 30: ...FHAII 9 ID HO 30 1000 l l l 0 5 35 Programy czesciowe Plukanie 1000 l l 7 36 Wirowanie 1000 l 7 16 Wydalanie wody 0 7 2 Programy specjalne Sport Light program 9 zosta opracowany do prania tkanin u ywa...

Page 31: ...nych i syntetycznych o niewielkim stopniu zabrudzenia patrz Tabela program w mo esz pra szybciej oszcz dzaj c wod i energi Zaleca si stosowa p ynny rodek do prania dostosowuj c jego ilo do ilo ci wsad...

Page 32: ...1 5 kg Jedwab max 1 kg Ile wa y bielizna 1 prze cierad o 400 500 gr 1 poszewka 150 200 gr 1 obrus 400 500 gr 1 szlafrok 900 1 200 gr 1 r cznik 150 250 gr 1 2 3 Tkaniny wymagaj ce szczeg lnego traktowa...

Page 33: ...ci gn c za kabel lecz trzymaj c za wtyczk W trakcie pracy maszyny nie otwiera szufladki na rodki pior ce Nie dotyka odprowadzanej wody gdy mo e ona osi ga wysokie temperatury W adnym wypadku nie otwi...

Page 34: ...py Pralka wyposa ona jest w pomp samoczyszcz c kt ra nie wymaga zabieg w konserwacyjnych Mo e si jednak zdarzy e drobne przedmioty monety guziki wpadn do komory wst pnej zabezpieczaj cej pomp kt ra zn...

Page 35: ...a odpowietrznika Je li po sprawdzeniu tych mo liwo ci problem nie zostanie rozwi zany nale y zamkn kurek dop ywu wody wy czy pralk i wezwa Serwis Techniczny Je li mieszkanie znajduje si na najwy szych...

Page 36: ...uruchomi program i sprawdzi czy problem nie znikn Je li nie zwr ci si do autoryzowanego Serwisu Technicznego dzwoni c pod numer podany w karcie gwarancyjnej Nigdy nie wzywa nieautoryzowanych technik w...

Page 37: ...37 GR 38 39 40 41 42 43 44 45 46 47 48 GR IWDC 7105...

Page 38: ...38 GR 1 2 3 4 4 5 1 2 2 1 3 4 gas 2 3...

Page 39: ...39 GR 65 100 cm 65 100 cm 150 cm 2 IWDC 7105 cm 59 5 cm 85 cm 53 5 1 7 kg 1 5 kg 1 MPa 10 bar 0 05 MPa 0 5 bar 52 1000 EN 50229 2 60 C 7 kg 2 kg 5 kg 89 336 CEE 03 05 89 2002 96 CE 2006 95 CE...

Page 40: ...40 GR stand by stand by 30...

Page 41: ...41 GR 0 3 1 2 3 4 5 6 7 8 9...

Page 42: ...l l 7 3 5 92 71 5 K 60 800 l l l 3 2 85 72 Special 6 cachemire 40 600 l l 1 5 55 7 30 0 l l 1 55 8 JEANS 40 800 l l l 3 80 9 Sport Light 30 600 l l 3 68 10 Sport Shoes 30 600 l l MAX 2 50 11 l 5 12 l...

Page 43: ...43 GR A 40 180 B 11 12 1 2 1 2 6 7 8 9 10 11 12 13 1000 500 7 11 12 13 END 7 6 9 10 11 12 13 9 ax kg 5 180 170 140 3 140 120 100...

Page 44: ...44 GR 1 2 3 max 7 kg max 3 kg max 2 kg max 1 5 kg max 1 kg 1 400 500 gr 1 150 200 gr 1 400 500 gr 1 900 1 200 gr 1 150 250 gr 6 1 5 kg 1 2 3 7 7 Jeans 8...

Page 45: ...45 GR 2002 96 EK...

Page 46: ...46 GR 1 2 3 4 5...

Page 47: ...47 GR 65 100 cm 1 0...

Page 48: ...48 GR Mod S N...

Page 49: ...anmas Fonksiyonlar Deterjan ve ama r 56 Deterjan haznesi Beyazlatma i levi ama r n haz rlanmas zel ama rlar Y k dengeleme sistemi nlemler ve neriler 57 Genel g venlik uyar lar At klar n tasfiye edilme...

Page 50: ...emine yerle tiriniz duvar veya mobilyalara dayamay n z 2 Yerle tirilecek zemin tam d z de ilse ama r makinesinin vidal n ayaklar n s karak veya gev eterek dengeyi sa lay n z bkz ekil e im a s makineni...

Page 51: ...edilen ama r makinesinin fi inin kolayl kla eri ilebilir olmas gerekir Uzatma kablosu ile oklu prizler kullanmay n z Kablonun ezilmemesi ve katlanmamas gerekir Beslenme kablosunun yaln zca yetkili tek...

Page 52: ...s i in kalan s reyi g sterir bkz yan sayfa KAPAK K L TL g stergesi ama r makinesinin kapa n n a labilirli ini g rmek i in bkz yan sayfa BA LAT DURDUR uyar lambal tu programlar ba latmak yada ge ici ol...

Page 53: ...G sterge a k oldu unda yan kapak a lmamas i in kilitlenir kapa a madan nce g sterge n n kapal oldu undan emin olunuz yakla k 3 dakika bekleyiniz Devam eden y kama devri s ras nda kapa a mak i in BA LA...

Page 54: ...por Ayakkab lar 30 600 l l En fazla 2 ift 50 Kurutma programlar 11 Pamuklular n Kurutmas l 5 12 Sentetiklerin Kurutmas l 3 13 H zl Y kama Kurutma 30 1000 l l l 0 5 35 Ek Programlar Durulama 1000 l l 7...

Page 55: ...azaltmak i in tambur y n n s cakl k ve suyu uygun bir ekilde ayarlayabilirsiniz daha k sa s rede y kaman z ve dolay s yla su ve elektrikten tasarruf etmenizi sa lar Y k miktar na g re l lm s v deterj...

Page 56: ...5 kg pekliler max 1 kg ama rlar n a rl nedir 1 ar af 400 500 gr 1 yast k k l f 150 200 gr 1 masa rt s 400 500 gr 1 bornoz 900 1 200 gr 1 havlu 150 250 gr zel ama rlar Y nl ler t m y nl k yafetler zer...

Page 57: ...nlar seriniz Cihaza ayaklar n z plakken yada elleriniz veya ayaklar n z slak yada nemliyken dokunmay n z Fi i prizden ekerken kablosundan de il fi in kendisinden tutarak ekiniz Makine al rken deterjan...

Page 58: ...ama r makinesinin pompas kendini temizleyen bir zelli e sahip olup ayr ca temizlik gerektirmez Ancak baz k k cisimler madeni para d me pompan n alt k sm ndaki koruyucu b lmeye d ebilirler Y kama devr...

Page 59: ...Tahliye hortumunun ba suya girmi bkz Montaj Duvardaki tahliyenin hava bo lu u yok Bu kontrollerden sonra olumlu sonu al namazsa muslu u ve kapat p ama r makinesini durdurarak Servise haber veriniz Da...

Page 60: ...elgesinde belirtilen telefon numaralar ndan teknik servisi aray n z Kesinlikle yetkili olmayan tamircilere m racaat etmeyiniz unlar bildiriniz ar za tipini cihaz n modeli Mod seri numaras S N Bu bilgi...

Reviews: