background image

14

GB

Installation

 This instruction manual should be kept in a safe

place for future  reference. If the washer-dryer is sold,

transferred  or  moved,  make  sure  that  the  instruction

manual  remains  with  the  machine  so  that  the  new

owner is able to familiarise himself/herself with its

operation  and  features.


Read  these  instructions  carefully:  they  contain  vital

information relating to the safe installation and

operation  of  the  appliance.

Unpacking and levelling

Unpacking

1.  Remove  the  washer-dryer  from  its  packaging.

2.  Make  sure  that  the  washer-dryer  has  not  been

damaged during the transportation process. If it has

been  damaged,  contact  the  retailer  and  do  not

proceed  any  further  with  the  installation  process.

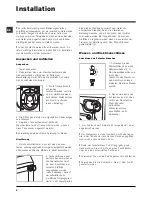
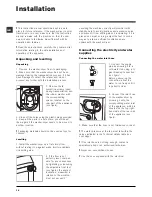
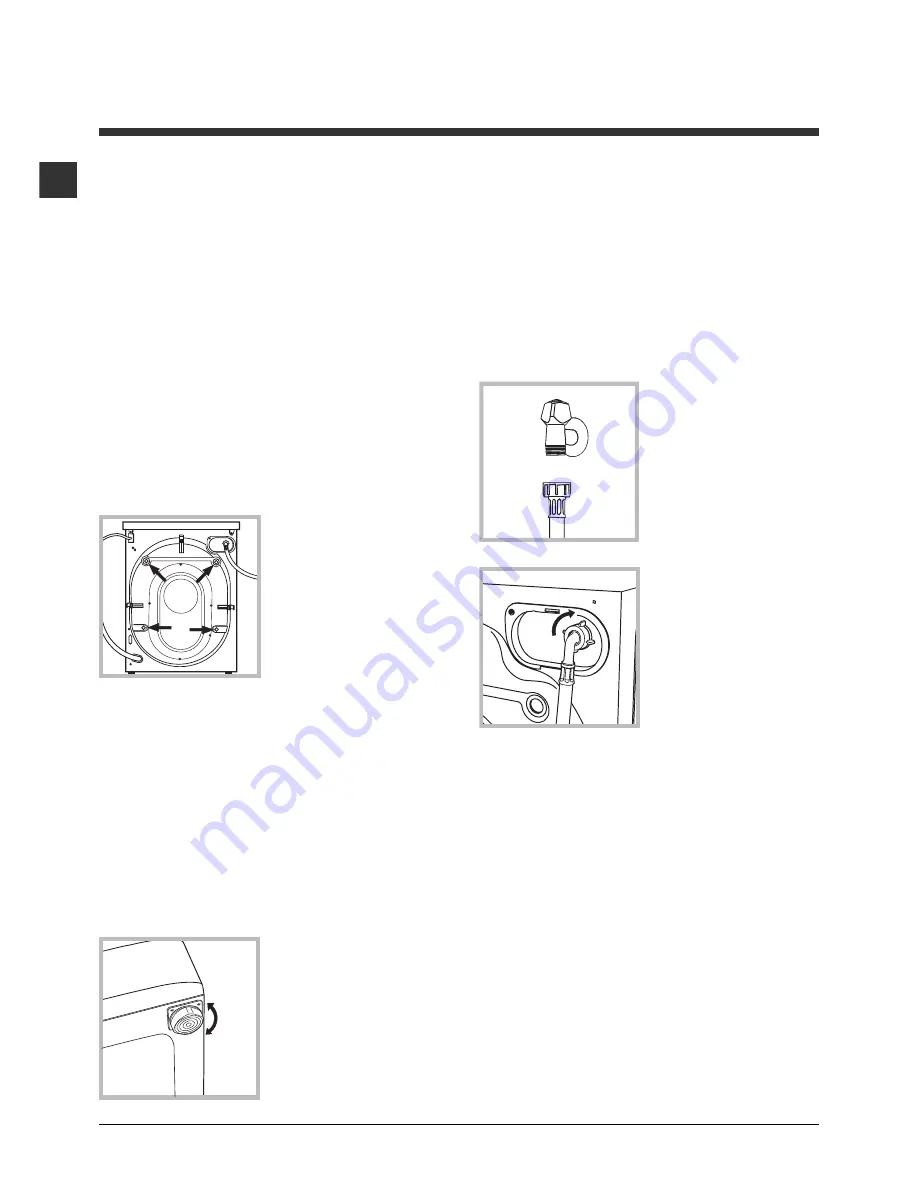
3.  Remove  the 

4

protective  screws  (used

during transportation) and

the  rubber  washer  with

the corresponding

spacer,  located  on  the

rear part of the appliance

(

see figure

).

4. Close off the holes using the plastic plugs provided.

5. Keep all the parts in a safe place: you will need

them again if the washer-dryer needs to be moved to

another  location.

 Packaging materials should not be used as toys for

children.

Levelling

1. Install the washer-dryer on a flat sturdy floor,

without resting it up against walls, furniture cabinets

or anything else.

2. If the floor is not

perfectly  level,  compen-

sate  for  any  unevenness

by tightening or loosening

the adjustable front feet

(

see figure

); the angle of

inclination,  measured  in

relation  to  the  worktop,

must  not  exceed  2°.

Levelling the machine correctly will provide it with

stability, help to avoid vibrations and excessive noise

and prevent it from shifting while it is operating. If it is

placed on carpet or a rug, adjust the feet in such a

way as to allow a sufficient ventilation space

underneath  the  washer-dryer.

Connecting the electricity and water

supplies

Connecting the water inlet hose

1. Connect the supply

pipe by screwing it to a

cold water tab using a ¾

gas  threaded  connection

(see figure).

Before  performing  the

connection,  allow  the

water to run freely until it

is  perfectly  clear.

2.  Connect  the  inlet  hose

to  the  washer-dryer  by

screwing it onto the

corresponding  water  inlet

of the appliance, which is

situated on the top right-

hand side of the rear part

of the appliance

 (see

figure)

.

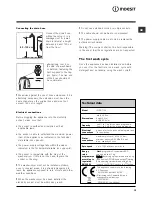
3. Make sure that the hose is not folded over or bent.

 The water pressure at the tap must fall within the

values indicated in the Technical details table 

(see

next  page).

 If the inlet hose is not long enough, contact a

specialised shop or an authorised technician.


Never  use  second-hand  hoses.


Use  the  ones  supplied  with  the  machine.

Summary of Contents for IWDD 7125

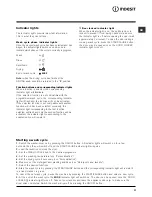
Page 1: ...unktionen Waschmittel und W sche 8 Waschmittelschublade Vorsortieren der W sche Besondere W scheteile Unwuchtkontrollsystem Vorsichtsma regeln und Hinweise 9 Allgemeine Sicherheit Entsorgung Reinigung...

Page 2: ...en an W nde M bel etc direkt anzulehnen 2 Sollte der Boden nicht perfekt eben sein m ssen die Unebenheiten durch An bzw Ausdrehen der vorderen Stellf e ausgeglichen werden siehe Abbildung der auf der...

Page 3: ...en Platz handelt Es ist gef hrlich das Ger t Gewittern und Unwettern auszusetzen Die Steckdose sollte nach installiertem Ger t leicht zug nglich sein Verwenden Sie bitte keine Verl ngerungen oder Mehr...

Page 4: ...um Start des ausgew hlten Programms verbleibende Zeit angezeigt Taste STARTZEITVORWAHL Zur Vorwahl der Startzeit des gew hlten Programms dr cken Sie bitte diese Taste Der Wert wird auf dem Display ang...

Page 5: ...Kontrollleuchte ausgeschaltet kann das Bullauge ge ffnet werden Starten eines Waschprogramms 1 Schalten Sie den Waschtrockner durch Dr cken der EIN AUS Taste ein S mtliche Kontrollleuchten leuchten f...

Page 6: ...s 30 1200 l l l 0 5 Teilprogramme Sp len 1200 l l 7 Schleudern 1200 l 7 Abpumpen 0 7 Sonderprogramme Sport Light Programm 9 ist speziell f r wenig verschmutzte Sportkleidung Trainingsanz ge Sporthosen...

Page 7: ...halten die Ihren W nschen entspricht Aktivierung der Funktionen 1 Dr cken Sie die Taste die der gew nschten Funktion entspricht 2 Das Aufleuchten der entsprechenden Kontrollleuchte zeigt an dass die F...

Page 8: ...1 Handtuch 150 250 gr Besondere W scheteile Wolle Mit dem Programm 6 k nnen alle Wollsachen gewaschen werden auch wenn das Etikett nur Handw sche zeigt F r beste Ergebnisse verwenden Sie ein spezifis...

Page 9: ...nd und auch nicht mit nassen oder feuchten H nden oder F en Ziehen Sie den Ger testecker nicht am Kabel aus der Steckdose sondern nur am Netzstecker selbst ffnen Sie die Waschmittelschublade nicht wen...

Page 10: ...umpe ausger stet eine Wartung ist demnach nicht erforderlich Es k nnte jedoch vorkommen dass kleine Gegenst nde M nzen Kn pfe in die zum Schutz der Pumpe dienende Vorkammer befindlich unter der Pumpe...

Page 11: ...de liegt unter Wasser siehe Installation Der Abfluss der Hausinstallation wurde nicht mit einer Entl ftungs ffnung versehen Konnte die St rung durch diese Kontrollen nicht behoben werden dann drehen S...

Page 12: ...oben wurde Ist dies nicht der Fall dann kontaktieren Sie den autorisierten Kundendienst unter der auf dem Garantieschein befindlichen Telefonnummer Wenden Sie sich auf keinen Fall an nicht autorisiert...

Page 13: ...e Functions Detergents and laundry 20 Detergent dispenser drawer Preparing the laundry Garments requiring special care Load balancing system Precautions and tips 21 General safety Disposal Care and ma...

Page 14: ...resting it up against walls furniture cabinets or anything else 2 If the floor is not perfectly level compen sate for any unevenness by tightening or loosening the adjustable front feet see figure the...

Page 15: ...ot be underwater We advise against the use of hose extensions if it is absolutely necessary the extension must have the same diameter as the original hose and must not exceed 150 cm in length Electric...

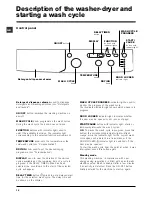
Page 16: ...he DELAY TIMER option has been selected the countdown to the start of the selected cycle will appear DELAY TMER button press to set a delayed start time for the selected wash cycle The delay time will...

Page 17: ...cator light is off before opening the door wait approximately 3 minutes To open the door during a running wash cycle press the START PAUSE button the door may be opened once the DOOR LOCKED indicator...

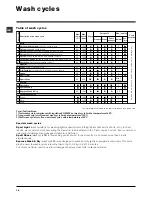
Page 18: ...3 Short wash cycle for cottons set wash cycle 4 with a temperature of 40 C Wash cycles Table of wash cycles Description of the wash cycle Max temp C Max speed rpm Drying Detergents Max load kg Cycle d...

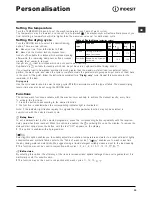
Page 19: ...chieve the desired results every time To activate the functions 1 Press the button corresponding to the desired function 2 the function is enabled when the corresponding indicator light is illuminated...

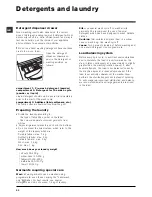
Page 20: ...3 kg Delicate fabrics max 2 kg Wool max 1 5 kg Silk max 1 kg How much does your laundry weigh 1 sheet 400 500 g 1 pillow case 150 200 g 1 tablecloth 400 500 g 1 bathrobe 900 1200 g 1 towel 150 250 g G...

Page 21: ...appliance from the electricity socket Hold the plug and pull Do not open the detergent dispenser drawer while the machine is in operation Do not touch the drained water as it may reach extremely high...

Page 22: ...rom forming Cleaning the pump The washer dryer is fitted with a self cleaning pump which does not require any maintenance Sometimes small items such as coins or buttons may fall into the pre chamber w...

Page 23: ...f the hose is under water see Installation The wall drainage system is not fitted with a breather pipe If the problem persists even after these checks turn off the water tap switch the appliance off a...

Page 24: ...istance Centre using the telephone number provided on the guarantee certificate Always request the assistance of authorised technicians Have the following information to hand the type of problem the a...

Reviews: