background image

20

GB

Installation

! Before placing your new appliance into operation please read 
these  operating  instructions  carefully.  They  contain  important 
information  for  safe  use,  for  installation  and  for  care  of  the 
appliance.

!

 Please keep these operating instructions for future reference. 

Pass them on to possible new owners of the appliance.

Positioning and connection

Positioning

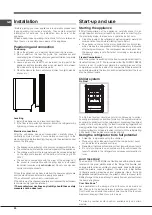
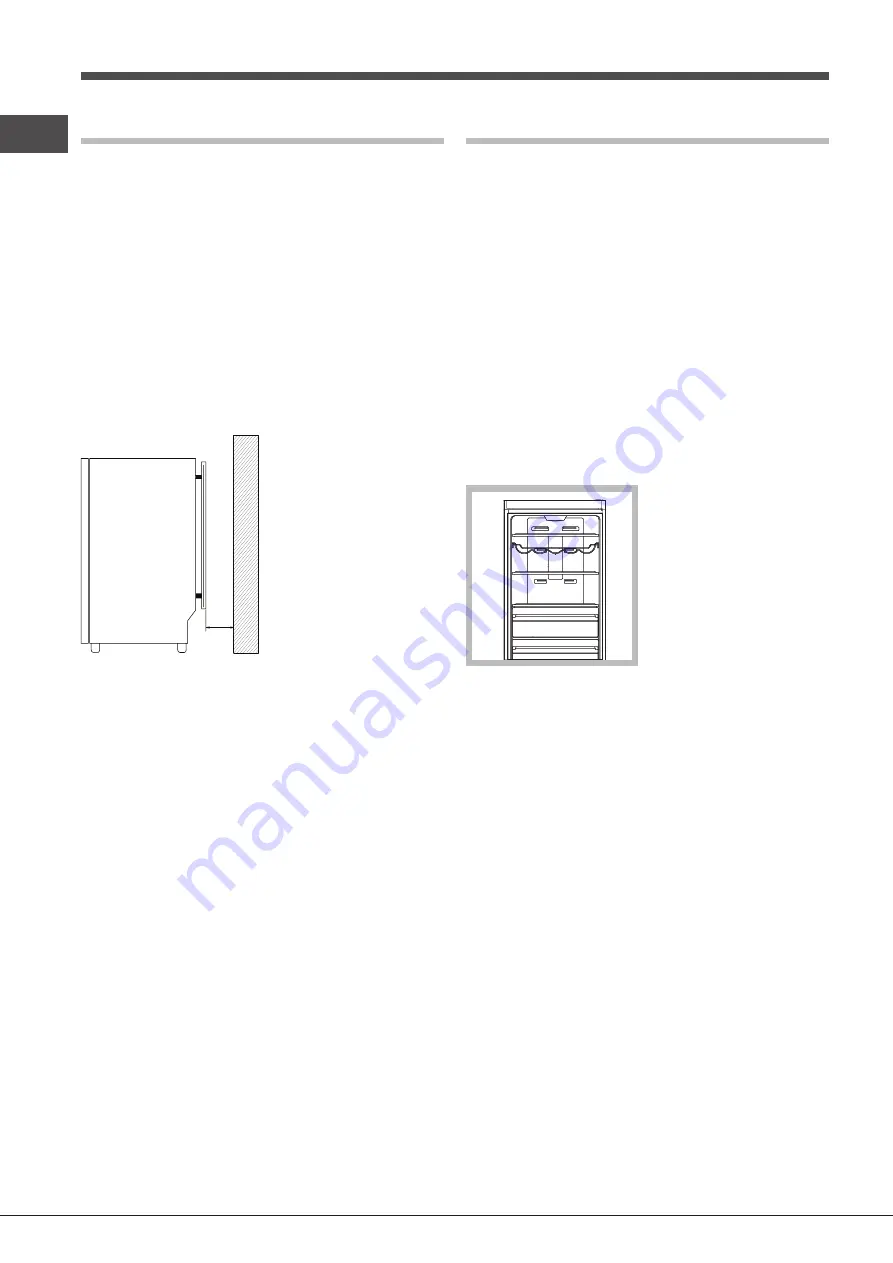
1.  Place the appliance in a well-ventilated humidity-free room.
2.  Do  not  obstruct  the  rear  fan  grills.  The  compressor  and 

condenser give off heat and require good ventilation to operate 
correctly and save energy.

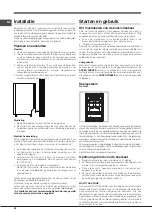
3.  Leave a space of at least 10 cm between the top part of the 

appliance and any furniture above it, and at least 5 cm between 
the sides and any furniture/side walls.

4.  Place the device far from heat sources (direct sun light, electric 

kitchen etc.)

50

mm

Levelling

1.  Install the appliance on a level and rigid floor.
2.  If the floor is not perfectly horizontal, adjust the refrigerator by 

tightening or loosening the front feet.

Electrical connections

After  the  appliance  has  been  transported,  carefully  place  it 
vertically  and  wait  at  least  3  hours  before  connecting  it  to  the 
electricity mains. Before inserting the plug into the electrical socket 
ensure the following:

•   The appliance is earthed and the plug is compliant with the law.
•   The socket can withstand the maximum power of the appliance,
•   The voltage must be in the range between the values indicated 

on the data plate located on the bottom left side (e.g. 220-
240V).

•   The  socket  is  compatible  with  the  plug  of  the  appliance.  If 

the socket is incompatible with the plug, ask an authorised 
technician to replace it (

see Assistance

). Do not use extension 

cords or multiple sockets.

!

 Once the appliance has been installed, the power supply cable 

and the electrical socket must be easily accessible.

!

 The cable must not be bent or compressed.

!

 The cable must be checked regularly and replaced by authorised 

technicians only (see Assistance).

! The manufacturer declines any liability should these safety 
measures not be observed.

Start-up and use

Starting the appliance

!

  After  transportation  of  the  appliance,  carefully  place  it  in  an 

upright position and wait at least 3 hours before connecting it to 
the electricity mains, to make sure it operates as it should.
•  Clean the inside of the refrigerator well using warm water and 

bicarbonate of soda before placing food inside it.

•  The appliance comes with a motor protection control system 

which makes the compressor start approximately 8 minutes 
after being switched on. The compressor also starts each time 
the power supply is cut off whether voluntarily or involuntarily 
(blackout).

Freezer Compartment

When the product is switched on the freezer compartment is set to 
its default value of -18°C. We recommend that the SUPER FREEZE 
function is set  in order to accelerate the cooling process of the 
compartment; when the inside of the compartment has reached its 
optimal temperature the function will be deactivated and the food 
may be placed inside.

Chiller system 

No Frost

The  No  Frost  system  circulates  cold  air  continuously  to  collect 
humidity and prevent ice and frost formation. The system maintains 
an optimal humidity level in the compartment, preserving the original 
quality of the food, preventing the food from sticking together and 
making defrosting a thing of the past. Do not block the aeration cells 
by placing food or containers in direct contact with the refrigerating 
back panel. Close bottles and wrap food tightly.

Using the refrigerator to its full potential

•   Adjust the  temperature using the  display.
•   Place only cold or lukewarm foods in the compartment, never 
    hot  foods (see Precautions and tips).
•   Remember that cooked foods do not last  longer than raw foods.
•   Do not store liquids in open containers: they will increase the 

level of humidity in the  refrigerator and cause condensation to 
form.

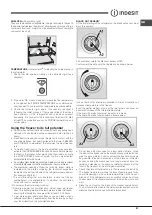
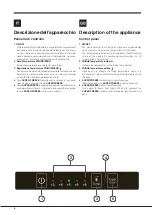
MULTI TASK ZONE*

The new MULTI TASK ZONE is a flexible box with a plastic cover 
located  in  the  most  visible  area  of  the  fridge.This  flexible  box 
changes its function according to your needs: like a bottle holder 
when  the  plastic  cover  is  opened,  it  hosts  up  to  5  big  bottles 
(2  liters),ensuring  steadiness  and  ergonomy;  like  a  fruit  and 
vegetable compartment when the plastic cover is closed (with 
bottle storage in the top balcony) to easily find out and control all 
the items at a glance.

Cool Care Zone 

*

Area dedicated to the storage of fresh food, such as meat and 
fish. Thanks to the low temperature inside the compartment, the 
Cool Care Zone extends the period of time for which the food can 
be stored, keeping it fresh for up to a week.

*

  Varies  by  number  and/or  position,  available  only  on  certain 

models.

Summary of Contents for XD95 Series

Page 1: ...aire Mode d emploi 1 Assistance 3 Description de l appareil 7 Description de l appareil 12 R versibilit des portes 52 Installation 24 Mise en marche et utilisation 25 Entretien et soin 26 Pr cautions...

Page 2: ...de da abertura das portas 52 Instala o 40 In cio e utiliza o 41 Manuten o e cuidados 42 Precau es e conselhos 42 Anomalias e solu es 43 Polski Instrukcja obs ugi LOD WKO ZAMRA ARKA Spis tre ci Instruk...

Page 3: ...dette tariffe potrebbero essere soggette a variazione da parte dell operatore telefonico per maggiori informazioni consultare il sito www indesit com Assistance Before calling for Assistance Check if...

Page 4: ...ca Verifique si la anomal a puede ser resuelta por Ud mismo ver Anomal as y Soluciones Si no obstante todos los controles el aparato no funciona y el inconveniente por Ud detectado contin a llame al C...

Page 5: ...serwis Techniczny Nale y poda rodzaj anomalii model urz dzenia Mod numer seryjny S N Te dane znajduj si na tabliczce znamionowej w lod wce po lewej stronie w dolnj jej cz ci Zwracajcie si wy cznie do...

Page 6: ...EEZE indicator light illuminates see Start up and use Descrizione dell apparecchio Pannello di controllo 1 ON OFF L intero prodotto sia il frigorifero e congelatore scompartimenti pu essere acceso pre...

Page 7: ...elle est enfonc e le voyant SUPER FREEZE s allume voir Mise en marche et utilisation Beschreibung Ihres Ger tes Bedienblende 1 EIN AUS Das ganze Produkt beides K hl und Gefrierfach kann durch das Dr c...

Page 8: ...a congelar alimentos frescos Cuando se presiona se enciende la luz testigo SUPER FREEZE ver Puesta en funcionamiento y uso Beschrijving van het apparaat Bedieningspaneel 1 AAN UIT Het volledige produc...

Page 9: ...elar alimentos frescos Quando for premida acende se o indicador luminoso de SUPER FREEZE veja In cio e utiliza o Opis urz dzenia Panel kontrolny 1 W CZNIK WY CZNIK Ca e urz dzenie zar wno lod wka jak...

Page 10: ...dicatorul de temperatur al FRIGIDERULUI Acesta indic temperatura compartimentului frigiderului 3 Setarea de temperatur a FRIGIDERULUI Aceasta permite schimbarea valorii temperaturii frigiderului n mod...

Page 11: ...mber and or position available only on certain models 2 1 3 6 8 7 11 10 9 4 12 5 Descrizione dell apparecchio Vista d insieme Le istruzioni sull uso valgono per diversi modelli per cui possibile che l...

Page 12: ...ille MULTI TASK ZONE 12 D TECTEUR DE PANNE D LECTRICIT Leur nombre et ou leur emplacement peut varier n existe que sur certains mod les Beschreibung Ihres Ger tes Ger teansicht Die Gebrauchsanleitunge...

Page 13: ...ntal of positie alleen op enkele modellen aanwezig Descripci n del aparato Vista en conjunto Las instrucciones sobre el uso son v lidas para distintos modelos y por lo tanto es posible que la figura p...

Page 14: ...teleira para garrafas MULTI TASK ZONE 12 SENSOR DE ESCURECIMENTO Vari veis em n mero e ou na posi o presente somente em alguns modelos Opis urz dzenia Widok og lny Instrukcje dotycz ce u ytkowania s t...

Page 15: ...ria este cuprins n paginile urm toare 1 SUPORT de reglare 2 Compartimentul CONSERVARE 3 Compartimentul CONGELARE i CONSERVARE 4 Cutie Cool Care Zone 5 Caseta FRUCTE i VERDE URI 6 WINE RACK 7 RAFT 8 BE...

Page 16: ...me non vengano rispettate Avvio e utilizzo Avviare l apparecchio Dopo il trasporto posizionare l apparecchio verticalmente ed attendere circa 3 ore prima di collegarlo alla presa di corrente per favor...

Page 17: ...ttiglie di vetro contenenti liquidi tappate o chiuse ermeticamente perch potrebbero rompersi Laquantit massimagiornalieradialimentidacongelare indicata sulla targhetta caratteristiche posta nel vano f...

Page 18: ...nformit alle norme internazionali di sicurezza Queste avvertenze sono fornite per ragioni di sicurezza e devono essere lette attentamente Questa apparecchiatura conforme alle seguenti Direttive Comuni...

Page 19: ...e fa aumentare il consumo di energia Anomalie e rimedi Pu accadere che l apparecchio non funzioni Prima di telefonare all Assistenza vedi Assistenza controllare che non si tratti di un problema facilm...

Page 20: ...s to make sure it operates as it should Clean the inside of the refrigerator well using warm water and bicarbonate of soda before placing food inside it The appliance comes with a motor protection con...

Page 21: ...ompartment for example 2Kg 24h To avoid blocking the air circulation inside the freezer compartment it is advisable not to obstruct the ventilation holes with food or containers Do not open the door d...

Page 22: ...s designed for domestic use inside the home and is not intended for commercial or industrial use The appliance must be used to store and freeze food products by adults only and according to the instru...

Page 23: ...s with a motor protection control see Start up and use a The alarm sounds a The refrigerator door has remained open for more than two minutes the buzzer will stop sounding when you shut the door or th...

Page 24: ...her une prise de courant son fonctionnement n en sera que meilleur Nettoyez bien l int rieur du r frig rateur avec de l eau ti de et du bicarbonate avant d y ranger vos aliments Cet appareil est quip...

Page 25: ...es bouch es ou ferm es herm tiquement elles pourraient se briser La quantit journali re maximale d aliments pouvant tre congel e est indiqu e sur l tiquette des caract ristiques plac e dans le compart...

Page 26: ...protection comme illustr voir figure Remplacez la par une ampoule semblable dont la puissance doit correspondre celle indiqu e sur le couvercle de protection 3 Remplacement du voyant LED Le voyant LE...

Page 27: ...aliments et augmente la consommation d lectricit Anomalies et rem des Il peut arriver que l appareil ne fonctionne pas Avant de t l phoner au service de d pannage voir Assistance contr lez s il ne s a...

Page 28: ...Aufstellen bzw nach einem Transport ca 3 Stunden bevor Sie das Ger t an die Netzleitung anschlie en um die optimale Betriebsweise zu f rdern Bevor Sie das K hlgut in den K hlschrankeinsortieren muss...

Page 29: ...inlagern des Lebensmittels gestartet werden Nach dem Einlagern des Lebensmittels muss die Funktion SUPER FREEZE erneut gestartet werden da sie sich nach 24 Stunden automatisch abschaltet LagernSieinde...

Page 30: ...tel Wenn Sie die LED Lampe wechseln m ssen wenden Sie sich an den technischen Kundendienst Lampenaustausch Zum Austausch der Lampe der K hlschrankbeleuchtung muss der Netzstecker aus der Steckdose gez...

Page 31: ...test rung Bevor Sie sich an den Technischen Kundendienst wenden siehe Kundendienst vergewissern Sie sich bitte zuerst ob es sich um eine Kleinigkeit handelt die Sie selbst beheben k nnen Ziehen Sie h...

Page 32: ...plaatst u het apparaat verticaal en wacht u ongeveer 3 uur voordat u het aansluit op het elektriciteitsnet Dit is noodzakelijk om een goede werking te kunnen garanderen Voor u de etenswaren in de koe...

Page 33: ...it glazen flessen met vloeistof in de diepvrieskast vooral niet als er een dop op zit of als ze hermetisch zijn afgesloten ze zouden kunnen barsten De maximum hoeveelheid die men dagelijks kan invriez...

Page 34: ...et een lampje dat eenzelfde vermogen heeft als staat aangegeven op het kapje 3 Vervang de LED lamp De LED verlichting biedt een duidelijk beeld van alle etenswaren dankzij het krachtig verspreide lich...

Page 35: ...ie Onderhoud een dikke laag ijs vertraagt de koudeoverdracht naar de levensmiddelen en verhoogt het energieverbruik Storingen en oplossingen Het zou kunnen gebeuren dat het apparaat niet functioneert...

Page 36: ...oras antes de conectarlo a la toma de corriente para favorecer un buen funcionamiento Antesdecolocarlosalimentosenelfrigor fico limpiebienelinterior con agua tibia y bicarbonato Elaparatoposeeuncontro...

Page 37: ...24 horas antes de introducir los alimentos Una vez que se introducen los alimentos es necesario activar nuevamente la funci n SUPER FREEZE que se desactivar autom ticamente pasadas 24 horas No coloque...

Page 38: ...alimentos est n siempre protegidos y bien cerrados Esto evitar tambi n la formaci n de manchas Si se debe apagar el aparato por un largo per odo limpie su interior y deje las puertas abiertas Sustitu...

Page 39: ...si se formara hielo ver Mantenimiento una espesa capa de hielo vuelve m s dif cil la cesi n de fr o a los alimentos y hace que aumente el consumo de energ a Anomal as y soluciones Puede suceder que e...

Page 40: ...rticalmenteeaguarde cerca de 3 horas antes de lig lo tomada el ctrica para facilitar o bom funcionamento Antes de guardar alimentos no frigor fico limpe o bem por dentro com gua morna e bicarbonato Es...

Page 41: ...ngelador garrafas de vidro contendo l quidos tampadasoufechadashermeticamente porquepoder opartir se A quantidade m xima di ria de alimentos a ser congelada indicada na placa de identifica o situada n...

Page 42: ...compartimento frigor fico desligue a ficha da tomada de corrente Obede a as seguintes instru es Para obter acesso l mpada retire a protec o da maneira indicada na figura Substitua a por uma de pot nci...

Page 43: ...energia Anomalias e solu es Pode acontecer que este aparelho n o funcione Antes de telefonar Assist ncia t cnica veja a Assist ncia verifique se n o se trata de um problema f cil de resolver com a aj...

Page 44: ...przywiezieniu ustawic urzadzenie w pozycji pionowej i odczekac okolo 3 godzin przed podlaczeniem gniazdka pradu aby zapewnic wlasciwe funkcjonowanie urzadzenia Przed wlozeniem zywnosci do lod wki nal...

Page 45: ...amra arki konieczne jest ponowne uruchomienie funkcji SUPER FREEZE kt ra wy czy si automatycznie po up ywie 24 godzin Nie wk ada do zamra arki szklanych butelek z p ynami zamkni tych hermetycznie lub...

Page 46: ...i ki silnemu rozproszonemu wiat u zapewnia doskona y widok przechowywanej ywno ci Je li musisz wymieni o wietlenie diodowe skontaktuj si z serwisem technicznym Zalecenia i rodki ostro no ci Urz dzenie...

Page 47: ...acja du a warstwa lodu utrudnia doj cie zimna do artyku w spo ywczych i zwi ksza zu ycie energii Anomalie i rodki zaradcze W przypadku gdy lod wko zamra arka nie b dzie funkcjonowa a Przed wezwaniem S...

Page 48: ...otec ie a motorului Aparatulestedotatcuunsistemdeprotec ieamotoruluicareactiveaz compresorul dup aproximativ 8 minute de la punerea n func iune Acest lucru se nt mpl de fiecare dat c nd se ntrerupe cu...

Page 49: ...lui Dac se ntrerupe curentul sau este vreo defec iune pan de la re ea nu deschide i u a congelatorului n acest mod alimentele nghe ate i congelate se vor p stra intacte timp de 12 18 ore Pentru a avea...

Page 50: ...oarele Directive Comunitare 73 23 CEE din data de 19 02 73 Tensiuni Joase i modific ri succesive 89 336 CEE din data de 03 05 89 Compatibilitate Electromagnetic i modific ri succesive 2002 96 CE Sigur...

Page 51: ...de energie Nu nc rca i aparatul pentru a asigura o bun r cire a alimentelor aerul trebuie s circule c t mai bine Dac mpiedica i circula ia aerului compresorul va lucra n permanen Nu introduce i alimen...

Page 52: ...52 19513656100 06 2015...
Reviews: