Indivision AGA MK3 1200 short manual
Dear customer,
thank you for purchasing a product from Individual Computers. We're sure that your new
flickerfixer will satisfy all your needs. However, we would like to emphasize that installing
the product in an A1200 is not easy, and it requires some skills.
Please make sure that
you have enough light at your desk!
Installing the flickerfixer should only be done by experienced persons. If you have never
opened your computer before, you should seek help from a technician.
Open the computer and remove the disk drive, the harddrive and the RF shield. Carefully
put the keyboard to the back of the computer, so there is no mechanical stress on the
cable. The main board of your A1200 is now lying in front of you like this:
The picture above marks the Lisa chip, which is responsible for video output. The brown
socket of Indivision AGA is placed over top of this chip. The cable connection of Indivision
AGA MK3 must face to the right.
The mainboard of your A1200 must be placed on a stable, level surface. First, place the
socket over the Lisa chip, but do not push yet! Double-check that all pins line up properly.
If the socket should be tilted in any way, it might be destroyed by the pressure that must
be applied. The socket is in place if the board is level on the Lisa chip, but cannot be
rotated any more.
Your final step is to push the socket on the Lisa chip. You might need to push very hard,
but
do not use any tools for this step!
It is possible to apply the required pressure with
your thumbs. The unit snaps into place with an obvious latching sound.
Do the same for the CIA adapter, which must be placed on U7 of the A1200 (A4000T:
U550). Now you can attach the cable to the black connector of Indivision AGA MK3 and
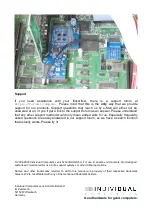
route it in the computer as shown in the following picture:


