4
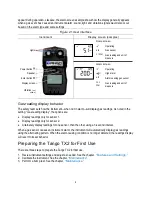
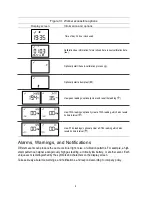
appear during operation. Likewise, the alarm-screen example shows how the display generally appears
when a gas event has caused an instrument alarm; sound, light, and vibration signals would also occur
based on the alarm type and some settings.
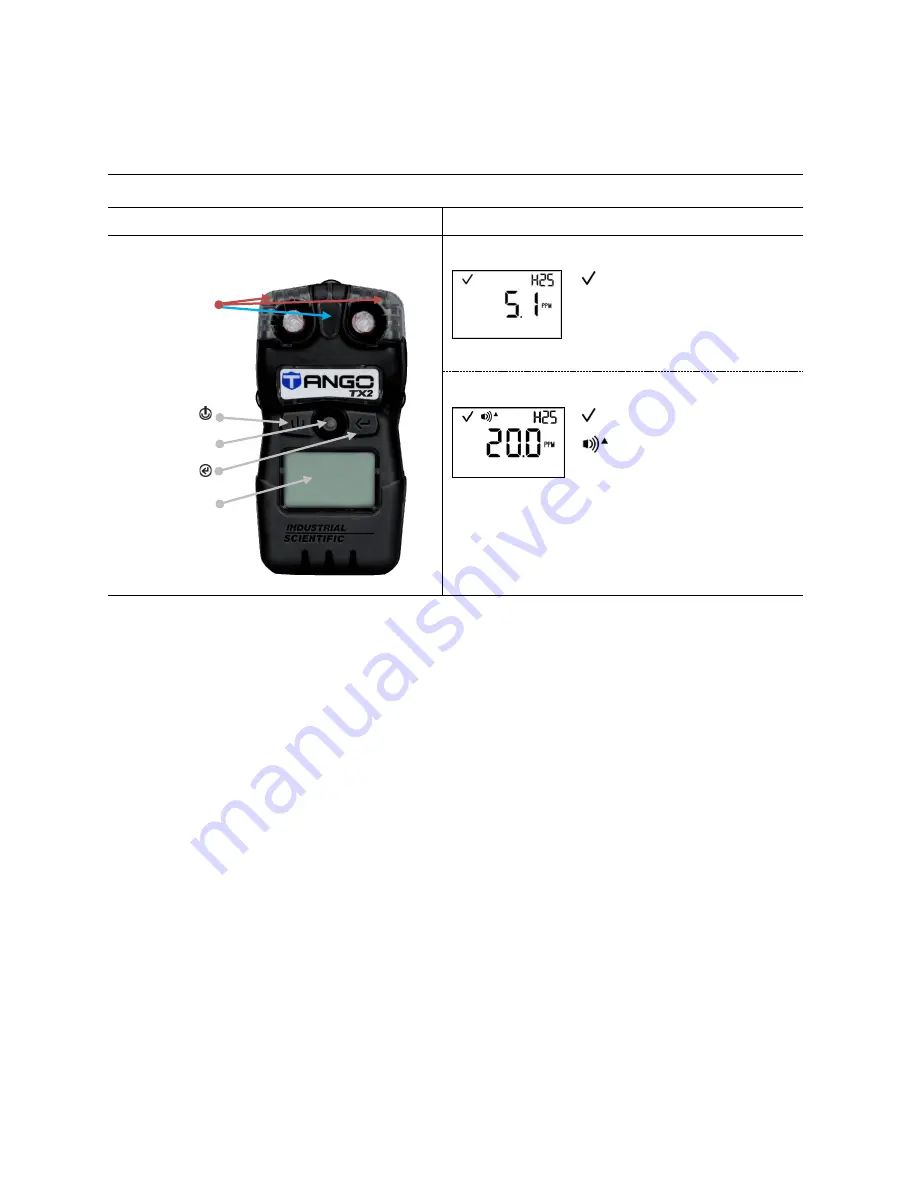
Figure 2.1 User interface
Instrument
Display screen (samples)
Home screen
Operating
Lights
H2S
Gas sensor
5.1 PPM
Gas reading and unit of
measure
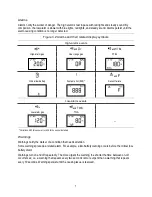
Alarm screen
Power button
Operating
Speaker
High alarm
Enter button
H2S
Alarm-causing gas sensor
Display screen
20.0
PPM
Gas reading and unit of
measure
Vibration
(not
shown)
Gas-reading display behavior
The safety team sets how the instrument
—
when
not
in alarm
—
will display gas readings. As noted in the
setting,
“
Gas reading display
”
, the options are:
•
Display readings only for sensor 1.
•
Display readings only for sensor 2.
•
Alternately display readings for one sensor, then the other using a 3-second interval.
When a gas sensor causes an instrument alarm, the instrument will automatically display gas readings
using the alternating pattern. When the alarm-causing condition is no longer detected, the readings display
will revert to its set behavior.
Preparing the Tango TX2 for First Use
There are three steps to prepare the Tango TX2 for first use.
1.
Review instrument settings and adjust as needed. See the chapter,
2.
Calibrate the instrument. See the chapter,
3.
Perform a bump test. See the chapter,
Summary of Contents for TANGO TX2
Page 6: ......
Page 16: ......
Page 38: ...32 Illustration 7 1 Disassembled Tango TX2 and case top assembly Instrument Case top assembly...


