3. Connecting the NAS
Connecting the Cables
1.
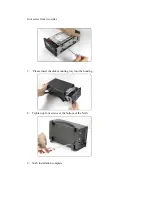
Connect the Power Adapter to DC IN.
2. Connect one end of the RJ-45 cable to the Ethernet port at the rear of the
NAS.
3. Connect the other end of the RJ-45 cable to an available Ethernet port on
your computer or router.
Powering Up the NAS
Press the power switch to turn on the unit. Wait 3 seconds after blue LCD
illuminates.
4. Configuring the NAS
Summary of Contents for I-NA312N1-S
Page 1: ...Model I NA312N1 S Network Attached Storage User Manual www ineotechusa com...
Page 3: ...uShare Web Album IP Camera Web Server PHP BB Gallery...
Page 17: ...d Internet Protocol Setting...
Page 18: ...e Time Settings f Wizard Setting Confirmation...
Page 20: ...b Step 2 3...
Page 21: ...c Step 3 3 3 Add Group a Step 1 3...
Page 22: ...b Step 2 3 c Step 3 3...
Page 23: ...4 Add Share a Step 1 3 b Step 2 3...
Page 24: ...c Step 3 3...
Page 32: ...a Windows FTP Access button...
Page 33: ...b NFS Access button...
Page 34: ...3 Printer Server...
Page 37: ...3 Time Settings...
Page 39: ...5 Information To display some basic system information...
Page 47: ......
Page 53: ...Press play to start play music C Photo Please select UPnP NAS3000 from source list...
Page 54: ...Please select photo folder from list Now you can select photo to browse or run slideshow...
Page 56: ...5 1 3 Please press Upload button 5 1 4 The package is uploading...
Page 81: ...2 Update Choose any ServerName from table and press Update button...
Page 85: ...E Sample To verify the apache server is working normal E 1 Login admin admin E 2 Message Page...
Page 88: ...4 Press phpMyAdmin link to create a database named as phpbb 4 1 Please login in to phpMyAdmin...
Page 98: ...11 Please press Continue to step 3 button 12 Please press Continue to step 4 button...
Page 112: ...Log File 1 Samba Log...
Page 113: ...2 FTP Log...
Page 114: ...3 DHCP Server Log 4 System Log...
Page 115: ...5 Administration Log...
Page 129: ...available http www neo2tech com Thank you for choosing ineo Tech products...


