ASSEMBLY INSTRUCTIONS
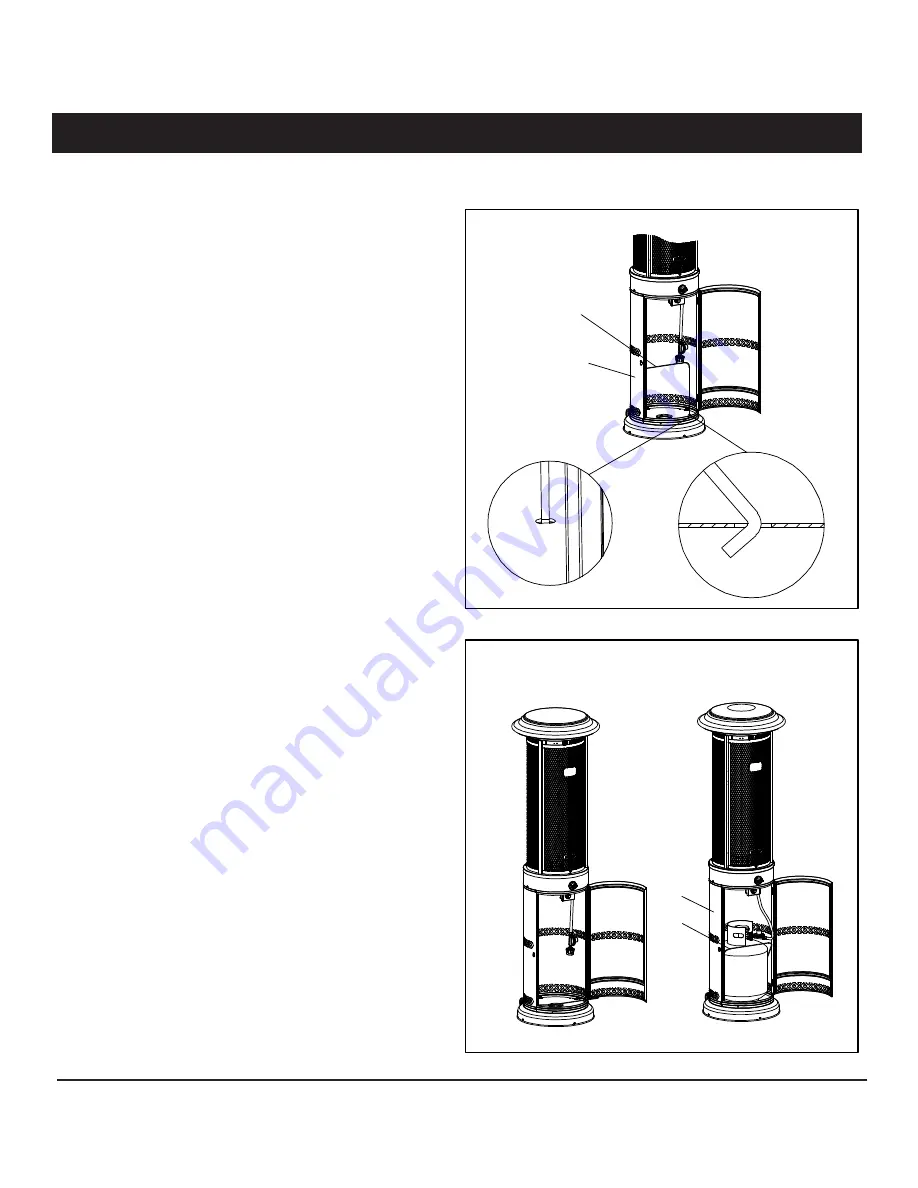
Step 10
Insert the cylinder locking bar (10) into the two holes
on the base assembly (9) as shown in the illustration.
Step 10:
Warning: This appliance requires installation by a competent person. Proper assembly is the responsibility of the
installer.
10
9
Step 11
Place the gas cylinder (not included) into the base
assembly (
9
), and fix it with the cylinder locking bar (
10
).
Attach the regulator to the cylinder, turn clockwise to tighten
it securely, and close the door.
Note: Make sure to check for leaks once the cylinder has
been replaced. (refer to the “Check for leaks” section).
Step 11:
10
9
12


