7
10 pizza plates
¢
36cm
80 espresso cups
40 cappuccino cups
30 glasses (grog)
18 soup dishes
¢
22cm
2 soup bowls 21cm X 18cm
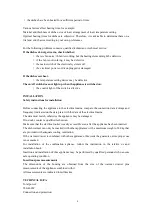
CARE AND CLEANING
Cleaning operations are to be undertaken only when the machine is disconnected from the
electrical mains. The appliance is disconnected from the electrical mains in the following cases:
-
the main switch of the electrical system is off.
-
The safety switch is off.
-
The appliance is unplugged.
When unplgging the appliance, do not pull on the cord. Take hold of the plug.
Clean all surface with a soft sponge, a bit of detergent and lukewarm water.
Then dry all surfaces with a soft cloth.
Important:
the area of the grille for the protecion of intermal components and the area of the
switch and themostat must not be cleaned with water.
Any penetration of liquids or other substances into electrically live parts may cause
failures or short circuits, creating hazards for the user.
Appliances with stainless steel front
The front of the appliance is easily scratced.
The steel surfaces should b cleaned with a special non-abrasive product for steel.
Do not use:
Detergents that contain soda, acids or chloride, abrasive detergents (powder or cream) abrasive
sponges (e.g.steel wool pads) or sponges that contin residual abrasive detergent.
Anti-slip bottom of draer
The anti-slip bottom of the drawer can be cleaned for thorough cleaning of the drawer
The bottom canbe hand-washed with warm water and a gentle detergent.dry thoroughly
afterwards.
Put the anti-slip bottom back in the drawer only when it is completely dry.
WHAT TO DO IN CASE OF FAULT
Repair of electrical appliances is to be carried only y qualified, authorised technical staff.
Improperly or incorrectly performed repairs may create grave hazards for the safety of the user.
If the dishes are not warm enough, check whether:
·
the appliance is on
·
the right temperature has been set
·
the heat outlets have been covered by large plates or bowls
Summary of Contents for 8436546192770
Page 1: ...1 Instruction Manual Built in Warming Drawer HWR 60BL HWR 61WH HWR 62X...
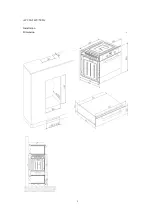
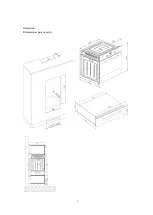
Page 9: ...9 AC 220 240V 50 Hz Installation Dimension...
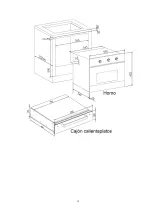
Page 10: ...10...
Page 11: ...1 Instruction Manual Built in Warming Drawer HWR 60BL HWR 61WH HWR 62X...
Page 19: ...9 Instalaci n Dimensiones para encastre...
Page 20: ...10...
Page 21: ...1 Instruction Manual Built in Warming Drawer HWR 60BL HWR 61WH HWR 62X...
Page 29: ...9 Instala o Dimens o...
Page 30: ...10...
Page 34: ......


