


16 |
www.HandiQuilter.com
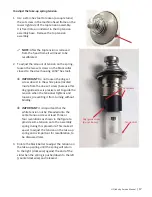
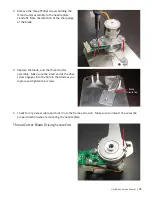
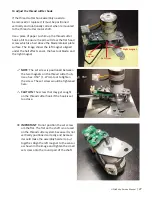
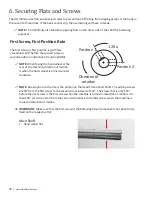
Take-up Spring Position
The straight part of the spring should be straight up
at 12 o’clock or a hair towards 11 o’clock when it is
its rest position at the right.
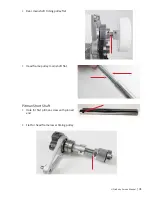
To correct the take-up spring position
1.
Use a 2mm hex tool to loosen (a couple turns)
the set screw in the machine head frame on the
lower right side of the top tension assembly.
It is fixed into an undercut in the top tension
assembly base.
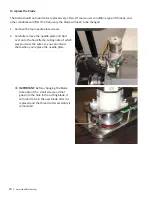
NOTE
: Take care not to pull the tension
device out of the frame which will decouple
the tension motor from the tension device.
If the tension is remove then it has to be
recalibrated. Calibration is covered later in
this section.
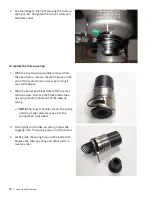
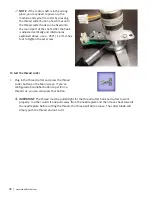
2.
Rotate the tension assembly until the straight
part of the spring is straight up, make sure
the tension device is seated into the head
frame and retighten the set screw. (The hole
is machined just deep enough for the back
tension disc to not touch the frame.)
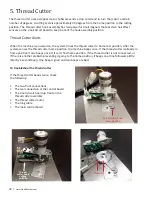
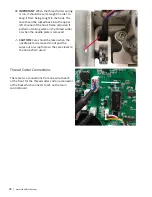
Take-up Spring Tension
Check that the take-up spring has normal torsion tension and inspect the spring for any cuts, breaks, or
abrasions. When moved by hand and released, the take-up spring should return to the end of the cutout
in the top tension base mount assembly. The proper amount of take-up spring tension is critical to the
stitch performance of the machine.


