HQ Infinity Service Manual
| 17
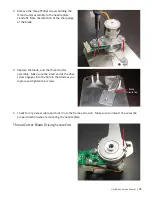
To adjust the take-up spring tension
1.
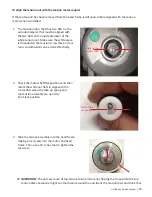
Use a 2mm hex tool to loosen (a couple turns)
the set screw in the machine head frame on the
lower right side of the top tension assembly.
It is fixed into an undercut in the top tension
assembly base. Remove the top tension
assembly.
NOTE
: After the top tension is removed
from the head frame it will need to be
recalibrated.
2.
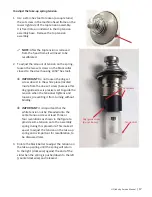
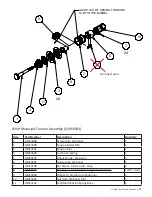
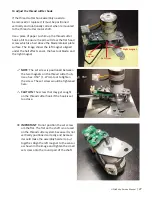
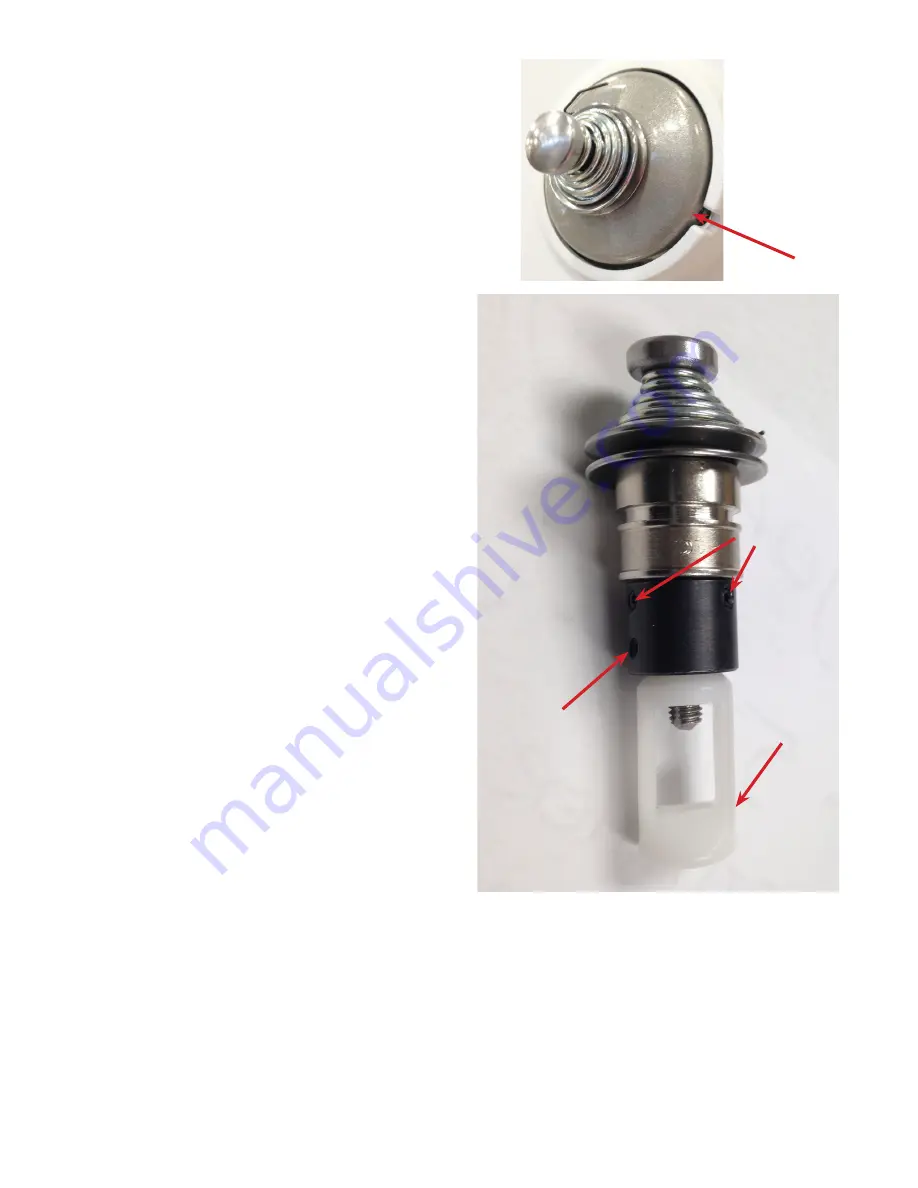
To adjust the amount of tension on the spring,
loosen the two set screws on the black collar
closest to the silver housing (.050” hex tool).
Â
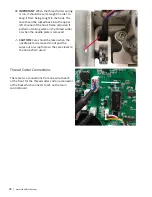
IMPORTANT
: Do not loosen the dog set
screw closest to the white piece (located
inside from the one set screw) because this
dog/guide screw is precisely set to guide the
tension when the tensioner tightens and
loosens, preventing it from turning without
binding.
Â
IMPORTANT
: It is important that the
white tension nut be threaded onto the
center tension screw at least three or
four revolutions as shown in the figure to
provide some tension onto the assembly
spring during this procedure. This makes it
easier to adjust the tension on the take-up
spring and is important for recalibration, to
be discussed later.
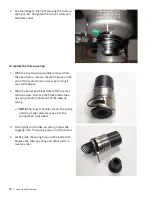
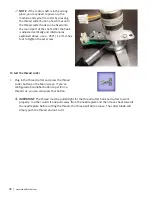
3.
Rotate the black barrel to adjust the tension on
the take-up spring until the spring will return
to the right (clockwise) against the end of the
slot when the spring is pushed down to the left
(counterclockwise) and released.
Set Screws
Dog/guide screw
(do not loosen)
Tension Nut


