


90 |
www.HandiQuilter.com
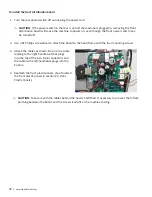
3.
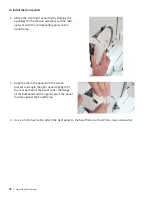
Taking care not to pinch any cables, place the power supply in position within the machine frame and
loosely mount the four brackets using a 3mm hex tool.
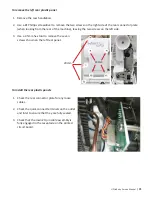
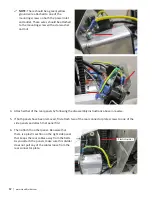
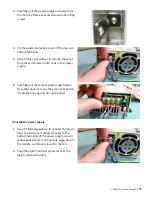
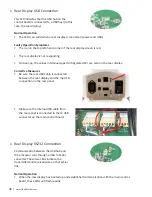
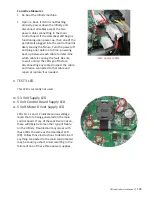
4. Use a Phillips screwdriver to connect the three
black wires to the three terminals farthest
from the green LED side, making sure to also
connect the green/yellow wire with one of the
black wires as shown. These three are ground
connections.
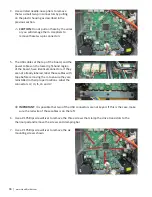
5.
You will either have three red wires or one red
wire and two white wires that should then be
connected to the three terminals closest to the
green LED side of the power supply.
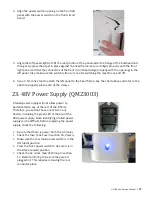
6.
Plug the small remote switch cable into the connector next to the green LED.
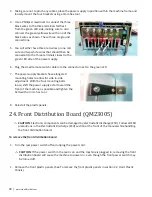
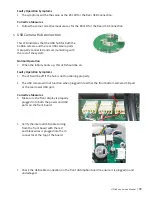
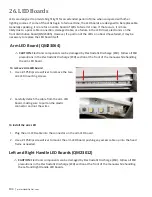
7. The power supply brackets have elongated
mounting holes to allow for side-to-side
adjustment. With the four mounting bolts
loose, shift the power supply as far toward the
front of the machine as possible and tighten the
bolts with a 3mm hex tool.
8.
Reinstall the plastic panels.
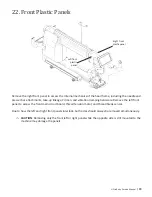
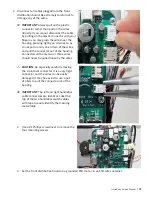
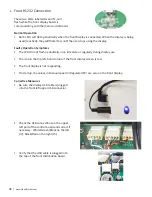
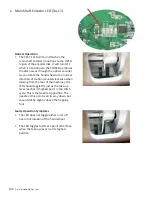
24. Front Distribution Board (QM23005)
U
CAUTION
: Electronic components can be damaged by electrostatic discharge (ESD). Follow all ESD
precautions in the
Electrostatic Discharge (ESD)
section at the front of the manual while handling
the front distribution board.
To remove the front distribution board
1.
Turn the rear power switch off and unplug the power cord.
U
CAUTION
: If the power switch in the rear is on and the machine is plugged in, removing the front
distribution board will cause the machine to power on, even though the front power switch may
be turned off.
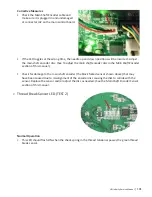
1.
Remove the front plastic panels. (See T
o remove the front plastic panels
in section 22,
Front Plastic
Panels
.)


