background image

InfiRay Outdoor 


EYE III Series


  User Manual                                                                                                                                                                                                            www.infirayoutdoor.com


All rights reserved and shall not be copied and distributed in any form without written permission.                                                                                                      - 10 -


11. 

Power status of the built-in battery pack.


(When the color in the battery 

icon is green        , it indicates that the battery percentage is higher than 

20%, and the power is sufficient. When the color in the icon is red        , 

the power is insufficient and need to be charged promptly. When a 

lightning icon        is displayed in the battery icon, the device is powered 

by an external power supply and the battery pack is in charging)


10 


Image Calibration 

When the image is degraded or uneven, it can be improved by calibration. 

Calibration can equalize the background temperature of the detector and 

eliminate the image defects (such as vertical bars, phantom images, etc.).


There  are  two  calibration  modes  -  Auto  Calibration  and  Background 

Calibration.


Auto Calibration

Device will calibrate automatically according to the 

software algorithm. There is no need to close the lens cover (the internal 

shutter covers the sensor). Turn on/off the auto calibration in the main 

menu referring to the Section 

Main Menu - Auto Calibration.


Background  Calibration:

  Close  the  lens  cap

  (9)

  to  perform  the 

background calibration automatically.


11 


Photography and Video Recording 

EYE  III  series  is  equipped  with  a  function  for  video  recording  and 

photography  of  the  observed image which is  saved  on  the  built-in  32GB 

memory storage. 


The  photo  and  video  files  are  named  with  time,  so  it  is  suggested  to 

synchronize date and time in the 

InfiRay Outdoor 

application before using 

the photo and video functions.


Photography 


On the home screen, press and hold the

 Camera button (4)

 to take a 

photo.


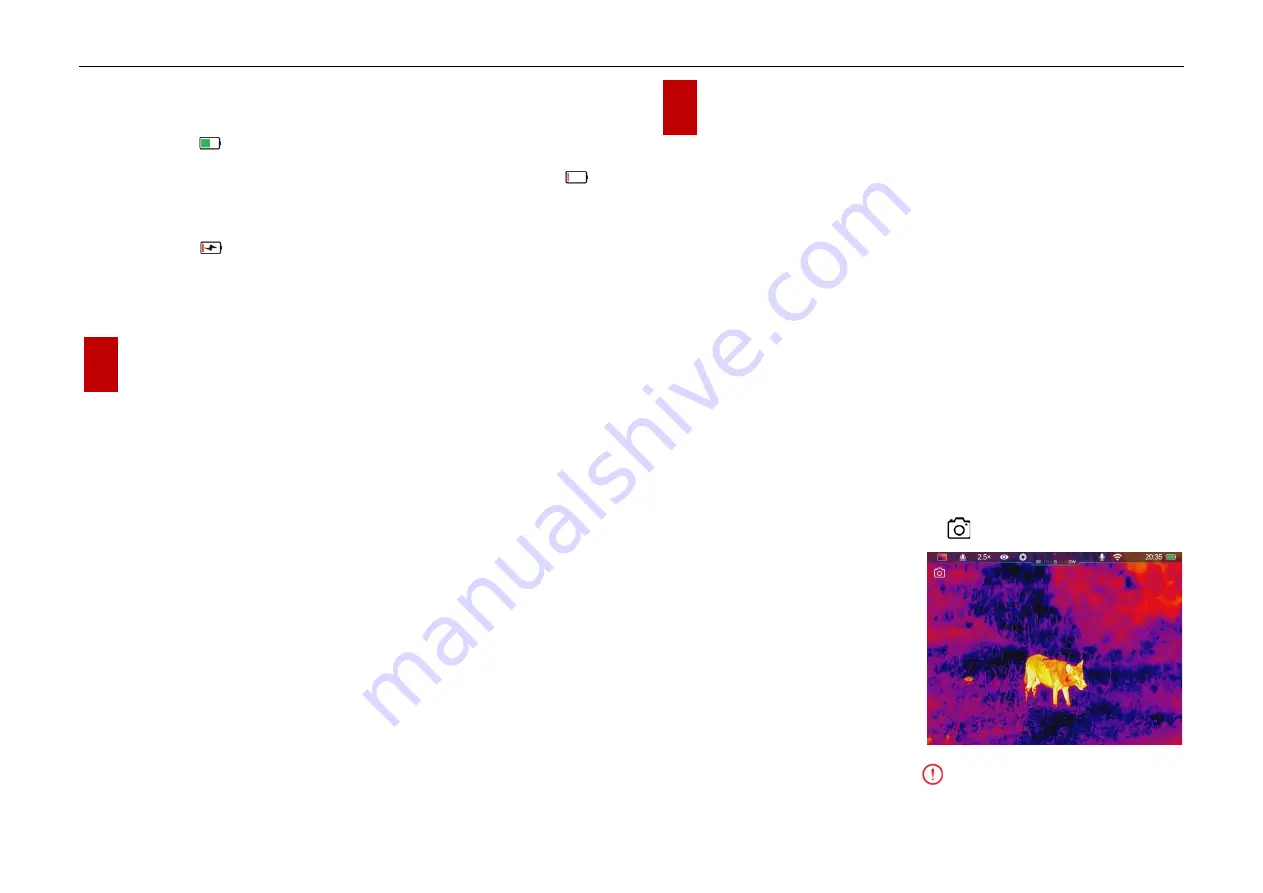
When taking a photo, the photo icon          flashes below the status bar 

in the upper left corner of the 

screen. The photo is taken 

successfully when the icon 

disappears.


Photos are stored in the built-in 

storage.


When the exclamation mark icon          appears on the right side of the 

Summary of Contents for E3 Max

Page 1: ...InfiRay Outdoor EYE III Series User Manual www infirayoutdoor com All rights reserved and shall not be copied and distributed in any form without written permission 0...

Page 2: ...ice to access the battery The battery is not meant to be replaced by the end user Only use the battery charger included in the delivery package Only charge the device at temperatures ranging between 0...

Page 3: ...hen you purchase a corresponding new product The proper disposal of this product serves to protect the environment and prevents possible harmful effects on human beings and their surroundings which ma...

Page 4: ...no visible damage Test to see if the device displays a clear undisturbed image Check that the settings for the device are correct See the notes in the section Operation Installing removing the battery...

Page 5: ...1 4 Detection Range m Target size 1 7m 0 5m P n 99 1300 1800 1800 Display Specifications Type OLED Resolution 1440 1080 Battery Power Supply Battery Type Capacity Output Voltage Built in Li ion batter...

Page 6: ...t It requires no external light source Even targets hidden behind obstacles such as branches grass and shrubs can be observed The EYE III series thermal imaging monocular is light and easy to carry sm...

Page 7: ...iclockwise Controller Powered off Power on the device Home screen Open the shortcut menu Open the main menu Digital zoom in Digital zoom out Standby mode Wake up the device Wake up the device Menu int...

Page 8: ...etic port 5 is red The power indicator 6 is on only in the charging status When the power indicator 6 turns green the device is fully charged When charging a lighting icon will appear inside the batte...

Page 9: ...ent Partial charging the battery is necessary if the battery is planned to be idled for long time Avid fully charged or discharged Keep the battery out of the reach of children 8 Operation Open the le...

Page 10: ...the Camera button 4 twice to standby the device If there is no operation performed for 30 minutes the product will automatically shut down 9 Status Bar The status bar is located at the top of the ima...

Page 11: ...ation Auto Calibration Device will calibrate automatically according to the software algorithm There is no need to close the lens cover the internal shutter covers the sensor Turn on off the auto cali...

Page 12: ...The images taken and the videos recorded are stored in the built in memory space in the format of PIC_HHMMSS jpg image and VIDEO_HHMMSS mp4 video with HHMMSS indicating hour minute second The maximum...

Page 13: ...ication is displayed in the status bar 13 Shortcut Menu Function On the shortcut menu you can quickly adjust basic configurations of commonly used functions including the image mode scene mode screen...

Page 14: ...rotate the Controller 3 and vice versa Press briefly the Controller 3 to adjust the current parameters or enter the sub menus In all menu interfaces press and hold the Controller 3 to save and exit to...

Page 15: ...Menu interface Rotate the Controller 3 to select the Wi Fi option Press briefly the Controller 3 to turn on off the Wi Fi function When Wi Fi is on the default password is prompted for 3s behind Wi Fi...

Page 16: ...Interconnection function is on and vice versa PIP Turn PIP function on off Press and hold the Controller 3 to enter the Main Menu interface Rotate the Controller 3 to select the PIP option Press brie...

Page 17: ...y collected during video recording Image hue Set the image hue Press and hold the Controller 3 to enter the Main Menu interface Rotate the Controller 3 to select the Image Hue option Press briefly the...

Page 18: ...pass calibration interface An icon like a triaxial coordinate system appears on the screen In the 15 seconds rotate the scope along the three axes indicated by the icon with each axis rotating at leas...

Page 19: ...firmware update function Rotate the Controller 3 to select Yes or No and press the Controller 3 to confirm the selection When select Yes it will automatically search for the update file in the folder...

Page 20: ...Sharpness level 3 Magnification 1 Auto Calibration On Image Hue C Ultra Clear Mode Off Wi Fi Off Wi Fi Password 12345678 Interconnection Off PIP Off Microphone Off Compass Off Info Show device informa...

Page 21: ...t supports to control the device via the InfiRay Outdoor App downloaded in the mobile device Setting Wi Fi Name and Password The name and password of the Wi Fi in EYE III series can reset on the InfiR...

Page 22: ...nection Between EYE III Two EYE III devices could also be interconnected manually First turn on the Wi Fi function on one device And turn on the interconnection function on the other device For faster...

Page 23: ...ler 3 to enter the Main Menu interface Rotate the Controller 3 to select the Firmware Update option Short press the Controller 3 to enter the submenu of the firmware update Rotate the Controller 3 to...

Page 24: ...ease may be used for cleaning process Clean the electric contacts and battery slots on the device using a non greasy organic solvent Check the glass surface of the eyepiece and lens If necessary clear...

Page 25: ...th the instructions may cause harmful interference to radio communications However there is no guarantee that interference will not occur in a particular installation If this equipment does cause harm...

Reviews: