Example 2 – HA Pair for Internal DNS and DHCP
For the Infoblox-550 Appliance
25
Note:
For details about using the LCD, see
Task 1.2 Specify Initial Network Settings
on page 16. For details on using
the console, see
Accessing the Device
on page 11 first, and then
Console Port
on page 16.
Node 1
Using the LCD or console port on one of the devices, enter the following information:
—
IP Address: 10.1.4.6 (for the LAN1 port)
—
Netmask: 255.255.255.0
—
Gateway: 10.1.4.1
Node 2
Using the LCD or console port on the other device, enter the following information:
—
IP Address: 10.1.4.8 (for the LAN1 port)
—
Netmask: 255.255.255.0
—
Gateway: 10.1.4.1
After you confirm your network settings, the Infoblox GUI application automatically restarts.
Task 2.3
Specify Device Settings
When you make the initial HTTPS connection to an Infoblox device, you see the Infoblox Appliance Startup Wizard,
which guides you through the basic deployment of the device on your network. To set up an HA pair, you must
connect to and configure each device individually.
Node 1
1.
Open a browser window and connect to https://10.1.4.6.
Note:
For details about making an HTTPS connection to an Infoblox device, see
Task 1.3 Specify Device Settings
on page 17.
2.
Log in using the default user name and password
admin
and
infoblox
.
Note:
User names and passwords are case-sensitive.
3.
The Infoblox Appliance Startup Wizard opens with a splash screen that provides basic information about the
wizard, and then displays license agreement information. Beginning on the third wizard screen, enter or select
the following to set up node 1 of the HA pair:
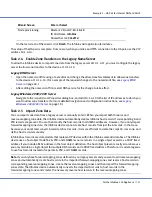
Wizard Screen
Enter
Deployment type
Stand alone
Node type
First HA node
ID Grid information
ID Grid Name:
Infoblox
Shared Secret:
37eeT1d
(Note: The nodes use the shared secret to form an encrypted
VPN tunnel between themselves. They synchronize the shared
database through this tunnel.)


