16
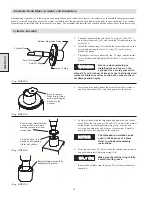
Manual Band Brake Assembly and Installation
NOTICE
Band brake installation is most
easily done with the motor end of
the winch blocked up approxi-
mately 10 cm [4 inches]. Be sure to support the winch
securely so that it cannot move while it is being serviced.
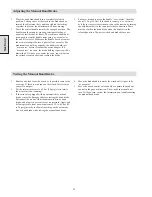
1.
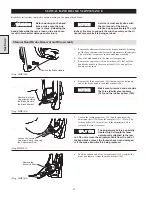
If the needle bearings (138 and 140) were removed, press them
back into place. Lubricate them by packing with a good quality
EP grease, and install and lubricate the ‘O’ ring dirt exclusion
seals with the same grease.
2.
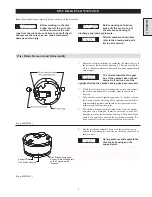
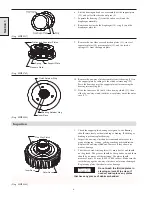
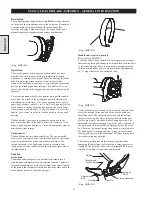
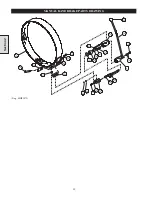
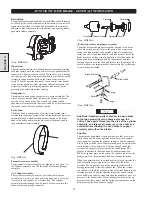
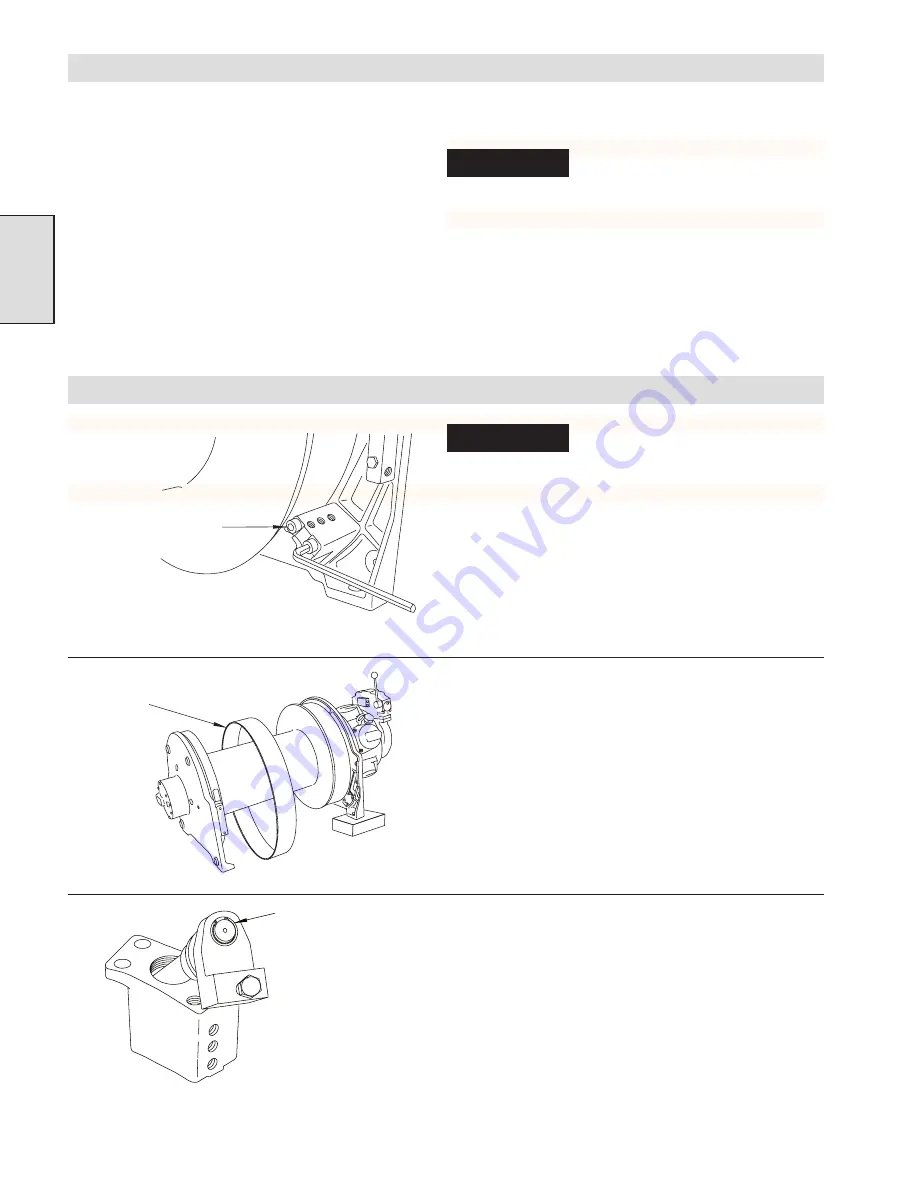
Using the two long (107) and two short (112) capscrews,
fasten the brake bracket (106) to the winch uprights. Torque
the capscrews to 45-50 Nm (33-36 ft. lbs.)
(Dwg. MHP1094)
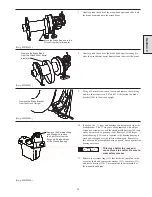
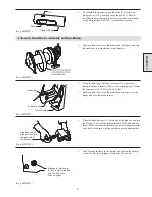
3.
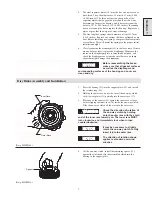
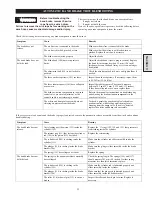
Gently spread the ends of the brake band (104) apart and slip
the band over the winch drum barrel diameter.
4.
Gently spread the ends of the brake band, and slip it over the
flange and onto the brake surface.
(Dwg. MHP1095)
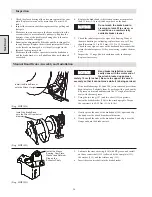
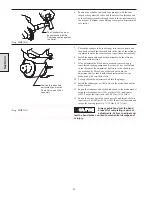
5.
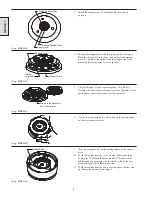
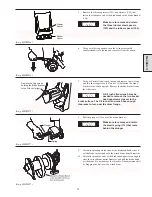
Lubricate the sleeve bearing (134) with EP grease, and install
on the eccentric shaft (135) followed by the cam plate (131),
the washer (133), and the retainer ring (132).
6.
Insert the eccentric shaft into the brake bracket .
(Dwg. MHP1092)
Inspection
Section 2
1.
Check the sleeve bearing allows free movement of the cam
plate. Replace if worn oval by more than 0.76 mm (0.03
inch).
2.
Inspect the eccentric shaft bearing surfaces for galling and
flat spots.
3.
Make sure the two bearings in the brake bracket allow the
eccentric shaft to move smoothly and easily. Replace the
bearings if any of the needles are damaged or if the outer
shells are cracked or chipped.
4.
Examine the adjustment bolt threads and the locking pellet
for any damage. Replace them if the adjustment bolt is bent
or the threads are damaged, or if the pellet is tight in the
threaded locking screw hole.
5.
Make sure that the rubber spacer between the brake band
and the brake bracket is still pliable and has not hardened
or cracked.
6.
Replace the brake band if the friction surface measures less
than 1.5 mm (1/16 inch) thick anywhere on the band.
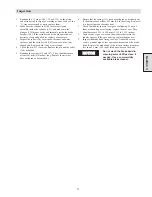
NOTICE
Do not wash the brake band in
cleaning solvent. Wipe clean, or
if needed use a commercially
available brake cleaner.
7.
Check the tubular spacers for signs of collapsing. If any of
them are buckling or collapsing, replace them as a set. They
should measure 28.3 to 28.8 mm (1.115 to 1.135 inches).
8.
Check for any signs of wear on the hardened flat washers that
retain the tubular spacers. If they are wearing, replace them as
a set.
9.
Inspect the ‘O’ rings (the dirt exclusion seals) for damage.
Replace if necessary.
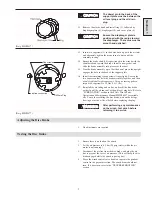
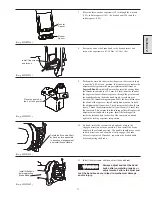
Install the Brake Bracket
onto the Winch Upright.
Install the Brake Band
onto the Winch Drum barrel
diameter.
Install the Sleeve
Bearing, Cam Plate,
Washer and Retainer
Ring on the
Eccentric Shaft.
Summary of Contents for FA5A
Page 10: ...10 DISC BRAKE PARTS DRAWING Dwg MHP0667 Dwg MHP0630 One Way Clutch Detail Section 1...
Page 19: ...19 Section 2 SERVICE NOTES...
Page 54: ...54 REDUCTION GEAR ASSEMBLY PARTS DRAWING Dwg MHP1221 Section 5...
Page 57: ...57 SERVICE NOTES...
Page 58: ...58 SERVICE NOTES...
Page 59: ...59 SERVICE NOTES...

