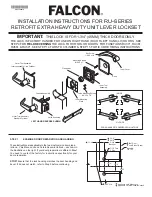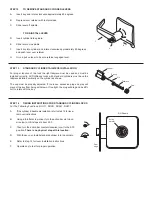
Fold template on lines indicated.
Place on
HIGH EDGE
of door bevel.
A.
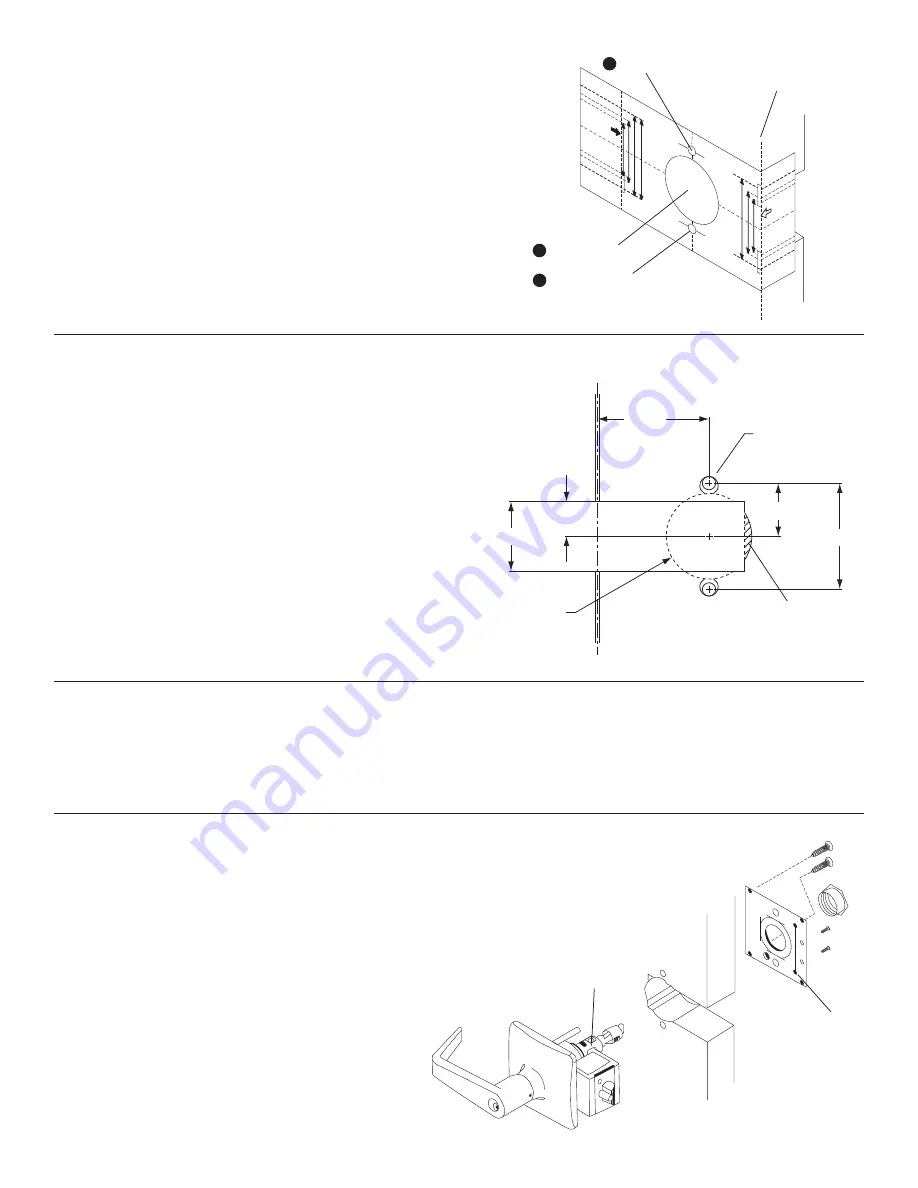
Place template on high edge of door bevel. Center the template to
the slot opening and mark 2-1/8” diameter on surface of door.
Repeat same for low edge of door.
B.
Locate and verify clearance for two (2) 5/16” (8mm) thru-bolt holes.
STEP 2
MARK DOOR
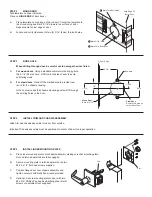
When drilling through door, be careful not to damage the door finish.
A.
For wood doors
: Using a standard commercial boring jig bore
the 2-1/8” (54mm) hole. Drill from both side of door to avoid
splintering wood.
B.
For steel doors
: Grind off the marked area to provide clea-
rance for the chassis housing.
Note: In most cases the chassis mounting posts will fit through
the existing holes in the door.
STEP 3
BORE HOLE
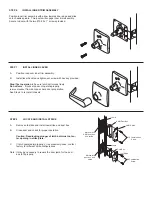
Slide trim and chassis assembly into door from outside.
Important: Chassis assembly must be positioned in center of door for proper operation.
STEP 4
INSTALL TRIM AND CHASSIS ASSEMBLY
A.
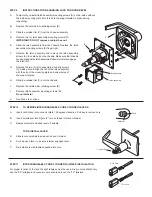
Place inner mounting plate onto chassis assembly making sure that mounting plate
slot and latch adapter tab are fully engaged.
B.
Secure mounting plate to latch adapter with the two
#8-32 x 1/2” flat head screws supplied.
C.
Position flanged nut over chassis assembly and
tighten securely with black hex wrench provided.
D.
Optional: Secure mounting plate to door with two
#8 x 3/4” Phillips Pan head self-drilling sheet metal
screws or equivalent (not supplied).
STEP 5
INSTALL INNER MOUNTING PLATE
B
Mark Thru Bolt Holes
A
Mark 2-1/8” Hole
B
Mark Thru Bolt Holes
High Edge Of
Bevel Door
Door Edge
See Note
2-3/4”
1-5/16”
2-5/8”
7/8”
1-3/4”
Wood Door:
Bore Ø 2-1/8”
Steel Door:
Remove this area on
both sides of door
C
L
Tab
Slot
FOLD HERE
& PLA
CE ON
LO
W EDGE OF
DOOR BEVEL
USE OF A DRILL FIXTURE IS
RECOMMENDED
TO
ENSURE PR
OPER
ALIGNMENT OF
THR
U-BOL
T HOLES
.
iF APPLICABLE.
USE OUTSIDE OF
⁵⁄₁₆
” (8 mm) &
¹⁄₈
” (5 mm) HOLE
C
L LA
TCH
2
2
TEMPLA
TE FOR INST
ALLA
TION HT F
ALCON
FOLD HERE &
PLA
CE ON HIGH
EDGE OF DOOR
BEVEL
LO
W EDGE
HIGH EDGE

