STEP 6
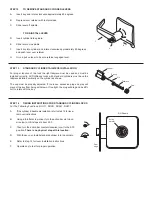
INSTALL INNER TRIM ASSEMBLY
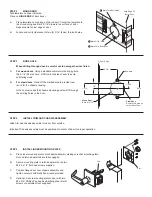
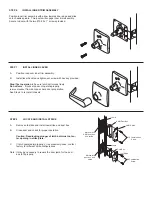
Position inner trim assembly with arrow towards door edge and slide
onto chassis spindle. Thru-posts will engage inner trim assembly.
Secure to door with the two #10-32 x 1” screws provided.
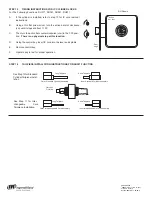
A.
Position rose over inner trim assembly.
B.
Install lever handle and tighten set screw with hex key provided.
Stop! Test operation
to be sure latch bolt moves freely.
Do not force.
If lockset does not operate properly,
re-move lockset from door and check door preparation.
See Step 4 to re-install chassis.
STEP 7
INSTALL INNER LEVER
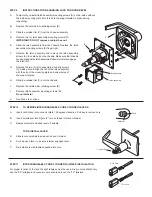
A.
Remove old strike and install new strike and dust box.
B.
Close door and check for proper operation.
Caution: Deadlocking plunger of latch bolt must not en-
ter opening in strike plate.
C.
If latch operates improperly, or is excessively loose, contact
factory for different strike configurations.
Note: It may be necessary to rework the door jamb for the dust
box to fit properly.
STEP 8
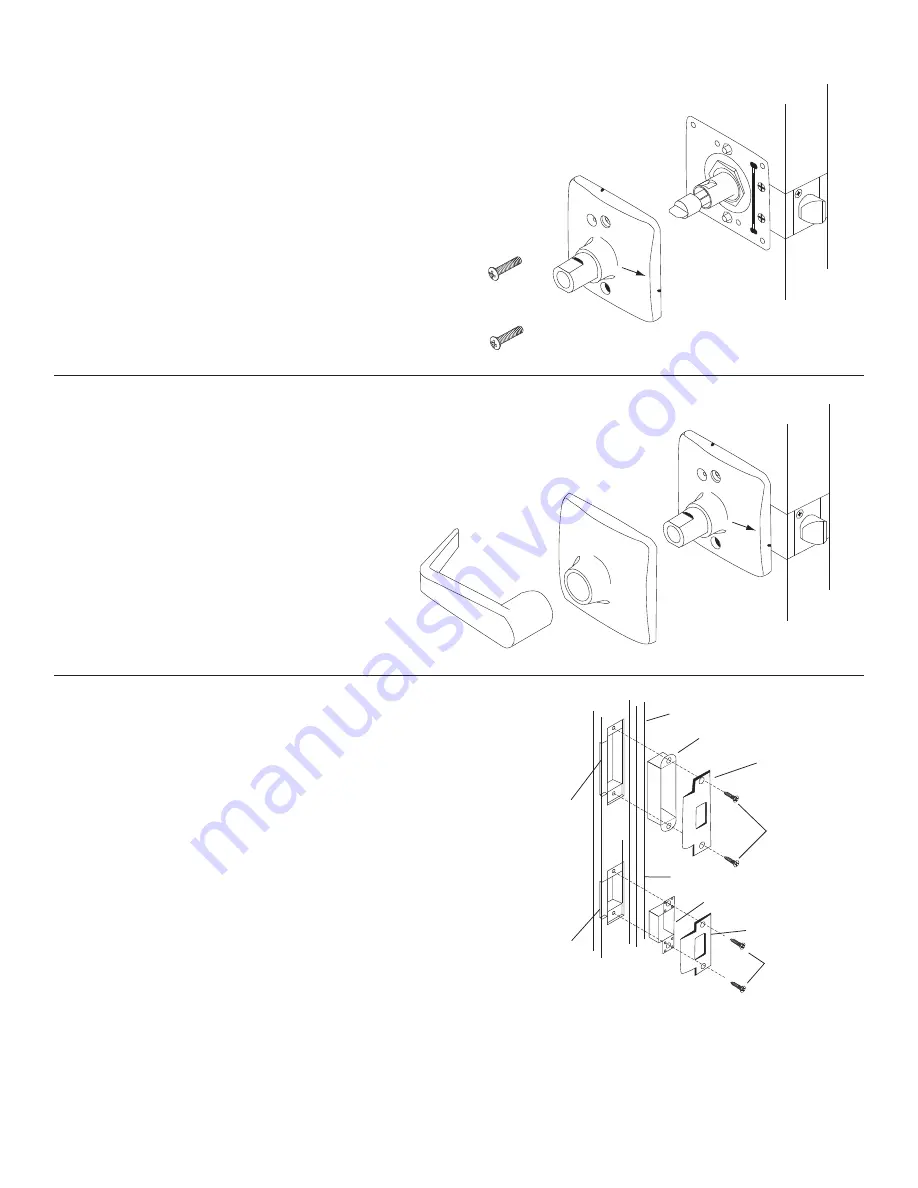
LOCATE AND INSTALL STRIKE
Jamb
ANSI Dust Box
ANSI Strike
#12 Combination
Screw
Jamb
Dust Box
Strike
#8 Combination
Screw
Mortise for
ANSI dust box
and strike
Mortise for
dust box and
strike

