background image

G2334H/E Quick Installation Guide

v1.00

www.ingrasys.com

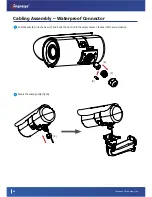
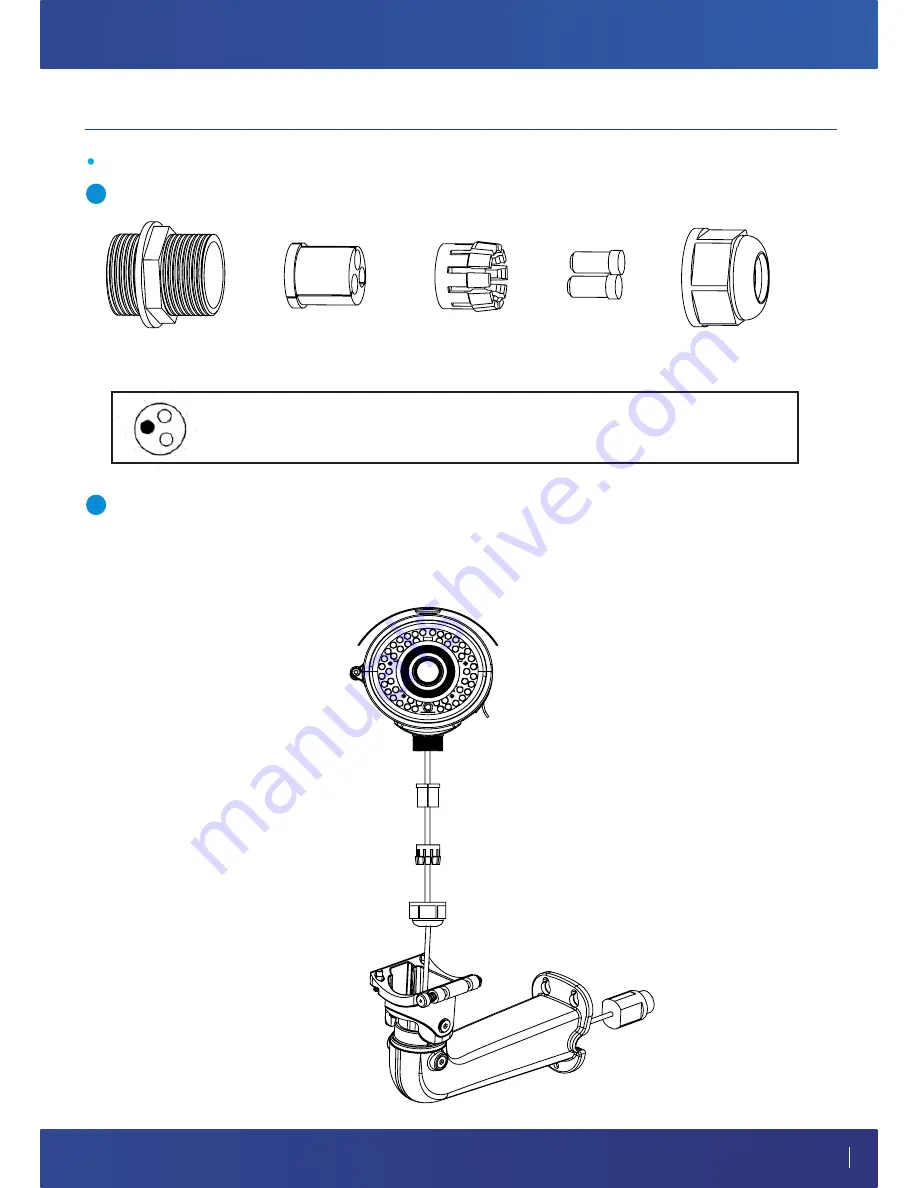
1.   Disassemble the components of waterproof connector into parts (A)~ (E) as show below.

2.   Remove the rubber stopper from the bottom of the network camera and secure the screw nut (A) tightly. If you need 
      extra power for external devices or external devices such as sensors and alarms, please feed the cable through the wall 
      mount bracket and the waterproof connector (E --> C --> B --> A) as the illustration shown below. 
      (Note: There are three holes on the seal (B), the recommended cable gauge is 6.2mm)

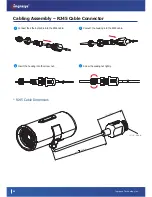
Cabling Assembly – Waterproof Connector

05

Assembling Steps

(A) Sealing Nut

(B) Seal

(C) Claw

(D) Pin

(E) Sealing Nut

(A) 

(B) 

(C) 

(E) 

1

2

 Recommended to use CAT-5 Cable (Φ6.2 ) for DC12V, AC24V or I.O function.

Summary of Contents for G2334E

Page 1: ...G2334H E Ver v1 00 Quick Installation Guide Ingrasys Technology Inc...

Page 2: ......

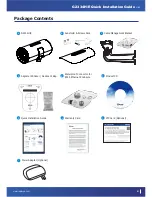
Page 3: ...H E Package Contents A Cable Management Bracket C Product CD F Warranty Card H Power Adapter Optional J VIP Card Optional I 01 Sunshield Screws Pack B Alignment Sticker Desiccant Bag D Waterproof Conn...

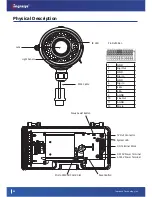
Page 4: ...2 RJ45 Cable Reset Button Micro SD SDHC Card Slot Focus Assist Button TV Out Connector System LED I O Terminal Block DC12V Power Terminal AC24V Power Terminal Pin Definition 1 GND 2 Digi Out 3 GND 4 D...

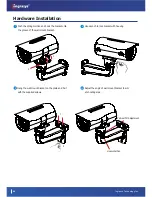
Page 5: ...ach the sunshield with two supplied screws 4 Fix Wall bracket holder on the wall 3 Attach the alignment sticker to the wall and drill three holes 6 Feed the function cable through the front opening of...

Page 6: ...04 2 Use wrench to lock bracket with housing 1 Push the spring mortise and hook the bracket onto the groove of the wall mount bracket 4 Adjust the angle of wall mount bracket to aim at shooting area 3...

Page 7: ...power for external devices or external devices such as sensors and alarms please feed the cable through the wall mount bracket and the waterproof connector E C B A as the illustration shown below Note...

Page 8: ...echnology Inc Cabling Assembly Waterproof Connector 06 3 Push the seal B in to the claw C and insert the pin D into the empty holes on the seal B to avoid moisture 4 Secure the sealing nut E tightly B...

Page 9: ...ng Assembly RJ45 Cable Connector 07 1 Attach the gasket to the front of the housing Components of the Waterproof Connector Assembling Steps E D 2 Insert the seal into the housing D B 3 Insert the stri...

Page 10: ...Cable Connector 4 Connect the Ethernet cable into the RJ45 cable 5 Connect the housing into the RJ45 cable 6 Insert the housing into the screw nut 7 Screw the sealing nut tightly RJ45 Cable Dimension...

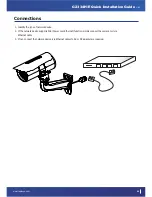
Page 11: ...nnections 1 Identify the type of network device 2 If the network device supports PoE Power over Ethernet function simply connect the camera to it via Ethernet cable 3 If not connect the network device...

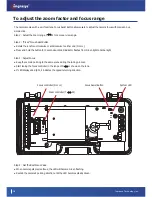
Page 12: ...hold the button for 3 seconds until LED indicator flashes from Green light to Amber light Step 3 Adjust Focus Keep the camera pointing to the same scene during the tuning process Start tuning the focu...

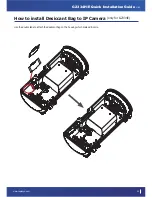
Page 13: ...334H E Quick Installation Guide v1 00 www ingrasys com How to install Desiccant Bag to IP Camera only for G2334E Use the double tape to attach the desiccant bag on the housing which marked in circle 1...

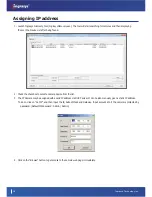
Page 14: ...e checkbox to select a camera device from the list 3 The IP Camera may be assigned with a valid IP address via DHCP server It can be also manually given a static IP address To do so click on Set IP an...

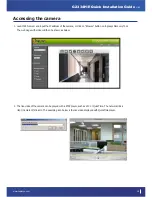
Page 15: ...the camera or click on Browse button on Ingrasys Discovery Tool The web page with video will then be shown as below 2 The live video of the camera can be played with a RTSP player such as VLC or Quic...

Page 16: ...Ingrasys Technology Inc...

Reviews: