5-4
•
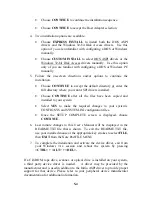
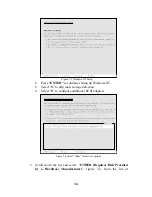
Choose CONTINUE to continue the installation sequence.
•
Choose CONTINUE to accept the Host Adapter selection.
4. Two installation options are available:
•
Choose EXPRESS INSTALL to install both the DOS ASPI
drivers and the Windows 32-bit Disk Access drivers. Use this
option if you are unfamiliar with configuring a DOS or Windows
manually.
•
Choose CUSTOM INSTALL to select DOS ASPI drivers or the
Windows 32-bit Disk Access drivers manually. Use this option
only of you are familiar with configuring a DOS or Windows PC
manually
5. Follow the on-screen directions and/or options to continue the
installation.
•
Choose CONTINUE to accept the default directory or enter the
full directory where you want ASPI drivers installed.
•
Choose CONTINUE after all the files have been copied and
installed to your system.
•
Select YES to make the required changes to your system’s
CONFIG.SYS and SYSTEM.INI configuration files.
•
Once the SETUP COMPLETE screen is displayed, choose
CONTINUE..
6. Last minute changes to this User’s Manual will be displayed in the
README.TXT file that is shown. To exit the README.TXT file,
use your installed mouse or the appropriate key strokes to select FILE,
then EXIT from the Note Pad FILE MENU.
7. To complete the installation and activate the device driver, exit from
your Windows 3.1x session and reboot the system by pressing
<CTRL> + <ALT> + <DEL>.
If a CD-ROM, tape drive, scanner, or optical drive is installed on your system,
a third party device driver is needed. A driver may be provided by the
manufacturer and is used in addition to the Initio ASPI driver to provide proper
support for that device. Please refer to your peripheral device manufacturer
documentation for additional information.
Summary of Contents for INI-9100U
Page 4: ...iv THIS PAGE INTENTIONALLY LEFT BLANK ...
Page 8: ...viii THIS PAGE INTENTIONALLY LEFT BLANK ...
Page 12: ...1 12 THIS PAGE INTENTIONALLY LEFT BLANK ...
Page 20: ...1 8 THIS PAGE INTENTIONALLY LEFT BLANK ...
Page 28: ...3 1 Hardware Installation This Chapter Is About Installing the INI 9100U 9100UW ...
Page 51: ...6 6 THIS PAGE INTENTIONALLY LEFT BLANK ...
Page 80: ...8 10 THIS PAGE INTENTIONALLY LEFT BLANK ...
Page 88: ...9 8 THIS PAGE INTENTIONALLY LEFT BLANK ...
Page 96: ...11 8 THIS PAGE INTENTIONALLY LEFT BLANK ...
Page 105: ...12 1 Appendix This Chapter Is About Troubleshooting DOS Space 1 Gigabyte Warranty ...
Page 110: ......
Page 111: ...13 1 Glossary This Chapter Is About Common terms and definitions ...
Page 116: ...6 ...


