background image

13

• Do not turn the appliance over while it is in use or connected to the mains.
• Always unplug the mixer from the power outlet before removing or changing accessories.
• Never leave the product unattended when in use.
• Store the appliance in a dry place, free from dust and out of direct sunlight, far from 

heating sources.

• Never immerse the appliance into water or other liquids and not place it under tap water.
• Always unplug the mixer from the power outlet before assembling, dismantling, coming 

close to the moving parts or cleaning the device.

• When in use, place the product on a flat and stable surface; ensure it cannot fall on the

floor, in a sink or a container full of water.

• DO NOT use near the kitchen hob and/or other sources of heat.
• Be careful that the cable does not touch hot, incandescent surfaces, open flames, pans or

other utensils.

• Do not touch the moving parts. CAUTION: Do not touch and/or remove accessories while

the unit is in operation.

• All parts that come into contact with food during the use of the device must be well washed

before use.

• Do not use accessories not original, or more than one accessory at once.
• During use do not obstruct the ventilation grills.
• Do not let water or objects inside the air grills
• Handle blades carefully when you proceed with the cleaning of the product; improper use 

of blades may result in a potential hazard.

• Pick up the product with caution. Make sure that the top of the bowl and the power cable 

are locked before you lift the product.

• Noise level: Lc> 70dB
• Be careful with the sharp blades when handling the product, emptying the basket, and 

while cleaning.

• Be careful when a hot liquid is poured into the product as they could be expelled because 

of a sudden vaporization.

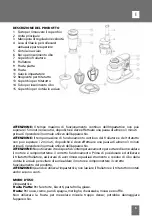
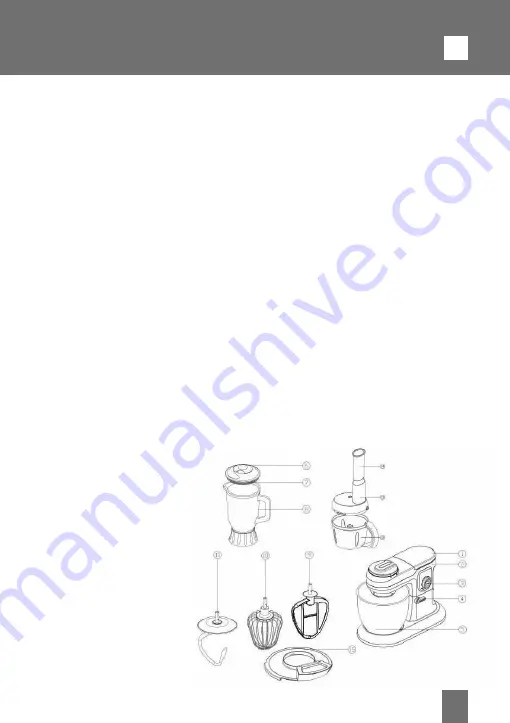
PRODUCT DESCRIPTION

1  Botton to remove the cover
2  Main unit
3  Speed Control 
4  Release Knob 
5  Stainless Steel Bowl
6  Measuring Cup
7  Blender Jug Cover
8  Blender Jug 
9 H-beater
10 Whisk
11  Dough Hook
12  Mixing Bowl
13  Mixing Bowl Cover
14  Measuring tube
15  Stainless Steel Bowl Cover

GB

Summary of Contents for INN-721

Page 1: ...IMPASTATRICE CON FRULLATORE E TRITATUTTO INN 721 MANUALE D USO USER MANUAL...

Page 2: ......

Page 3: ...do quanto previsto dalle normative vigenti Dopo aver rimosso l apparecchio dalla confezione controllare l eventuale presenza di danni da trasporto e l integrit della fornitura in base al disegno In ca...

Page 4: ...icie piana e stabile in modo che non possa cadere a terra nel lavandino o in altri contenitori di acqua NON utilizzare in prossimit del piano cottura della cucina e o altre fonti di calore Prestare at...

Page 5: ...re e del tritatutto non pu superare i 2 minuti dopodich si deve effettuare una pausa di almeno 3 minuti prima di riprendere il normale utilizzo dell apparecchio ATTENZIONE Non utilizzare i tre disposi...

Page 6: ...a spento l apparecchio 2 Per montare le uova meglio utilizzare uova a temperatura ambiente 3 Prima di montare gli albumi assicurarsi che la frusta o la ciotola non siano unti o sporchi di tuorlo 4 Uti...

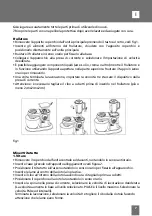
Page 7: ...mpostare la velocit 0 e staccare il dispositivo dalla presa di corrente Attenzione necessario tagliare il cibo a cubetti prima di inserirlo nel frullatore pi o meno 2cmx2cmx2cm fig 1 Mixer tritatutto...

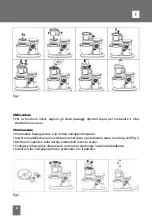
Page 8: ...asse girevole e la ciotola nell apposito spazio Inserire una delle due lame in dotazione nel disco e posizionarlo sopra la ciotola vedi fig 3 Mettere il coperchio sulla ciotola ruotandolo in senso ora...

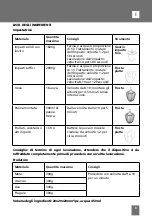
Page 9: ...Velocit da 8 10 montare gli albumi per 4 5 minuti senza interruzione Frusta Panna montata 300ml di panna fresca Dalla velocit 8 alla 10 per 5 minuti Frusta Frullati cocktails o altri liquidi 1 litro B...

Page 10: ...s 30s Tritare e frullare Carne 300g circa 10g a pezzo 30s Prosciutto 300g circa 15g a pezzo 30s Cipolle 400g circa 20g a pezzo 30s Uova 6 tuorli 25s Fragole 200g 25s Formaggio 100g 20s Mandorle 100g 2...

Page 11: ...componenti essenziali giunta a fine vita agli idonei centri di raccolta differenziata dei rifiuti elettronici ed elettrotecnici oppure riconsegnarla al rivenditore al momento dell acquisto di nuova ap...

Page 12: ...el matches the mains voltage before plugging in the appliance The rating label is on the product The appliance s plug must fit into the mains socket properly Do not alter the plug Do not use plug adap...

Page 13: ...e accessories while the unit is in operation All parts that come into contact with food during the use of the device must be well washed before use Do not use accessories not original or more than one...

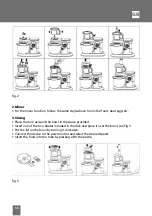
Page 14: ...mage the appliance Dough Hook For yeast mixtures 1 Turn the release knob clockwise and raise the mixer head till it locks 2 Insert a tool push up till it stops then turn it anti clockwise 3 Fit the bo...

Page 15: ...he base Connect the appliance to the power outlet and select the speed setting desired You can add liquid components eg Oil cream or other while the blender is in operation by using the appropriate op...

Page 16: ...e turn axis and the bowl in the space provided Insert one of the two blades included in the disk and place it over the bowl see Fig 3 Put the lid on the bowl by turning it clockwise Connect the device...

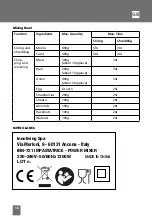
Page 17: ...eed 1 2 for 30 seconds Operation period speed 8 10 for 120 seconds H beater Eggs 16 eggs Speed 8 10 whip the egg whites for 4 5 minutes without stopping Whisk Whipped cream 300ml fresh cream From spee...

Page 18: ...and whisking Meat 300g about 10g piece 30s Ham 300g about 15g piece 30s Onion 400g about 20g piece 30s Egg 6 tuorli 25s Strawberries 200g 25s Cheese 100g 20s Almonds 100g 20s Hazelnuts 100g 20s Walnu...

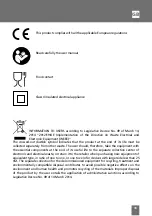
Page 19: ...pment with the essential components at the end of its useful life to the separate collection center of electronic and electrical waste or return it to the retailer when purchasing new equipment of equ...

Page 20: ...Innoliving Spa Via Merloni 9 60131 Ancona Italy Tel 199 188 335 www innoliving it MADE IN CHINA Rev 03_01 2018...

Reviews: