NV11 Manual Set – Section 4
5
Copyright © Innovative Technology Ltd 2012
GA963-2
4.2
Assembly and Fitting Instructions
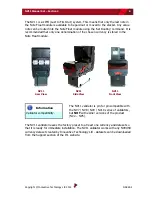
Installing the NV11 is a simple operation, but note that the validator can only be
installed
horizontally
:
Information
Validator compatibility.
The NV11 validator is pin for pin compatible with
the NV7 / NV8 / NV9 / NV10 series of validators,
but
NOT
with earlier versions of the product
(NV2 – NV5).
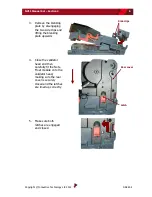
1.
If the validator head
has a blanking plate
fitted, you will need
to remove this
BEFORE attempting to
fit the Note Float
module. If the Note
Float module is
already fitted, please
go to step 6
2.
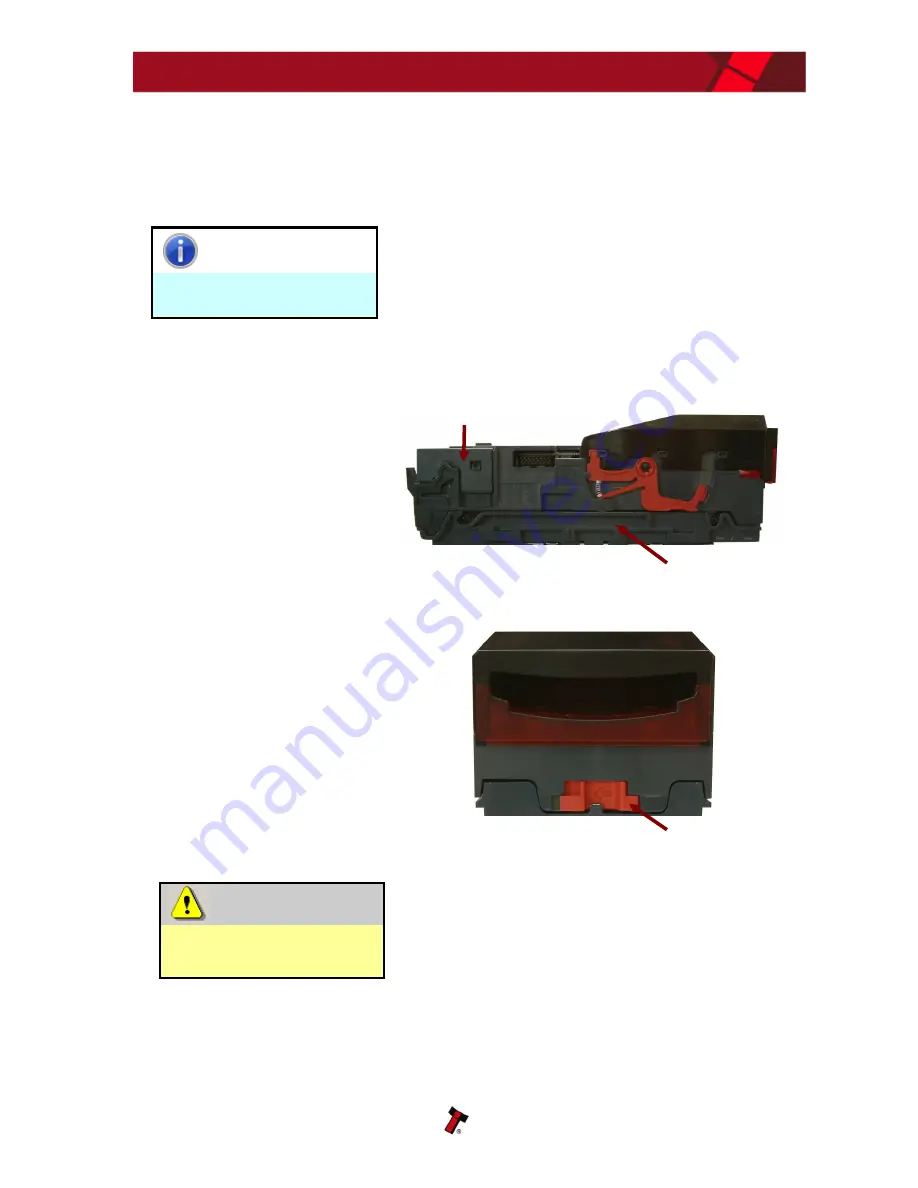
Open the validator
head by sliding the
red release catch on
the front of the
validator to the left
(as indicated in the
picture)
Caution!
Validator head
MUST
be
opened.
Always make sure the validator head has been
opened
BEFORE
trying to remove the blanking
plate – trying to remove the blanking plate with
the validator head closed will cause unit
damage.
Blanking plate
Validator head
Release catch
Summary of Contents for NV11
Page 1: ...NV11 MANUAL SET...
Page 2: ...NV11 MANUAL SET INTRODUCTION...
Page 10: ...NV11 MANUAL SET QUICK START AND CONFIGURATION GUIDE SECTION 1...
Page 27: ...NV11 MANUAL SET FIELD SERVICE MANUAL SECTION 2...
Page 49: ...NV11 MANUAL SET ITL SOFTWARE SUPPORT GUIDE SECTION 3...
Page 57: ...NV11 Manual Set Section 3 9 Copyright Innovative Technology Ltd 2012 GA963 2...
Page 74: ...NV11 Manual Set Section 3 26 Copyright Innovative Technology Ltd 2012 GA963 2...
Page 78: ...NV11 Manual Set Section 3 30 Copyright Innovative Technology Ltd 2012 GA963 2...
Page 92: ...NV11 MANUAL SET MECHANICAL AND ELECTRICAL MANUAL SECTION 4...
Page 121: ...NV11 Manual Set Section 4 30 Copyright Innovative Technology Ltd 2012 GA963 2...
Page 131: ...NV11 Manual Set Section 4 40 Copyright Innovative Technology Ltd 2012 GA963 2 Cashbox Options...
Page 134: ...NV11 MANUAL SET SOFTWARE IMPLEMENTATION GUIDE SECTION 5...
Page 157: ...NV11 MANUAL SET TECHNICAL APPENDICES SECTION 6...

