background image


MANUAL


 Innowater PHRX


Rev.05/19


Summary of Contents for PHRX

Page 1: ...MANUAL Innowater PHRX Rev 05 19 ...

Page 2: ......

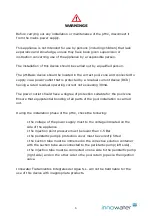
Page 3: ...should have a degree of protection suitable for the pool zone Ensure that equipotential bonding of all parts of the pool installation is carried out During the installation phase of the pHrx check the following the voltage of the power supply must to the voltage indicated on the side of the appliance the injection point pressure must be lower than 1 5 Bar the peristaltic pump s protection cover mu...

Page 4: ...t up ON OFF 7 3 4 Start up Priming and acid level alarm 7 4 pH configuration 9 4 1 Enable Disable 9 4 2 Setpoints 9 4 3 4 4 Probe calibration 10 4 5 Factory calibration 11 4 6 Dosing alarm 12 5 ORP configuration 13 5 1 Setpoints 13 5 2 ON OFF mode with chlorinator 15 5 3 Probe calibration 15 5 4 Factory calibration 16 ...

Page 5: ... of the probe and the setpoints programmed To avoid excessive dosage related to measuring delays the pump will alternate start pause periods in cycles of 100 seconds It also monitors the ORP thanks to its probe and then when needed sends a signal to activate an oxidant doser producer device 1 BNC socket for pH probe 2 BNC for pH level probe 3 BNC socket for ORP probe 4 230 VAC power suplly 5 ORP c...

Page 6: ... the peristaltic pump Suction Connect the flexible suction tube transparent to the injection fitting left side of the peristaltic pump Use a length of tube long enough to reach from the acid container to the peristaltic pump and feed the tube through the black rubber grommet in the anti fume cap Once the cap is on the tube fit the suction filter to the suction tube and place the suction line into ...

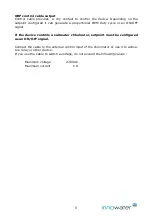
Page 7: ...duty cycle or an ON OFF signal If the device controls a saltwater chlorinator setpoint must be configured as an ON OFF signal Connect the cable to the external control input of the chlorinator or use it to activa te a relay or other device If you use the cable to switch a voltage do not exceed the following values Maximum voltage 230 VAC Maximum current 1 A ...

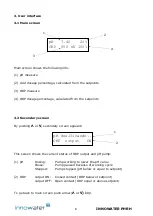
Page 8: ... Λ or V secondary screen appears This screen shows the current status of ORP output and pH pump 1 pH Dosing Pump working to lower the pH value Pause Pump paused because of working cycle Stopped Pump stopped pH below or equal to setpoint 2 ORP output ON Closed contact ORP below of setpoint output OFF Open contact ORP equal or above setpoint To go back to main screen push arrow Λ or V key 1 4 2 pH 7...

Page 9: ... evacuate the priming acid Press OK to stop the priming process if don t it will automatically return to main screen in 60 seconds Level alarm PH pump If the float drops down due to a lack of acid in the acid tank the level alarm will be activated and the pump will stop dosing This is indicated by a beep and the message EMPTY TANK on the display Fill the tank and the pump will be activated and wor...

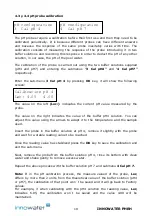
Page 10: ...ess OK 4 2 Setpoint configuration Enter with the OK key It will show the following screen The calculation of the dosage is made by establishing the two set points A and B and the relative volume of dosage that is required in each of these points When the pH is below the lower set point the pump will not dose acid When the pH is between both points the chlorinator will send a proportional signal de...

Page 11: ...e the required dosing volume and the response delay after dosing both of them depending on the size of your pool For example if your pool has a high volume you should establish high percentages of dosing The response time in the pH measurement of your pool can be considered when setting point A of the setpoint stopping the dosage before reaching the desired pH value For example to obtain a pH 7 0 ...

Page 12: ...e value of the buffer pH4 solution You can adjust this value using the arrows to adapt it to the temperature and the sample used Insert the probe in the buffer solution at pH 4 remove it slightly with the probe and wait for a stable reading value to be reached Once the reading value has stabilized press the OK key to save the calibration and exit the sub menu Next remove the probe from the buffer ...

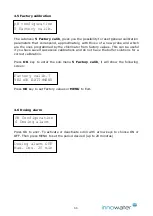
Page 13: ...alibrations and do not have the buffer solutions for a correct calibration Press OK key to enter the sub menu 5 Factory calib it will show the following screen Press OK key to set Factory values or MENU to Exit 4 6 Dosing alarm Press OK to ener To activate or deactivate scroll with arrow keys to choose ON or OFF Then press MENU to set the period desired up to 20 minutes Factory calib YES OK EXIT M...

Page 14: ... connect it to operate with a relay or other device If you use the cable to switch a voltage do not exceed the following values Maximum admissible voltage 230 VAC Maximum admissible current 1 A If percentage when calculated is different of 0 or 100 contact will open and close according to a variable work cycle PWM in cycles of 100 seconds For example if the calculated dosaje is 40 contact will rem...

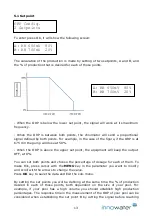
Page 15: ...eep the output OFF at 0 You can set both points and choose the percentage of dosage for each of them To make this press cursor with the MENU key in the parameter you want to modify and scroll with the arrows to change the value Press OK key to save the data and Exit the sub menu By setting the set points you will be defining at the same time the of production desired in each of those points both d...

Page 16: ...NATOR If you set the same ORP value in both points and dosage in A is 100 output will behave as a ON OFF signal When ORP is below the value output will remain ON closed contact If ORP is above the value output will remain OFF open contact 5 2 1 To work with a domestic INNOWATER salt water chlorinator you have to set the following parameters in the chlorinator Enter Control Ext in the main menu A O...

Page 17: ... same probe inevitably varies with time The calibration consists of measuring the response of the probe introducing it in two buffer solution and recording this response in order to deduct the ORP RH of any other solution in our case the ORP RH of the water in the pool The calibration of the probe is carried out using a buffer solution supplied 220mV and entering the sub menu 3 ORP Calib Enter the...

Page 18: ...es you the possibility to reset general calibration parameters that correspond approximately with those of a new probe and which are the ones programmed by the chlorinator from factory values This can be useful if you have saved successive calibrations and do not have the buffer solutions for a correct calibration Press OK key to enter the sub menu 5 Factory calib it will show the following screen...

Page 19: ...17 ...

Reviews: