6. Description of Parameters
- 200 -
6
6.11 Auxiliary Function
6.11.1 Jog
Jog is used to test equipment. In jog running, F6-00 must be set to 0 (direct start) and F6-10
must be set to 0 (Decelerate to stop).
Function Code
Parameter Name
Setting Range
Default
F0-25
Acceleration/Deceleration
time base frequency
0: Maximum frequency (F0-10)
1: Frequency reference
2: 100 Hz
0
F8-00
Jog frequency reference
0.00 Hz to maximum frequency
2.00 Hz
F8-01
Jog acceleration time
0.0s to 6500.0s
20.0s
F8-02
Jog deceleration time
0.0s to 6500.0s
20.0s
Jog acceleration time indicate time to accelerate from 0 Hz to F0-25.
Jog deceleration time indicate time to decelerate from F0-25 to 0 Hz.
Function Code
Parameter Name
Setting Range
Default
F8-27
Set highest priority to
terminal JOG function
0: Disabled
1: Enabled
0
This function parameter determines whether to set the highest priority to terminal JOG function.
If this function is enabled and any of F4-00 to F4-09 is set to 4 (forward jog) or 5 (reverse jog)
becomes active, the AC drive enters jog running status immediately.
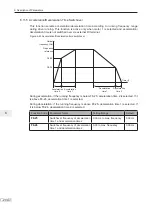
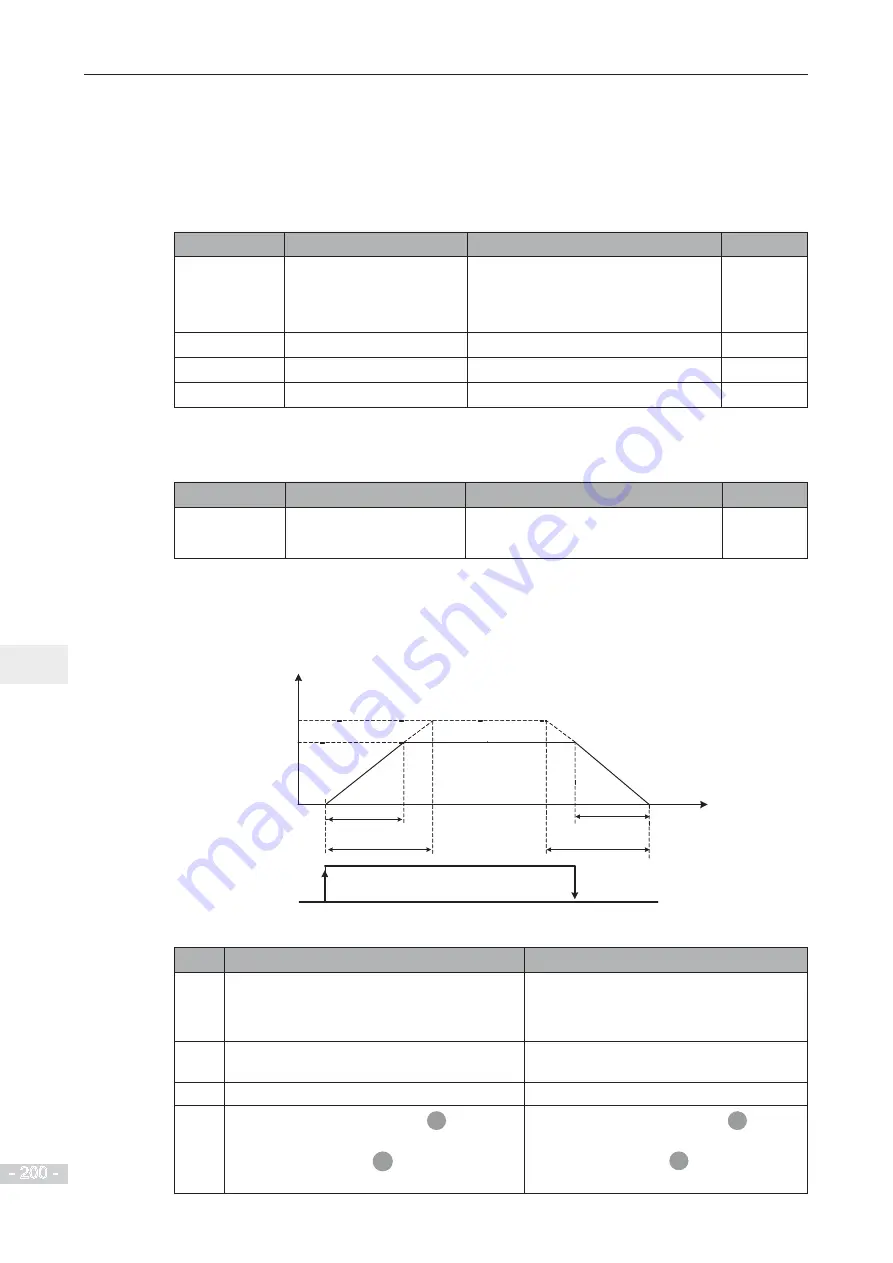
Figure 6-55 Jog running
F8-01
Time(t)
Output frequency
F0-25
Set acceleration time
Set deceleration time
Actual acceleration time
Actual deceleration time
F8-02
F8-00
Jog command
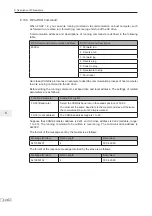
Follow the steps below to control the drive jog via the operation panel.
Steps Forward jog
Reverse jog
1
Set F7-01 = 3 to allocate the MF.K key with
forward jog.
Set F7-01 = 4 to allocate the MF.K key
with reverse jog.
Set F8-13 = 0 to allow reverse running.
2
Set F0-02 = 0 to select operation panel as
command source.
Set F0-02 = 0 to select operation panel as
command source.
3
Set F8-00, F8-01 and F8-02 properly.
Set F8-00, F8-01 and F8-02 properly.
4
In stop status, press down the
MF.K
key.
The drive starts to jog in forward direction.
After you release the
MF.K
key, the AC drive
decelerates to stop.
In stop status, press down the
MF.K
key.
The drive starts to jog in reverse direction.
After you release the
MF.K
key, the AC
drive decelerates to stop.
Summary of Contents for MD290 Series
Page 1: ......
Page 79: ...3 Electrical Installation 78 3 ...
Page 80: ...4 Operating Panel Keypad Display 4 1 Introduction 80 4 2 Inbuilt LED Operating Panel 80 ...
Page 92: ...5 Quick Setup 5 1 Get Familiar With Operating Panel 92 5 2 Setup Flowchart 93 ...
Page 227: ...7 Interfaces and Communication 226 7 ...
Page 285: ...10 Troubleshooting 284 11 ...
Page 349: ......
Page 350: ......


