— 64 —
to install them. To circumvent this inconvenience, and also de-
pending on how the Firmware Updater utility was delivered, we
may
have renamed the one file with a
.ex_
extension. So the ac-
tual file extension may be either
.ex_
or
.exe
. If it was amended
for delivery, the proper
.exe
extension must be restored for the
Firmware Updater to work. If necessary, right-click this file and
rename the
.ex_
extension
.exe
.
Running the
Firmware
Updater
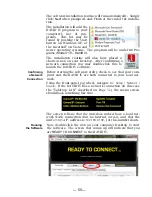
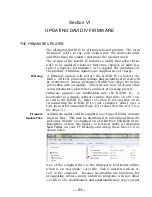
Navigate to you temporary
Desktop folder and double-
click the .exe file. (arrow,
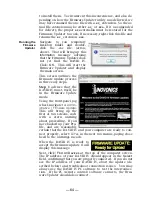
above). That will bring up this
Information
message advising
that the Firmware Updater does
not yet find the DAVID IV.
Click:
OK
. This will start the
Firmware Updater and display
the main screen.
This screen outlines the
firmware update process
in three easy steps.
Step 1
advises that the
DAVID IV must, itself, be
in the Firmware Update
mode.
Using the front-panel jog
wheel, navigate to:
Admin-
istrative / Firmware Update
.
This will bring up the
first of two screens, each
with a stern warning
about proceeding. If you
have backed up your Pro-
file, and are reasonably
certain that the DAVID IV and your computer are ready to con-
nect properly, select:
Yes
in the next two menus, paying close
heed to the warnings in each.
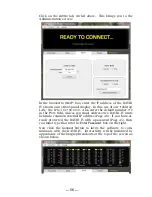
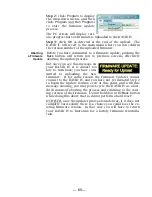
When the DAVID IV is ready to
accept the firmware update it will
display this message.
Next, click:
Find All Devices
at the top of the computer screen.
The IP address of your DAVID IV should appear in the
Select:
field, confirming that you are properly connected. If you do
not
see the IP address of your DAVID IV, abort the update (de-
scribed below) and troubleshoot connection issues. You may
always use the DAVID IV PC software to test the interconnec-
tion. If the PC (remote control) software connects, the Firm-
ware Updater should also connect.
Summary of Contents for 719
Page 1: ...DAVID IV FM Audio Broadcast Processor Installation User Guide www inovonicsbroadcast com ...
Page 2: ......
Page 4: ......
Page 70: ... 66 NOTES AND DOODLES ...

