© Inovonics, 2011 - www.inovonics.com
EE1265 EchoStream® 360° Passive InfraRed
Motion Detector
Installation and Operation Manual - 05377C
1 Overview
The EE1265 is a wireless, ceiling-mounted, four-element passive infrared (PIR)
intrusion detector providing protection from intruders by pyro-sensor array. Micro-
controller signal analysis with special technology for pulse processing increases
immunity to interference, vibration, static, lightning, ambient temperature changes,
and other common causes of false alarms.
Caution:
The EE1265 needs one minute for stabilization after power up. During the
stabilization period, the LED will blink twice per second, and the EE1265 will not be
operational.
1.1 Inovonics Wireless Contact Information
If you have any problems with this procedure, contact Inovonics Wireless technical
services:
•
E-mail: support@inovonics.com
•
Phone: (800) 782-2709; (303) 939-9336
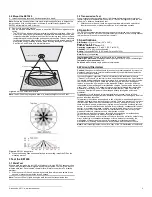
Figure 1
EE1265 components
2 Installation and Startup
2.1 Install the Batteries
The EE1265 can accomodate two batteries for extra battery life, but only one is
required for operation.
Note:
When installing batteries, it is recommended that batteries are replaced in new
pairs from the same manufacturer.
To install batteries:
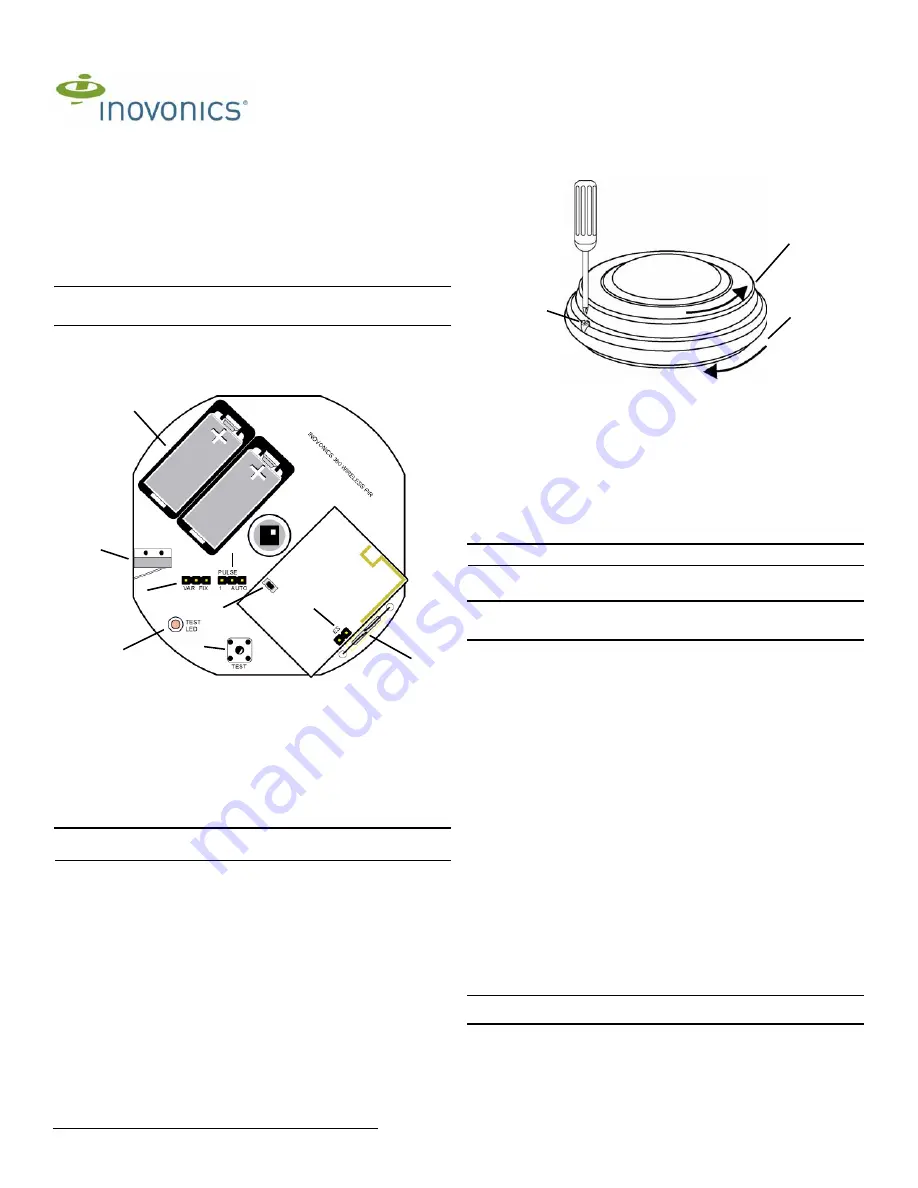
1.
Loosen the housing tamper lock screw.
Figure 2
Remove the housing cover and mounting bracket
2.
Install the battery included with the unit.
3.
Install an optional second battery.
4.
Press the
Reset
button to initialize the transmitter.
You must press the
Reset
button each time the battery is installed.
2.2 Enable EchoStream Select
To meet ETSI requirements, Inovonics has developed a new line of EE 868MHz-only
products. These new 868MHz-only products are compatible with older systems that
include EchoStream Select products. If you are using any ES products in your current
system, you will need to enable EchoStream Select compatibility on this new 868MHz-
only product.
To enable/disable EchoStream Select compatibility:
1.
To enable compatibility with ES products, place a selection jumper on the ES
selection pins.
Note:
The selection jumper is included in the EE1265 hardware packet.
2.
If no ES products are used in your system, remove the selection jumper from the
ES selection pins.
3.
Press the
Reset
button to initialize the transmitter.
Caution:
When pressing the
Reset
button, make sure you don’t also touch the ES
selection pins. Touching the ES selection pins while pressing the
Reset
button can
inadvertently set the EE1265 to the wrong frequency band.
2.3 Select PIR Sensitivity
The pulse count selection pins provide control for difficult operating environments.
Automatic pulse count is recommended for reliable operation in environments subject
to temperature fluctuation that can cause false alarms. The single pulse count mode is
more sensitive to minor temperature variations, and should be used in sites where
variant heat sources will not cause alarms. Automatic pulse count is the factory default
because it allows more reliable operation in environments subject to temperature
fluctation. To select PIR sensitivity:
1.
Place a selection jumper on the appropriate pulse count selection pins.
•
Place the jumper on the left two pins to select a single pulse count.
•
Place the jumper on the right two pins to select an automatic pulse count.
2.4 Select Fixed/Variable Sleep Time
The sleep time jumper setting provides control for normal or high-traffic operating
environments. When set to fixed, if the EE1265 senses motion, it will transmit an
alarm, then enter sleep mode for 180 seconds; if motion is sensed when the sleep
time has expired, the EE1265 will transmit another alarm. Fixed sleep time is
recommended for normal operating environments. When set to variable, if the EE1265
senses motion, it will transmit an alarm, then enter sleep mode for 180 seconds; if
motion is sensed before the sleep time has expired, the EE1265 will restart the 180
second interval. Variable sleep time is recommended for high-traffic operating
environments.
1.
Place a selection jumper on the appropriate sleep countselection pins.
•
Place the jumper on the left two pins to select variable sleep time.
•
Place the jumper on the right two pins to select fixed sleep time.
2.
Install the battery.
3.
Press the
Reset
button.
2.5 Register the PIR
The EE1265 must be registered. Refer to receiver, network coordinator, or control
panel installation instructions to register the EE1265. Press
Reset
when prompted to
register the transmitter.
Caution:
The EE1265 should be tested after registration to ensure operation. To test
the EE1265, activate each of the conditions and ensure an appropriate response.
A
Batteries
B
Tamper switch
C
Pulse count selection pins
D
Test LED
E
Reset button
F
Test button
G
ES selection
pins
H
Test reed switch
I
Fixed/variable sleep time selection
pins
A
I
H
B
D
F
G
E
C
Housing
tamper lock
screw
Remove
the
housing
cover
Remove
the
mounting
bracket