background image

27

Insignia NS-LTDVD20 20" LCD TV/DVD Combo

www.insignia-products.com

1-year limited warranty

Insignia Products (“Insignia”) warrants to you, the original 
purchaser of this new 

NS-LTDVD20 

(“Product”), that the 

Product shall be free of defects in the original manufacture of 
the material or workmanship for a period of one (1) year from 
the date of your purchase of the Product (“Warranty Period”). 
This Product must be purchased from an authorized dealer 
of Insignia brand products and packaged with this warranty 
statement. This warranty does not cover refurbished 
Product. If you notify Insignia during the Warranty Period of a 
defect covered by this warranty that requires service, terms 
of this warranty apply.

How long does the coverage last?

The Warranty Period lasts for 1 year (365 days) from the 
date you purchased the Product. The purchase date is 
printed on the receipt you received with the Product.

What does this warranty cover?

During the Warranty Period, if the original manufacture of the 
material or workmanship of the Product is determined to be 
defective by an authorized Insignia repair center or store 
personnel, Insignia will (at its sole option): (1) repair the 
Product with new or rebuilt parts; or (2) replace the Product 
at no charge with new or rebuilt comparable products or 
parts. Products and parts replaced under this warranty 
become the property of Insignia and are not returned to you. 
If service of Products or parts are required after the Warranty 
Period expires, you must pay all labor and parts charges. 
This warranty lasts as long as you own your Insignia Product 
during the Warranty Period. Warranty coverage terminates if 
you sell or otherwise transfer the Product.

How to obtain warranty service?

If you purchased the Product at a retail store location, take 
your original receipt and the Product to the store you 
purchased it from. Make sure that you place the Product in 
its original packaging or packaging that provides the same 
amount of protection as the original packaging. If you 
purchased the Product from an online web site, mail your 
original receipt and the Product to the address listed on the 
web site. Make sure that you put the Product in its original 
packaging or packaging that provides the same amount of 
protection as the original packaging.
To obtain in-home warranty service for a television with a 
screen 25 inches or larger, call 1-888-BESTBUY.  Call 
agents will diagnose and correct the issue over the phone or 
will have an Insignia-approved repair person dispatched to 
your home.

Where is the warranty valid?

This warranty is valid only to the original purchaser of the 
product in the United States and Canada.

What does the warranty not cover?

This warranty does not cover:

Customer instruction

Installation

Set up adjustments

Cosmetic damage

Damage due to acts of God, such as lightning strikes

Accident

Misuse

Abuse

Negligence

Commercial use

Modification of any part of the Product, including the 
antenna

Plasma display panel damaged by static (non-moving) 
images applied for lengthy periods (burn-in).

This warranty also does not cover:

Damage due to incorrect operation or maintenance

Connection to an incorrect voltage supply

Attempted repair by anyone other than a facility 
authorized by Insignia to service the Product

Products sold as is or with all faults

Consumables, such as fuses or batteries

Products where the factory applied serial number has 
been altered or removed

REPAIR REPLACEMENT AS PROVIDED UNDER THIS 
WARRANTY IS YOUR EXCLUSIVE REMEDY. INSIGNIA 
SHALL NOT BE LIABLE FOR ANY INCIDENTAL OR 
CONSEQUENTIAL DAMAGES FOR THE BREACH OF ANY 
EXPRESS OR IMPLIED WARRANTY ON THIS PRODUCT, 
INCLUDING, BUT NOT LIMITED TO, LOST DATA, LOSS 
OF USE OF YOUR PRODUCT, LOST BUSINESS OR LOST 
PROFITS. INSIGNIA PRODUCTS MAKES NO OTHER 
EXPRESS WARRANTIES WITH RESPECT TO THE 
PRODUCT, ALL EXPRESS AND IMPLIED WARRANTIES 
FOR THE PRODUCT, INCLUDING, BUT NOT LIMITED TO, 
ANY IMPLIED WARRANTIES OF AND CONDITIONS OF 
MERCHANTABILITY AND FITNESS FOR A PARTICULAR 
PURPOSE, ARE LIMITED IN DURATION TO THE 
WARRANTY PERIOD SET FORTH ABOVE AND NO 
WARRANTIES, WHETHER EXPRESS OR IMPLIED, WILL 
APPLY AFTER THE WARRANTY PERIOD. SOME 
STATES, PROVINCES AND JURISDICTIONS DO NOT 
ALLOW LIMITATIONS ON HOW LONG AN IMPLIED 
WARRANTY LASTS, SO THE ABOVE LIMITATION MAY 
NOT APPLY TO YOU. THIS WARRANTY GIVES YOU 
SPECIFIC LEGAL RIGHTS, AND YOU MAY ALSO HAVE 
OTHER RIGHTS, WHICH VARY FROM STATE TO STATE 
OR PROVINCE TO PROVINCE.
Contact Insignia:
For customer service please call 1-877-467-4289
www.insignia-products.com
INSIGNIA™ is a trademark of Best Buy Enterprise Services, 
Inc.
Distributed by Best Buy Purchasing, LLC.
Insignia, 7601 Penn Avenue South, Richfield, Minnesota, 
U.S.A.

Summary of Contents for NS-LTDVD20

Page 1: ...20 LCD TV DVD Combo Ensemble TV Lecteur de DVD à écran ACL de 20 po Combo TV con pantalla LCD reproductor de DVD de 20 NS LTDVD20 User Guide Guide de l utilisateur Guía del Usuario ...

Page 2: ......

Page 3: ...Using DVD last memory 20 Setting up DVD speaker output 21 Setting up DVD Dolby Digital 21 Using the DVD equalizer 22 Setting up DVD 3D sound 22 Setting a DVD parental password 22 Changing DVD preferences 23 Maintaining 23 Cleaning the cabinet 23 Handling discs 23 Troubleshooting 24 Specifications 24 1 year limited warranty 27 Français 29 Español 59 Welcome Congratulations on your purchase of a hig...

Page 4: ... your TV combo on an unstable cart stand tripod bracket or table Your TV combo may fall causing serious personal injury and serious damage to your TV combo Use only with a cart stand tripod bracket or table recommended by the manufacturer or sold with your TV combo If you mount your TV combo to the wall follow the manufacturer s instructions and use a mounting accessory recommended by the manufact...

Page 5: ...r on the screen as a fixed blue green or red point These non active pixels do not adversely affect the performance of your TV combo and are not considered defects Outdoor antenna grounding If an outside antenna or cable system is connected to your TV combo make sure that the antenna or cable system is grounded to provide some protection against voltage surges and built up static charges Article 81...

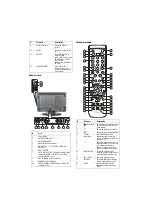
Page 6: ...control Do not block 10 CH CH Press to change the channel 11 Volume Volume Press to adjust the volume NEXT PREV STOP PLAY OPEN CLOSE DISC IN 7 5 6 1 2 4 3 9 8 INPUT VOL CH CH VOL POWER MENU PHONES VIDEO L R AUDIO INPUT 2 10 11 12 13 14 12 MENU Press to open the TV menu 13 INPUT Press to select the AV signal input You can select TV AV1 AV2 S Video Component DVD HDMI or VGA 14 POWER Press to turn yo...

Page 7: ...ing DVD and CD playback 15 SKIP and SKIP Press to skip to the previous or next chapter or track 16 STOP Press to stop DVD or CD playback 17 DVD TITLE Press to open the DVD title menu 18 DVD MENU Press to open the DVD menu 19 REPEAT Press to repeat a section of a DVD or CD 20 AUDIO Press to change the DVD audio language 21 OPEN Press to eject the disc in the disc slot 22 INPUT Press to open the sou...

Page 8: ...e the remote control Point the remote control directly at your TV combo within a 30 angle of the remote control sensor on the front of your TV combo and within 20 feet of your TV combo 1 2 Caution Do not expose the remote control to liquids direct sunlight or shock Note Objects between the remote control and the remote control sensor may block the remote control signal The range of the remote cont...

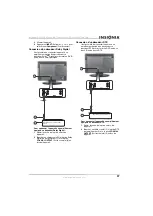
Page 9: ...io output jack and into the upper AUDIO L and AUDIO R jacks on the back of your TV combo 3 Turn on your TV combo 4 Press INPUT and the or to select AV1 To connect an external video device to the AV2 jacks 1 Plug the RCA video connector 7 into a standard video device 1 and VIDEO jack 8 on the side of your TV combo 2 Plug the RCA audio connectors 6 into the audio out jacks on the video device and in...

Page 10: ...d into the Y Pb Pr jacks 3 on the back of your TV combo 2 Plug the RCA audio cables 4 into the audio out jacks on progressive scan or HDTV video device and into the lower AUDIO L and AUDIO R jacks 3 on the back of your TV combo 3 Turn on your TV combo 4 Press INPUT and the or to select Component Connecting a Dolby Digital decoder You can connect your TV combo to an amplifier equipped with a Dolby ...

Page 11: ...r 1 and into the COAXIAL OUTPUT jack 3 on the back of your TV combo Connecting an MPEG audio decoder You can connect your TV combo to an amplifier equipped with a MPEG decoder or processor to listen to DVDs in MPEG2 sound To connect to an amplifier equipped with an MPEG audio decoder 1 Remove the port cover on the back of your TV combo 2 Plug a coaxial cable 2 into the amplifer 1 and into the COAX...

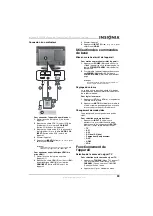
Page 12: ...the VGA INPUT port on the back of your TV combo 3 Plug a audio cable 3 into the audio jack on the computer 4 and into the AUDIO VGA INPUT port on the back of your TV combo 4 Turn on your TV combo 5 Press INPUT and the or to select PC VGA To connect an HDMI device to the HDMI jack 1 Remove the port cover on the back of your TV combo 1 2 Plug an HDMI cable 5 into the HDMI port on the HDMI deivce 6 a...

Page 13: ... on the remote control In digital TV mode a main major channel may have one or more sub minor channels Press the number buttons for the major channel press the button to the left of the 0 button then press the number button for the minor channel For example if you want to watch channel 5 2 press 5 press the button then press 2 To go to the previous channel Press RECALL Memorizing channels To selec...

Page 14: ...te channel list 6 Press ENTER A checkmark appears and the channel is marked as a favorite 7 Repeat this procedure to select the other channels To select your favorite channel 1 Press FAVORITE one or more times on the remote control until Favorite List appears 2 Press or to select the preset for your favorite channel To remove a channel from the favorite channel list 1 Press TV MENU on the remote c...

Page 15: ...s In addition detailed information about the program is often available in the EPG The availability and the amount of program details varies depending on the broadcaster To use the EPG 1 In digital TV mode select a channel you want to watch 2 Press GUIDE on the remote control The EPG opens with the channel that is currently active 3 Press or to preview the upcoming digital programs 4 Press GUIDE o...

Page 16: ... to highlight the TIME icon The TIME menu appears PC mode TV modes 2 Press to enter the menu 3 Press or to select one of the following settings then press or to change the setting SLEEP TIMER Select the sleep time you want Time Zone Pacific Alaska Hawaii Atlantic Eastern Central or Mountain Daylight Saving Time On or Off 4 Press TV MENU one or more times to close the menu Adjusting other settings ...

Page 17: ...s on page 15 3 Press TV MENU one or more times to close the menu Setting closed caption styles To set closed caption styles 1 Press or to highlight Option then press TV mode 2 Press or to select one of the following settings then press or to change the setting You can select Mode Custom or Default If Default is selected the settings below Mode are not available Font Style Default Font0 Font1 Font2...

Page 18: ... 3 Press number buttons to input the new password The cursor moves to the Confirm Password column 4 Press number buttons to input the new password again Blocking US TV ratings To block TV ratings 1 In the LOCK menu highlight US then press to open the US rating menu 2 Press or to select TV then press The following menu appears 3 Press or to select any of the TV ratings then press ENTER The lock ico...

Page 19: ...tings tab 4 Change the Screen resolution to a supported resolution The ideal resolution for your TV combo is 1280 768 5 Click OK then click Yes to save your changes Using the on screen menus Use your remote control to navigate in the on screen menus To use the on screen menus 1 Press INPUT on the remote control to select the video source 2 Press TV MENU on the remote control The on screen menu app...

Page 20: ...t CHAPTER repeats the current chapter TITLE repeats the current title ALL repeats the entire DVD 2 To stop repeat playback do one of the following Press REPEAT until ALL disappears Press STOP twice Eject the DVD Using CD repeat play You can repeat tracks or the entire CD using repeat play To use repeat play 1 While the CD is playing press REPEAT to select what you want to repeat You can select ALL...

Page 21: ...o language 2 If multiple audio languages are available press AUDIO again to select the next audio language Turning DVD subtitles on and off To turn subtitles on and off 1 While your TV combo is in DVD mode press SETUP The General Setup icon is highlighted 2 Press PLAY The General Setup Page opens 3 Press or to highlight Captions then press PLAY 4 Press or to highlight On or Off then press PLAY 5 P...

Page 22: ...3 Press or to highlight Screen Saver then press PLAY 4 Press or to highlight On or Off then press PLAY 5 Press one or more times to go back to the previous menu 6 To close the menu press to highlight the Exit icon then press PLAY Using DVD last memory Your TV combo can remember where a DVD stopped playing when your TV combo is turned off When your DVD combo is turned on and you start DVD playback ...

Page 23: ...hen press PLAY Setting up DVD Dolby Digital To set up Dolby Digital 1 While your TV combo is in DVD mode press SETUP 2 Press or to select the Audio icon then press PLAY The Audio Setup Page opens 3 Highlight Dolby Digital Setup then press PLAY The Dolby Digital Setup Page opens 4 Press or to highlight DUAL MONO or D R C then press PLAY DUAL MONO This is the output mode for the left and right signa...

Page 24: ...2 Press or to select the Audio icon then press PLAY The Audio Setup Page opens 3 Highlight 3D Processing then press PLAY The 3D Processing Page opens 4 Press or to select one of the following options then press PLAY V SURR Turns virtual surround sound on and off Reverb Mode Selects a reverb mode 5 Press one or more times to go back to the previous menu 6 To close the menu press to highlight the Ex...

Page 25: ...isplayed in that language If the language you select is not available on the DVD the original subtitle language is displayed Disc menu Changes the language for the disc menu If the language you select is available on the DVD the disc menu is displayed in that language If the language you select is not available on the DVD the disc menu is displayed in the original language Default Resets the DVD p...

Page 26: ...ake sure that the cable is firmly connected to the computer and TV Image is not clear Adjust the phase control Image is not centered Adjust the horizontal control Problem Solution No sound Make sure that your TV combo or amplifier is working correctly Make sure that the amplifier is set to receive DVD signal output No image Make sure that your TV combo is working correctly Make sure the color syst...

Page 27: ...ned by turning the equipment off and on the user is encouraged to try to correct the interference by one or more of the following measures Reorient or relocate the receiving antenna Increase the separation between the equipment and receiver Connect the equipment into an outlet on a circuit different from that to which the receiver is connected Consult the dealer or an experienced technician for he...

Page 28: ...26 Insignia NS LTDVD20 20 LCD TV DVD Combo www insignia products com ...

Page 29: ...f protection as the original packaging To obtain in home warranty service for a television with a screen 25 inches or larger call 1 888 BESTBUY Call agents will diagnose and correct the issue over the phone or will have an Insignia approved repair person dispatched to your home Where is the warranty valid This warranty is valid only to the original purchaser of the product in the United States and...

Page 30: ...28 Insignia NS LTDVD20 20 LCD TV DVD Combo www insignia products com ...

Page 31: ...TV selon la classification des États Unis 46 Paramétrage de la classification RRT 47 Réglage de la résolution VGA 47 Modification de la résolution vidéo de l ordinateur 47 Utilisation des menus d écran 48 Utilisation du lecteur de DVD 48 Lecture d un DVD 48 Lecture d un CD audio 48 Sélection d une piste 48 Lecture en boucle d un DVD 48 Lecture en boucle d un CD 48 Utilisation du menu de titres d u...

Page 32: ... plot large ou rond a été prévu pour la sécurité de l utilisateur Si la fiche ne s adapte toujours pas à la prise secteur contacter un électricien afin qu il remplace la prise inadéquate Protection du cordon d alimentation Les cordons d alimentation électrique doivent être acheminés afin que personne ne puisse marcher dessus et qu aucun objet posé dessus ne vienne les entraver Prêter particulièrem...

Page 33: ...l appareil fonctionne anormalement en observant les instructions d utilisation Ne régler que les commandes décrites dans les instructions d utilisation en effet le réglage incorrect d autres commandes pourrait provoquer des dégâts entraînant souvent d importantes réparations par un technicien qualifié pour rétablir le fonctionnement normal de l appareil si l appareil est tombé ou s il est endommag...

Page 34: ...e d électricité 2 Système de mise à la terre des électrodes de la compagnie d électricité 3 Serre fils de mise à la terre 4 Conducteurs de mise à la terre 5 Unité de décharge de l antenne 6 Serre fil de mise à la terre 7 Fil conducteur de l antenne 6 7 5 2 1 3 4 Nº Éléments Description 1 OUVRIR FERMER Permet d éjecter le disque inséré dans son logement 2 LECTURE Permet de passer en mode DVD et de ...

Page 35: ...ONES VIDEO L R AUDIO INPUT 2 HDMI INPUT PC INPUT AUDIO CB PB Y CR PR L R VGA PC INPUT L R AUDIO VIDEO AUDIO L R S VIDEO INPUT OUTPUT INPUT 1 AUDIO A N T I N COAXIAL 1 5 2 3 4 6 7 8 10 9 Nº Éléments Description 1 Marche Arrêt Permet de mettre l appareil sous et hors tension ou de le mettre en mode attente 2 TV Permet de basculer en mode TV 3 DVD Permet de basculer en mode DVD 4 Touches numériques E...

Page 36: ...CD 17 TITRE DU DVD Permet d ouvrir le menu de titre du DVD 18 MENU DU DVD Permet d ouvrir le menu du DVD 19 RÉPÉTITION Permet de répéter une section d un DVD ou d un CD 20 AUDIO Permet de changer la langue audio du DVD 21 OUVRIR Permet d éjecter le disque inséré dans son logement 22 ENTRÉE Permet d ouvrir le menu de la source d entrée 23 ZOOM Permet de modifier le mode zoom 24 CH et CH Permettent ...

Page 37: ...ncher le câble de l antenne d une antenne de la TV câblée ou d un récepteur satellite 3 à la prise ANT IN Entrée antenne de l appareil 2 3 Allumer l appareil 4 Appuyer sur INPUT Entrée et ou pour sélectionner TV Attention Ne pas exposer la télécommande à des liquides au soleil ou à des chocs Remarque Des objets entre la télécommande et le capteur peuvent obstruer le signal de la télécommande La po...

Page 38: ... standard aux prises AV1 1 Brancher un câble S Vidéo 4 à la prise de sortie S Vidéo d un périphérique S Vidéo 1 et à la prise S VIDEO 5 au dos de l appareil 2 Brancher les câbles audio RCA 2 aux prises de sortie audio du périphérique S Vidéo et aux prises AUDIO L et AUDIO R 1 au dos de l appareil 3 Allumer l appareil 4 Appuyer sur INPUT Entrée et ou pour sélectionner S Video Connexion d un périphé...

Page 39: ... un câble coaxial 2 à la prise Dolby Digital de l amplificateur 1 et à la prise COAXIAL OUTPUT Sortie coaxiale 3 au dos de l appareil Connexion d un décodeur DTS Il est possible de connecter l appareil à un amplificateur équipé d un processeur ou décodeur DTS pour écouter un DVD audio ou des CD audio en son DTS Pour connecter l appareil à un amplificateur équipé d un décodeur DTS 1 Retirer le cach...

Page 40: ...UT Sortie coaxiale 3 au dos de l appareil Connexion d une entrée audio numérique Il est possible de connecter l appareil à un amplificateur numérique à 2 canaux pour écouter un son à 2 canaux Pour connecter l appareil à un amplificateur équipé d une entrée audio numérique 1 Retirer le cache de la prise au dos de l appareil 2 Brancher un câble coaxial 2 à l amplificateur 1 et à la prise COAXIAL OUT...

Page 41: ...2 Pour éteindre l appareil appuyer de nouveau sur POWER Marche Arrêt Le témoin POWER STANDBY Marche Veille devient rouge Réglage du volume Le volume sonore peut être ajusté à l aide des commandes du panneau latéral de l appareil ou de la télécommande Pour régler le volume 1 Appuyer sur VOL ou VOL pour augmenter ou diminuer le volume 2 Appuyer sur MUTE Sourdine pour mettre le son en sourdine puis a...

Page 42: ...n 2 Appuyer sur pour accéder au menu CHANNEL Canal 3 Appuyer sur ou pour sélectionner AUTO SCAN Balayage automatique puis appuyer sur 4 Appuyer sur ou pour sélectionner Cable System Réseau câblé puis appuyer sur ou pour sélectionner AUTO STD IRC ou HRC 5 Appuyer sur ou pour sélectionner Start to Scan Commencer le balayage puis appuyer sur pour commencer le balayage automatique L appareil recherche...

Page 43: ...E Favoris de la télécommande pour afficher la liste des favoris 2 Appuyer sur ou pour sélectionner le préréglage pour le canal favori Pour supprimer un canal de la liste des canaux favoris 1 Appuyer sur TV MENU Menu TV sur la télécommande puis appuyer sur ou pour mettre en surbrillance l icône CHANNEL Canal Le menu CHANNEL Canal s affiche à l écran 2 Appuyer sur pour accéder au menu CHANNEL Canal ...

Page 44: ...que des programmes GEP qui fournit des informations telles que la liste des programmes et les heures de début et de fin des émissions De plus des informations détaillées relatives aux émissions sont souvent disponibles dans le GEP la disponibilité et les détails des émissions peuvent varier suivant les diffuseurs Pour utiliser le GEP 1 En mode TV numérique sélectionner le canal souhaité 2 Appuyer ...

Page 45: ...u canal puis appuyer sur pour ouvrir le menu des étiquettes de canaux 4 Appuyer sur ou pour déplacer le curseur puis appuyer une ou plusieurs fois sur ou pour sélectionner chaque caractère du nouveau nom pour le canal 5 Appuyer sur TV MENU Menu TV une ou plusieurs fois pour fermer le menu Réglage des paramètres d heure Pour régler les paramètres d heure 1 Appuyer sur TV MENU Menu TV puis sur ou po...

Page 46: ...YES Oui puis appuyer sur ENTER Entrée pour rétablir les paramètres d usine de l appareil 4 Appuyer sur TV MENU Menu TV une ou plusieurs fois pour fermer le menu Réglage du mode des sous titres codés Pour régler le mode des sous titres codés 1 Appuyer sur ou pour sélectionner Closed Caption Sous titres codés puis appuyer sur Mode TV 2 Appuyer sur ou pour sélectionner un des paramètres suivants puis...

Page 47: ...plan Default Par défaut Solid Opaque Flashing Clignotant Translucent Translucide ou Transparent BG Opacity Opacité de l arrière plan Default Par défaut Solid Opaque Flashing Clignotant Translucent Translucide ou Transparent 3 Appuyer sur TV MENU Menu TV une ou plusieurs fois pour fermer le menu Réglage des paramètres de verrouillage Pour régler les paramètres de verrouillage 1 Appuyer sur TV MENU ...

Page 48: ...de TV selon la classification des États Unis Pour interdire des émissions de TV selon leur classification 1 Dans le menu LOCK Verrouillage mettre en surbrillance US États Unis puis appuyer sur pour accéder au menu des classifications des États Unis 2 Appuyer sur ou pour sélectionner TV puis appuyer sur Le menu suivant s affiche à l écran 3 Appuyer sur ou pour sélectionner une des classifications T...

Page 49: ...s l appareil affiche un écran bleu ou noir uni Modification de la résolution vidéo de l ordinateur L exemple suivant montre les paramètres de Windows XP Même avec un système d exploitation Windows différent les méthodes de configuration de base sont similaires Pour modifier la résolution vidéo sur un ordinateur Macintosh se reporter à la documentation du Macintosh Pour modifier la résolution vidéo...

Page 50: ... d un DVD appuyer deux fois sur la touche STOP Arrêt 6 Appuyer sur OPEN CLOSE Ouvrir fermer pour retirer le DVD Lecture d un CD audio Pour lire un CD audio 1 Appuyer sur POWER Marche Arrêt pour mettre l appareil sous tension 2 Appuyer sur INPUT Entrée puis sur ou pour sélectionner DVD puis sur ENTER Entrée Il est également possible d appuyer sur la touche DVDde la télécommande pour sélectionner le...

Page 51: ...tre d un DVD Pour rechercher un titre ou un chapitre d un DVD 1 Appuyer sur T SEARCH 2 Appuyer sur ou pour sélectionner un titre puis appuyer sur la touche numérique correspondant au titre 3 Répéter les étapes 2 et 3 pour sélectionner un numéro de chapitre Recherche d un instant spécifié sur un DVD Pour rechercher un instant spécifié sur un DVD 1 Appuyer une ou plusieurs fois sur T SEARCH jusqu à ...

Page 52: ...e d affichage de l écran TVN Pour modifier le mode d affichage de l appareil 1 Avec l appareil en mode DVD appuyer sur SETUP Configuration L icône General Setup Configuration générale apparaît en surbrillance 2 Appuyer sur PLAY Lecture La page de configuration générale General Setup Page s affiche 3 Appuyer sur ou pour sélectionner TV Display Affichage TV puis appuyer sur PLAY Lecture 4 Appuyer su...

Page 53: ...n surbrillance l icône Exit puis appuyer sur PLAY Utilisation de la dernière position mémorisée du DVD L appareil peut mémoriser le point d arrêt de la lecture d un DVD quand l appareil est mis hors tension Quand l appareil est mis sous tension et que la lecture du DVD est démarrée celle ci reprend au point d arrêt au moment de l arrêt de l appareil Pour utiliser la dernière position mémorisée 1 A...

Page 54: ... Dolby Digital Setup Page s affiche à l écran 4 Appuyer sur ou pour mettre en surbrillance DUAL MONO Mono à deux canaux ou D R C puis sur PLAY Lecture DUAL MONO Mono à deux canaux Mode de sortie des signaux gauche et droit de la sortie audio sélectionnée Si MIXED MONO Mono mixte est le paramètre choisi seuls les DVD en mode 5 1 canaux fonctionnent D R C Sélectionné pour ajuster le taux de compress...

Page 55: ...ance 3D Processing Traitement 3D puis appuyer sur PLAY La page du Traitement 3D 3D Processing Page s ouvre 4 Sélectionner ou pour sélectionner l une des options suivantes puis appuyer sur PLAY V SURR Ambiophonie virtuelle Active et désactive l ambiophonie virtuelle Reverb Mode Mode Réverbération Sélectionne un mode de réverbération 5 Appuyer plusieurs fois sur pour revenir au menu précédent 6 Pour...

Page 56: ... l audio Si la langue sélectionnée n est pas disponible sur le DVD l audio original est utilisé Subtitle Sous titres Modifie la langue des sous titres du DVD Si la langue sélectionnée est disponible sur le DVD les sous titres sont affichés dans cette langue Si la langue sélectionnée n est pas disponible sur le DVD les sous titres d origine sont utilisé Disc Menu Menu du disque Permet de sélectionn...

Page 57: ...ection du capteur infrarouge de l appareil Installer des piles neuves L appareil affiche un écran noir ou bleu Vérifier la résolution et la fréquence de l ordinateur puis ajuster à la résolution optimale pour ce téléviseur 1280 768 à 60 Hz Le message No Signal Pas de signal s affiche à l écran Vérifier que le câble est bien connecté à l ordinateur et au téléviseur L image n est pas nette Régler la...

Page 58: ...tenne réceptrice Augmenter la distance entre l équipement et le récepteur Brancher l équipement sur la prise secteur d un circuit différent de celui auquel le récepteur est relié Contacter le revendeur ou un technicien qualifié pour toute assistance Droits d auteur 2007 Insignia Insignia et le logo Insignia sont des marques de commerce de Best Buy Enterprise Services Inc Les autres noms de marques...

Page 59: ...tance technique établira un diagnostic et corrigera le problème au téléphone ou enverra un technicien agréé par Insignia pour la réparation à domicile Où cette garantie s applique t elle Cette garantie ne s applique qu à l acheteur original du Produit aux États Unis et au Canada Ce qui n est pas couvert par cette garantie limitée La présente garantie ne couvre pas la formation du client l installa...

Page 60: ...58 Insignia NS LTDVD20 Ensemble TV Lecteur de DVD à écran ACL de 20 po www insignia products com ...

Page 61: ...ueo de las clasificaciones estadounidenses de TV 76 Ajuste de la clasificación RRT 76 Cómo ajustar la resolución VGA 76 Cambio de la resolución de video de su PC 77 Uso de los menús de pantalla 77 Uso del reproductor de DVD 77 Reproducción de un DVD 77 Reproducción de un CD de audio 77 Selección de una pista 78 Reproducción de un DVD 77 Repetición de un CD 78 Uso del menú de títulos de un DVD 78 U...

Page 62: ... o conector de tierra se proporcionan para su seguridad Si el enchufe no entra solicite a un electricista que cambie el tomacorriente obsoleto Protección del cable de alimentación Los cables de alimentación deben colocarse de manera que no se pisen ni se los aplaste con artículos colocados sobre ellos o contra ellos Preste atención especial a los cables en los enchufes en los receptáculos auxiliar...

Page 63: ...el tomacorriente y encomiende su reparación a personal calificado bajo las siguientes condiciones Cuando el cable de alimentación o el enchufe esté dañado o pelado Si se ha derramado líquido u objetos han caído dentro de su combo TV Si su combo TV ha sido expuesto a la lluvia o al agua Si su combo TV no funciona normalmente aún siguiendo las instrucciones de operación Ajuste únicamente los control...

Page 64: ...e la conexión a tierra del cable debe conectarse al sistema de masa del edificio tan cerca al punto de entrada del cable cómo sea posible Características Accesorios Asegúrese de que los siguientes accesorios se encuentran en el paquete Cable YPbPr Cable de alimentación Control remoto y pilas Vista frontal 1 Equipo de servicio eléctrico 2 Sistemas de electrodos de tierra para el servicio de aliment...

Page 65: ...n PHONES VIDEO L R AUDIO INPUT 2 HDMI INPUT PC INPUT AUDIO CB PB Y CR PR L R VGA PC INPUT L R AUDIO VIDEO AUDIO L R S VIDEO INPUT OUTPUT INPUT 1 AUDIO A N T I N COAXIAL 1 5 2 3 4 6 7 8 10 9 N º Componente Descripción 1 ALIMENTACIÓN Presione para encender o apagar su combo TV o para entrar en el modo standby 2 TV Presione para cambiar al modo de TV 3 DVD Presione para cambiar al modo de DVD 4 Númer...

Page 66: ...ra repetir una sección de un DVD o CD 20 AUDIO Presione para cambiar el idioma del DVD 21 ABRIR Presione para expulsar el disco que hay en la ranura 22 ENTRADA Presione para abrir el menú de fuentes de entrada 23 ZOOM Presione para cambiar el modo zoom 24 CANAL y CANAL Presione para pasar al canal anterior o siguiente mientras está en el modo TV En otros modos presione para cambiar al modo TV 25 R...

Page 67: ...TV por cable o TV vía satélite 1 Retire la cubierta del puerto en la parte posterior de su combo TV 1 2 Enchufe el cable de antena de una antena TV por cable o receptor de satélite 3 al conector ANT IN Entrada de antena en su combo TV 2 3 Encienda su combo TV 4 Presione INPUT Entrada y o para seleccionar TV Cuidado No exponga el control remoto a líquidos luz solar directa o choque Nota Los objetos...

Page 68: ...o del dispositivo de video y en los tomas AUDIO L Audio Izq y AUDIO R Audio Der 8 en el lateral de su combo TV 3 Encienda su combo TV 4 Presione INPUT Entrada y o para seleccionar AV2 Para conectar un dispositivo de S Video estándar a los conectores AV1 1 Enchufe un cable de S Video 4 en el toma de salida S Video en un dispositivo de S Video 1 y en el toma S VIDEO 5 de la parte posterior de su com...

Page 69: ... escuchar un DVD en modo de sonido envolvente Para conectar a un amplificador equipado con un decodificador Dolby Digital 1 Retire la cubierta de los puertos en la parte posterior de su combo TV 2 Enchufe un cable coaxial 2 en el toma Dolby Digital del amplificador 1 y en el toma COAXIAL OUTPUT Salida coaxial 3 en la parte posterior de su combo TV Conexión de un decodificador DTS Puede conectar su...

Page 70: ...coaxial 3 de la parte posterior de su combo TV Conexión de un dispositivo de audio digital Puede conectar su combo TV a un amplificador digital de 2 canales para escuchar sonido de 2 canales Para conectar a un amplificador equipado con una entrada de audio digital 1 Retire la cubierta de los puertos en la parte posterior de su combo TV 2 Enchufe un cable coaxial 2 en el amplificador 1 y en el toma...

Page 71: ...teral de su combo TV o en el control remoto El indicador POWER STANDBY Alimentación Standby se ilumina en verde 2 Para apagar su combo TV presione de nuevo POWER El indicador POWER STANDBY cambia a rojo Ajuste del volumen El volumen puede ajustarse mediante los controles en el panel lateral de su combo TV o del control remoto Para ajustar el volumen 1 Presione VOL o VOL para aumentar o disminuir e...

Page 72: ...ego presione o para seleccionar AUTO STD IRC o HRC 5 Presione o para seleccionar Start to Scan Empezar el barrido luego presione para dar comienzo al barrido automático Su combo TV busca todos los canales disponibles en su área y los memoriza 6 Para detener la búsqueda automática presione ENTER Entrar Cuando se termina la búsqueda automática se abre el menú CHANNEL y el canal cambia al primer cana...

Page 73: ...one TV MENU Menú de TV en el control remoto después presione o para resaltar el icono CHANNEL Canal Aparece el menú CHANNEL 2 Presione para acceder al menú CHANNEL 3 Presione o para seleccionar Favorite Favoritos luego presione para abrir el menú de canales favoritos 4 Presione o para seleccionar el elemento que desea eliminar 5 Presione ENTER Entrar La marca de verificación desaparece y el canal ...

Page 74: ...rmación detallada sobre los programas La disponibilidad y la cantidad de detalles sobre los programas varían dependiendo de la transmisora Para usar la guía de programación electrónica 1 En el modo de TV digital seleccione el canal que desea ver 2 Presione GUIDE Guía en el control remoto La guía de programación electrónica se abre mostrando el canal activo actualmente 3 Presione o para previsualiz...

Page 75: ...canal y luego presione para abrir el menú de etiquetas de canal 4 Presione o para mover el cursor y luego presione o una o más veces para seleccionar cada uno de los carácteres del nuevo nombre del canal 5 Presione TV MENU Menú de TV una o más veces para cerrar el menú Ajuste de la hora Para ajustar la hora 1 Presione TV MENU Menú de TV después presione o para resaltar el icono TIME Hora Aparece e...

Page 76: ... más veces para cerrar el menú Ajuste del modo de subtítulos optativos Para ajustar el modo de subtítulos optativos 1 Presione o para resaltar Closed Caption Subtítulos optativos y luego presione Modo TV 2 Presione o para seleccionar uno de los ajustes siguientes y luego presione o para cambiar su valor Se puede seleccionar CC Mode Modo de subtítulos optativos Off Desactivado On Activado o CC On M...

Page 77: ... o más veces para cerrar el menú Ajuste del bloqueo Para ajustar el bloqueo 1 Presione TV MENU Menú de TV después presione o para resaltar el icono LOCK Bloqueo Aparece el menú LOCK Bloqueo 2 Presione para acceder al menú 3 Introduzca la contraseña con los botones numéricos del control remoto la contraseña predeterminada es 9999 4 Presione o para seleccionar uno de los ajustes siguientes y luego p...

Page 78: ...o insinuante 4 Presione TV MENU Menú de TV una o más veces para cerrar el menú Para bloquear las clasificaciones de películas de TV 1 En el menú LOCK Bloqueo resalte US Estados Unidos y luego presione para abrir el menú de clasificaciones de los Estados Unidos 2 Presione o para seleccionar MPAA y luego presione o para seleccionar X N A G PG PG 13 R o NC 17 3 Presione TV MENU Menú de TV una o más v...

Page 79: ...valor 5 Presione el botón TV MENU para cerrar el menú Uso del reproductor de DVD Reproducción de un DVD Para reproducir un DVD 1 Presione POWER Alimentación para encender su combo TV 2 Presione INPUT Entrada presione o para seleccionar DVD y luego presione ENTER Entrar También puede presionar DVD en el control remoto para seleccionar el modo DVD Aparece la pantalla de inicio del DVD Si el DVD ya s...

Page 80: ...DVD Si un DVD tiene dos o más títulos y el DVD tiene un menú de títulos puede utilizar este menú para seleccionar el título que desea reproducir Para usar el menú de títulos de un DVD 1 Durante la reproducción del DVD presione DVD TITLE Títulos del DVD 2 Presione o para seleccionar un título 3 Presione ENTER Entrar La reproducción comienza automáticamente con el título que seleccionó Uso del menú ...

Page 81: ...ego presione PLAY Reproducir 4 Presione o para resaltar On Activado o Off Desactivado y luego presione PLAY 5 Presione una o varias veces para regresar al menú anterior 6 Para cerrar el menú presione para resaltar el icono Exit Salir y luego presione PLAY Selección del idioma de los subtítulos Si un DVD tiene subtítulos puede cambiar el idioma de los subtítulos Para cambiar el idioma de los subtít...

Page 82: ...icas llenan toda la pantalla 5 Presione una o varias veces para regresar al menú anterior 6 Para cerrar el menú presione para resaltar el icono Exit Salir y luego presione PLAY Activación y desactivación del protector de pantalla Para activar y desactivar el protector de pantalla 1 Mientras su combo TV está en modo DVD presione SETUP Configuración Se resalta el icono General Setup Configuración ge...

Page 83: ...zcla y luego presione PLAY 5 Presione o para resaltar Lt Rt Izq Der o Stereo Estéreo y luego presione PLAY Lt Rt Para un disco grabado con una pista de audio multicanal la señal de salida será incorporada en los canales izquierdo y derecho STEREO Para un disco grabado con una pista de audio multicanal la señal de salida será incorporada al estéreo 6 Presione una o varias veces para regresar al men...

Page 84: ...dor predeterminados None Ninguno Rock Pop Live En vivo Dance Baile Techno Tecno Classic Clásica Soft Suave 6 Presione PLAY 7 Presione una o varias veces para regresar al menú anterior 8 Para cerrar el menú presione para resaltar el icono Exit Salir y luego presione PLAY Configuración del sonido 3D en un DVD Para configurar sonido 3D 1 Mientras su combo TV está en modo DVD presione SETUP Configurac...

Page 85: ...o STOP detener y el modo PW Contraseña está configurado en OFF Desactivado en Password Setup page Página de configuración de la contraseña Para cambiar las preferencias 1 En modo DVD presione SETUP Configuración en el control remoto seleccione el icono Preferences Preferencias y luego presione PLAY Reproducir Se abre Preferences Page Página de preferencias Audio Permite cambiar el idioma del audio...

Page 86: ...alada correctamente Si no ajuste la antena hacia la estación transmisora La imagen tiene nieve Revise la antena y su conexión Si hay problemas corríjalos Si todas las conexiones están apretadas el problema podría ser una antena o cable defectuoso Compruebe si existe tráfico de autos o señales de neón que puedan distorsionar la imagen Hay franjas en la imagen Compruebe si hay interferencia de otros...

Page 87: ...ión o la ubicación de la antena receptora Aumente la distancia entre el equipo y el receptor Conecte el equipo a un tomacorriente de un circuito distinto de aquel al que está conectado el receptor Solicite consejo al distribuidor o a un técnico calificado para obtener ayuda El disco no se puede reproducir Asegúrese de que el disco se ha insertado con la etiqueta hacia delante Limpie el disco Humed...

Page 88: ...sistencia técnica llame al 877 467 4289 Declaración de Macrovision Este producto incorpora tecnología de protección de derechos de reproducción que está protegida por demandas de método de ciertas patentes de los Estados Unidos y otros derechos de propiedad intelectual poseídos por Macrovision Corporation y otros dueños de los derechos El uso de esta tecnología con protección de derechos de autor ...

Page 89: ...arantía a domicilio para un televisor con pantalla de 25 o más llame al 1 888 BESTBUY El soporte técnico diagnosticará y corregirá el problema por teléfono o enviará un técnico certificado por Insignia a su casa En dónde es válida la garantía Esta garantía sólo es válida al comprador original del Producto en los Estados Unidos y en Canadá Qué es lo que no cubre la garantía Esta garantía no cubre F...

Page 90: ...88 Insignia NS LTDVD20 Combo TV con pantalla LCD reproductor de DVD de 20 www insignia products com ...

Page 91: ......

Page 92: ...ll rights reserved All other products and brand names are trademarks of their respective owners 2007 produits Insignia Tous droits réservés Tous les autres produits ou noms de marques sont des marques de commerce qui appartiennent à leurs propriétaires respectifs 2007 productos Insignia Todos los derechos reservados Todos los demás productos y marcas son marcas comerciales de sus respectivos dueño...

Reviews: