background image

16

NS-WB44SS8

www.insigniaproducts.com

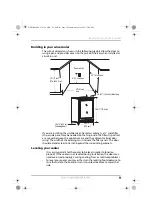
Lighting your cooler

Each zone has its own interior light, which can be switched on or off by 
pressing the 

 button on the control panel. Energy-efficient LEDs are 

used for long-term durability.

Memory function

If you experience a power outage, when your cooler is turned on again it 
resumes the same temperature that was set when the power went off.

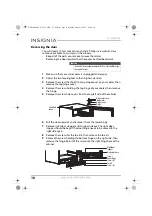
Using the wine shelves

All of the shelves have tabs to engage the cabinet on both sides.

Any of the shelves can be removed to accommodate larger bottles.

To remove a shelf

1

Remove all bottles from the shelves.

2

Lift the shelf upward and then gently pull out the shelf.

To replace a shelf

Place the sides of the shelf back onto the supporting guides of the 
cabinet and push back until the shelf tabs slide into place.

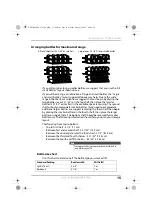
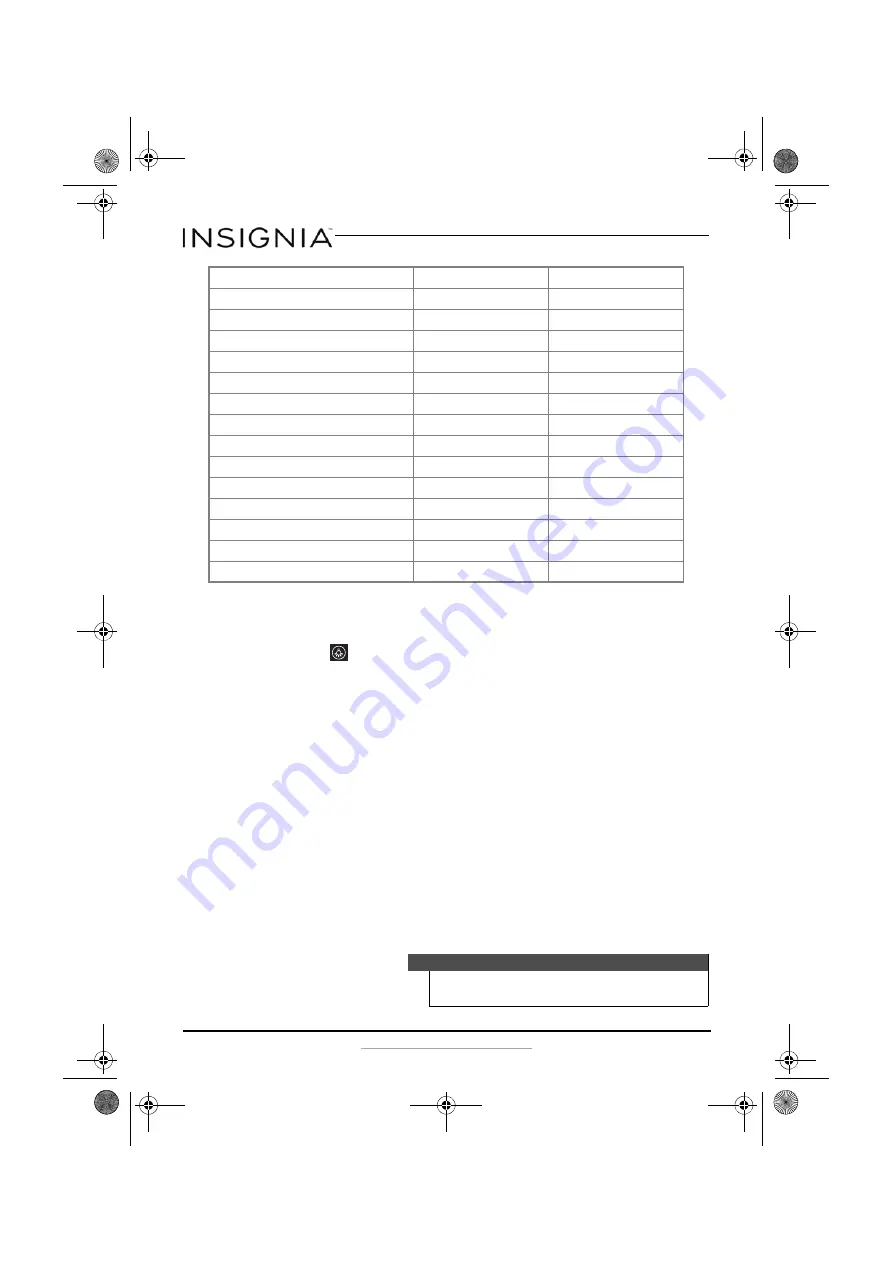
Cabernet (750 ml Boutique)

3 1/8”

Yes

Small Champagne

3 3/16”

Yes

Burgundy

3 1/4”

Yes

Pinot Noir (Large Pinot)

3 3/8”

Yes

Champagne Racking

Bottle width

Will it fit?

Bordeaux

2 7/8”

Yes

Cabernet (750 ml Boutique)

3 1/8”

Yes

Small Champagne

3 3/16”

Yes

Burgundy

3 1/4”

Yes

Pinot Noir (Large Pinot)

3 3/8”

Yes

Turley

3 9/16”

Yes

Magnum Racking

Bottle width

Will it fit?

Turley

3 9/16”

Yes

Big Champagne

3 7/8”

Yes

Magnum (1.5 L)

4”

Yes

Caution

Make sure that the tabs are firmly engaged in the supporting 
guides before storing any bottles.

NS-WB44SS8_17-0586_MAN_V1_ENG.fm  Page 16  Monday, August 14, 2017  8:44 AM

Summary of Contents for NS-WB44SS8

Page 1: ...ore using your new product please read these instructions to prevent any damage USER GUIDE Built in 4 9 Cu Ft Wine Cooler NS WB44SS8 NS WB44SS8_17 0586_MAN_V1_ENG fm Page 1 Monday August 14 2017 8 44...

Page 2: ...ng your cooler 16 Memory function 16 Understanding the dual temperature zones 14 Using the wine shelves 16 Arranging your wine 17 Serving and storage tips 17 Maintaining your wine cooler 19 Defrosting...

Page 3: ...r the guidelines of federal law refrigerants must be removed before the disposal of the product It is the consumer s responsibility to comply with federal and local regulations when disposing of this...

Page 4: ...ace so that children may not easily climb inside 7 Unplug the cooler before carrying out user maintenance on it 8 This appliance is not intended for use by persons including children with reduced phys...

Page 5: ...lified electrician install an outlet near the cooler 15 If the supply cord is damaged it must be replaced by the manufacturer its service agent or similarly qualified person in order to avoid a hazard...

Page 6: ...oler at one time the temperaturein the cooler may rise temporarily To prolong the service life of the compressor wait for at leastfive minutes before restarting the wine cooler after a power failure T...

Page 7: ...both upper zone temperature buttons simultaneously to change the display from F to C or back again Press both lower zone temperature buttons simultaneously to lock or unlock the cooler Press to turn...

Page 8: ...oler on a floor countertop or cabinet that is strong enough to support the cooler when it is fully loaded Locate the cooler away from direct sunlight and sources of heat stove heater radiator and so o...

Page 9: ...the filler panels The door should extend at least one inch beyond the surrounding cabinets Leveling your cooler It is very important for the cooler to be level in order to function properly If the co...

Page 10: ...Remove the screw hole covers from the top left side of the cabinet 6 Pull the door upwards and remove it from the lower hinge 7 Remove right door stopper and hinge pin sleeve The right door stopper s...

Page 11: ...hen attach the hinge pin sleeve and left stopper to the bottom of the left door 14 Align the hole at the bottom left of the wine cooler door with the bottom hinge pin then install the door on the hing...

Page 12: ...should be directed toward a certified electrician or an authorized service center Plug in and run your cooler for three to four hours before making any temperature adjustments and before adding wine T...

Page 13: ...ure range of both zones can be set between 39 F to 64 F 4 C to 18 C When the or buttons are pressed the temperature will increase or decrease in increments of one degree If the or buttons are pressed...

Page 14: ...pper zone Each shelf can hold up to eight bottles with the necks of the bottles alternating front to back Fewer bottles can be accomodated if larger bottles are also included You can move the shelf to...

Page 15: ...by placing the smaller bottles on the fourth shelf then place the larger bottles on top of them The bottom shelf should be reserved for smaller bottles only The following information should help you p...

Page 16: ...s 2 Lift the shelf upward and then gently pull out the shelf To replace a shelf Place the sides of the shelf back onto the supporting guides of the cabinet and push back until the shelf tabs slide int...

Page 17: ...cork of an opened bottle should always be moistened when returning it to the bottle Red wine should be allowed to breath oxygenate before drinking We suggest that you put pink rose type wines onto the...

Page 18: ...h the lock engaged in order to adjust any of the settings you must unlock the control panel by pressing and holding the buttons simultaneously for approximately three seconds The whole display lights...

Page 19: ...your cooler The ice build up on the inner back wall of your cooler will automatically be defrosted in a compressor off cycle When you press the button the compressor and circulation fans for both zon...

Page 20: ...rculation behind it Troubleshooting Error codes If a fault is detected the display shows one of the following codes If any of these error codes appears on the display please contact your local dealer...

Page 21: ...r turns on and off frequently Cool the room or move the cooler to a cooler location Make sure that the door is closed properly Clean the door gaskets Set the control to a colder setting The display sh...

Page 22: ...fter the Warranty Period expires you must pay all labor and parts charges This warranty lasts as long as you own your Insignia Product during the Warranty Period Warranty coverage terminates if you se...

Page 23: ...OUR EXCLUSIVE REMEDY FOR BREACH OF WARRANTY INSIGNIA SHALL NOT BE LIABLE FOR ANY INCIDENTAL OR CONSEQUENTIAL DAMAGES FOR THE BREACH OF ANY EXPRESS OR IMPLIED WARRANTY ON THIS PRODUCT INCLUDING BUT NOT...

Page 24: ...NSIGNIA is a trademark of Best Buyandits affiliated companies Distributed by Best Buy Purchasing LLC 7601 Penn Ave South Richfield MN55423 U S A 2017 Best Buy All rights reserved Made in China V1 ENGL...

Reviews: