Page 5
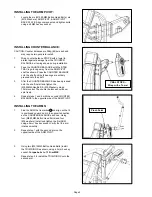
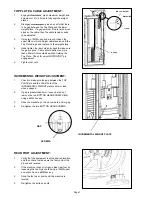
INSTALLING THE ARM PIVOT:
1.
Locate the six (M12,50MM,Button Head Bolts), six
(M12,Washers), ARM PIVOT, & ARM PIVOT
BACK PLATE. Align components and tighten bolts
using an 8MM hex key socket.
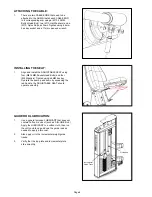
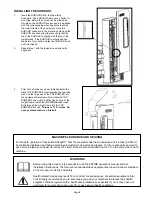
INSTALLING COUNTER BALANCE:
CAUTION: Counter balances are 28kg (62lbs) each and
may require two people to install.
1.
Wrap counter balance STOPS with a towel to
protect against damage from the COUNTER
BALANCE as it swings down during installation.
2.
Face the COUNTER BALANCE with the STAR
TRAC logo facing away from the ARM PIVOT
shaft as shown. Press the COUNTER BALANCE
onto the shaft until both bearings are entirely
pressed onto the shaft.
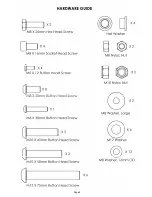
3.
After the COUNTER BALANCE has been pressed
onto the shaft install and tighten the
(M8,25MM,Hex Bolt) & (M8,Washer) using a
13mm socket. The counter balance should now
spin freely.
4.
Repeat steps 1 and 2 with the second COUNTER
BALANCE in the opposite side of the ARM PIVOT.
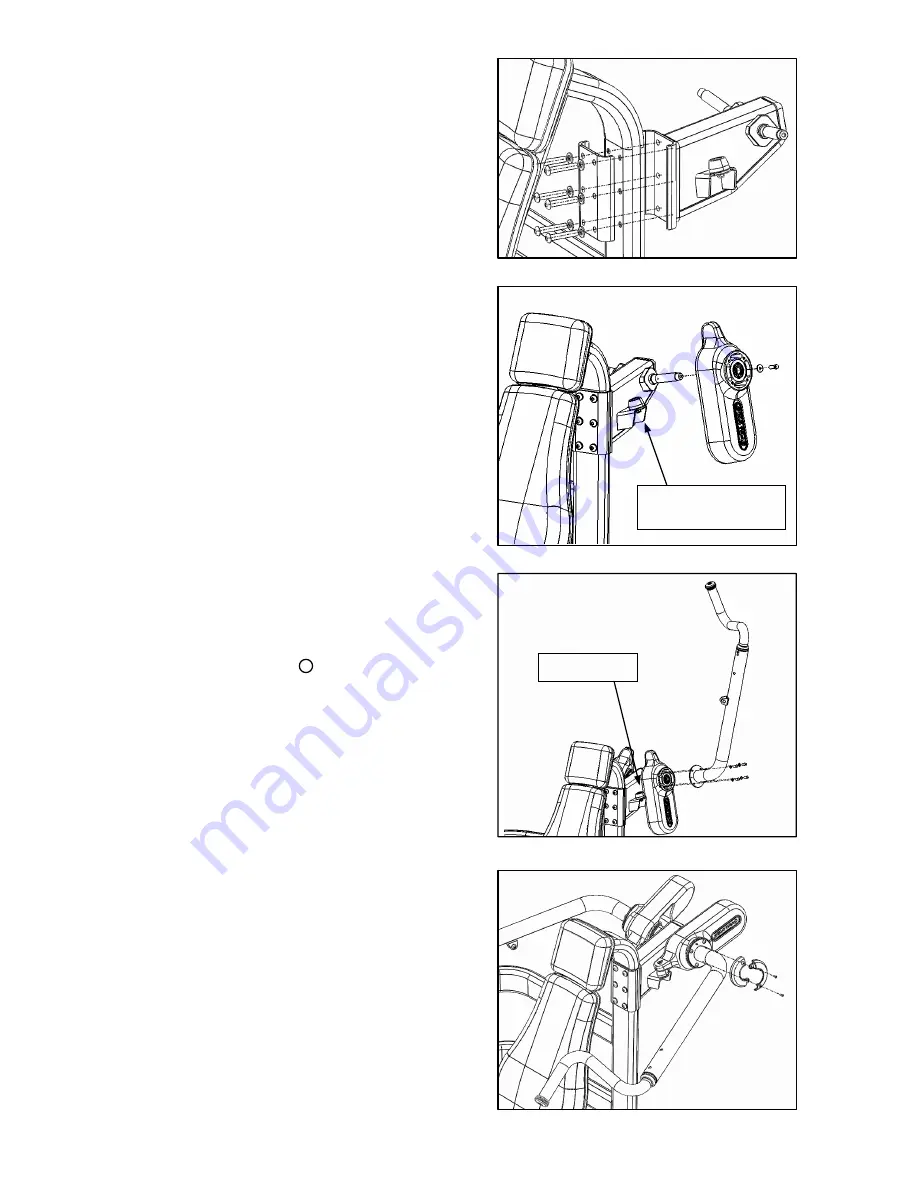
INSTALLING THE ARMS:
1.
Find the ARM that is marked A and align so that it
is positioned upward and in the opposite direction
as the COUNTER BALANCE as shown. Using
four (M8,20MM,Button Head Bolts) and four
(M8,washers) Install and tighten the first ARM
using a 5mm hex key socket. Verify that the arm
rotates smoothly.
2.
Repeat step 1 with the second arm on the
opposite side of the ARM PIVOT.
3.
Using two (M5,12MM,Button Head Bolts) install
the TRIM RINGS as shown, using a 3mm hex key
socket.
Torque bolts to 1.1 N-m MAX
.
4.
Repeat step 3 to install the TRIM RINGS onto the
second arm.
C’BAL STOPS –
Wrap with a Towel
Pinch Point
Summary of Contents for IP-S4305
Page 1: ...SHOULDER PRESS IP S4305 INSTALLATION INSTRUCTIONS...
Page 9: ...Page 9...


